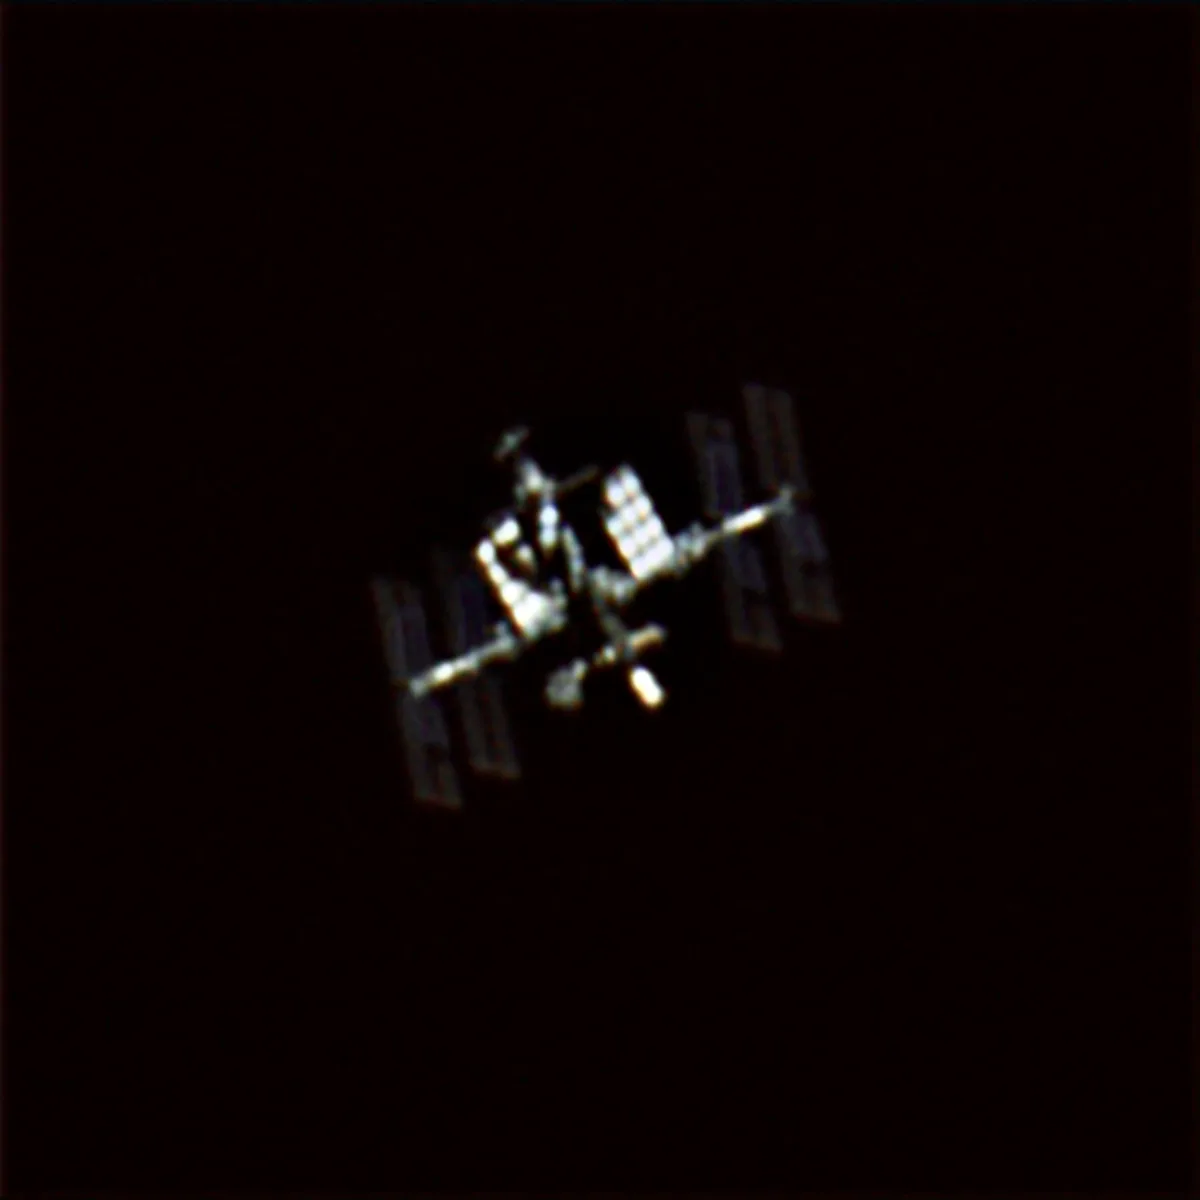
If you’ve ever spotted the International Space Station (ISS) streak across the sky, you may have wondered how it’s possible to photograph something that moves like a fast, bright star at the speed of 28,000km/h (17,500mph) in low Earth orbit.
However, with a mid-sized telescope and some patience, you’d be surprised how straightforward it can be to manually capture this iconic spacecraft from your garden.
When to see the Station
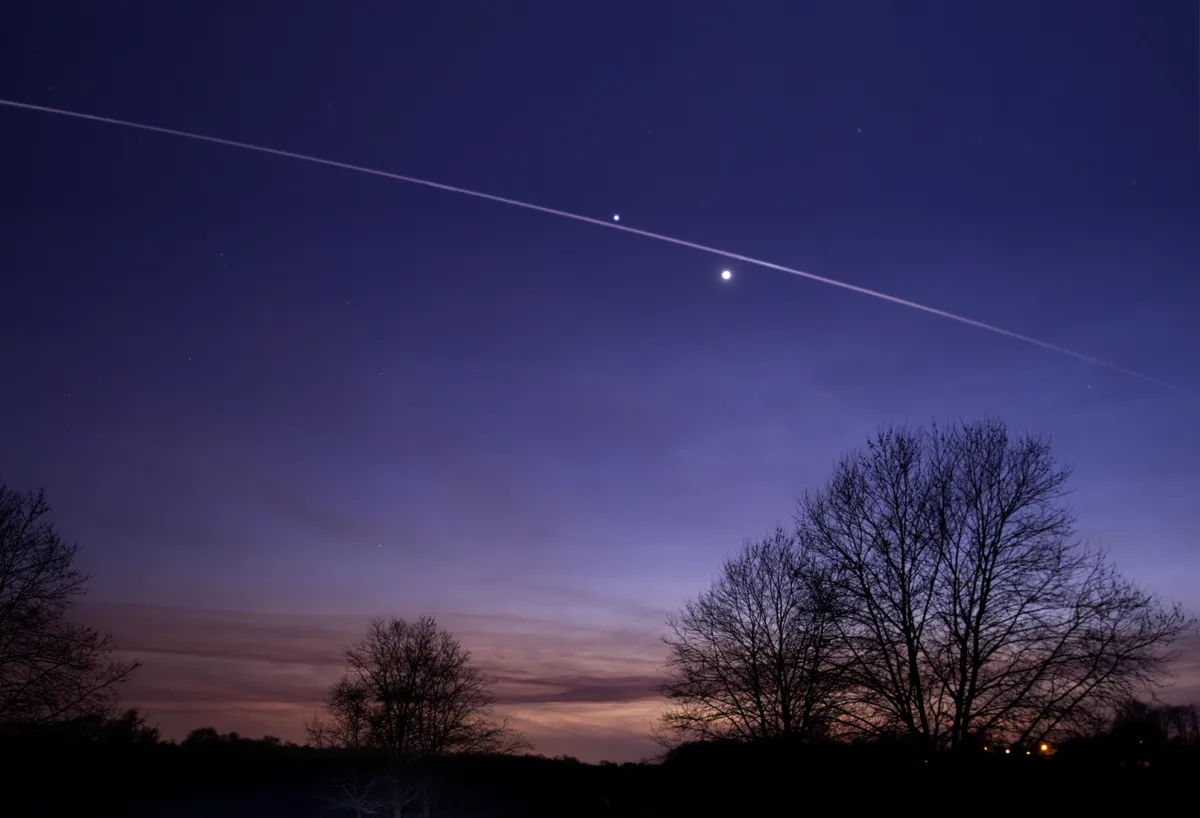
If you live below 51° latitude north or south, the International Space Station will be visible overhead in phases for a few days straight and is most visible at dusk or dawn, when it reflects sunlight.
For budding imagers, the best time to photograph it is when the flyover is as high in the sky as possible, ideally 70° and above.
When it’s low on the horizon, you will be battling layers of atmospheric distortion. For more details, read our guide on how to see the International Space Station.

To receive alerts on only the best visible passes and timings, you can subscribe to NASA’s Spot the Station website, which will send an email ahead of time with coordinates, exact times and the height of the pass for your location.
The free weather app Clear Outside also shows ISS passes above any location, as well as the apparent magnitude of each pass.
Equipment to photograph the International Space Station
A medium-sized telescope (at least 5 inches) is a to photograph it, as the International Space Station requires good focal length to resolve any details.
For tracking the Space Station manually, the optical tube needs to be mounted on a sturdy altaz mount where both clutches can be released and the tube pushed freely in both directions.
A good-quality and well-adjusted finderscope is essential, as you’ll use this for the actual visual tracking, with either a crosshair or a red dot to clearly mark the centre of the field of view.

While it’s possible to use a DSLR camera, it will be limited by the speed of its continuous shutter, making it difficult to time and achieve sharp images.
An ideal camera would be a dedicated planetary or guide camera, as they can be left to shoot continuously at a very high speed.
You can use a free capture program such as SharpCap or FireCapture to manage your image-capture settings.

Settings will vary according to your equipment and the magnitude of the pass, but a good starting point is to set your gain to around 60–70% of the slider and use exposures of less than 1 millisecond. It may need adjusting after the first snaps – trial and error will reveal the best settings for your equipment.
Before the pass, get everything ready; ensure your camera is well focused and adjust your finderscope carefully so that the centre of the crosshair or red dot corresponds to the centre of your camera capture screen.
It’s a good idea to ensure it’s properly aligned in the daytime.
When you spot the International Space Station rising, set your camera to shoot, follow it in the finderscope and try to let it pass as many times through the centre as possible to ensure it’s caught in your camera video.
Step 1

Sign up for customised alerts at Spot the Station and choose an ISS pass of 70° or more in height. Before the ISS pass is due, visualise where it will be rising from in the sky, based on the coordinates provided for your location.
Step 2

Prepare your telescope and camera, so that you’re ready in good time for the flyover. Open your capture software (such as SharpCap or FireCapture) and focus on the Moon or a bright star. If focusing on a star, it is easiest done by using a Bahtinov mask.
Step 3

Adjust your finderscope so the centre of its field of view matches your camera capture screen. Ideally do this in daylight, using a distant object like an antenna or chimney. When it’s time to shoot, release your mount’s clutches and push the telescope freely.
Step 4

While the optimum settings will vary from camera to camera, you can try the settings above as a starting point. When you see the Space Station rising, set your camera to capture unlimited frames or shoot continuously, then push your telescope to track it.
Step 5

Follow the International Space Station visually in the finderscope and let it pass through the centre of the crosshair or red dot as many times as possible while the telescope is still. Trying to keep the ISS in the centre while moving the telescope continuously may result in a blur!
Step 6

Run your capture through a program that extracts all the frames with the ISS in, such as PIPP, or find and extract them in a program such as AutoStakkert! Frames captured close together can be stacked to reduce noise and increase detail.
If you capture a photograph of the International Space Station, share your images with us by emailing contactus@skyatnightmagazine.com
