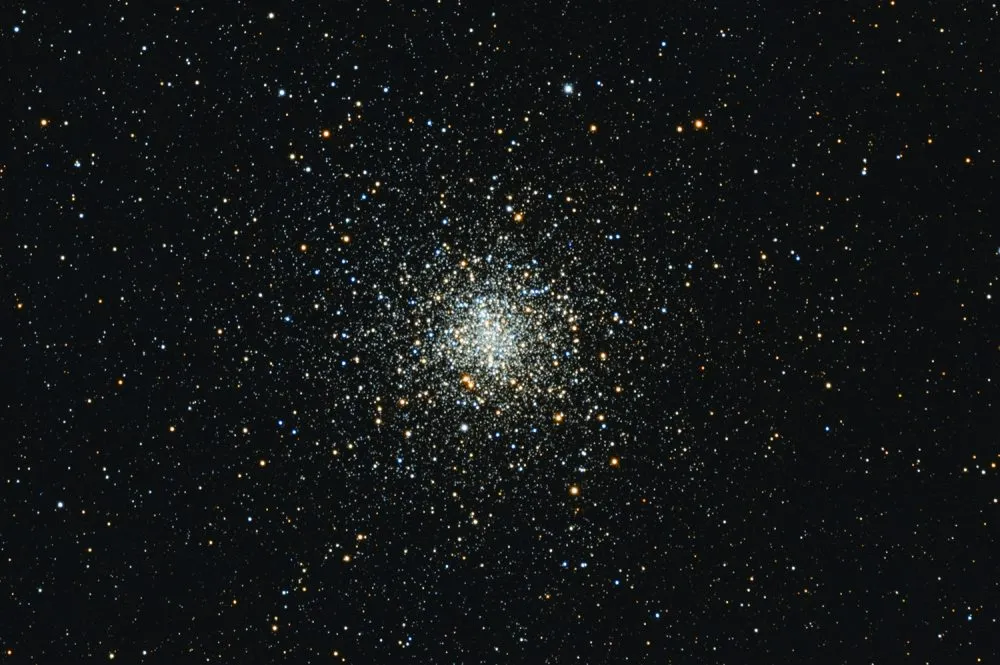
On the night of 23/24 May, the Moon will appear to pass in front of globular cluster M4, in an event known as a lunar occultation.
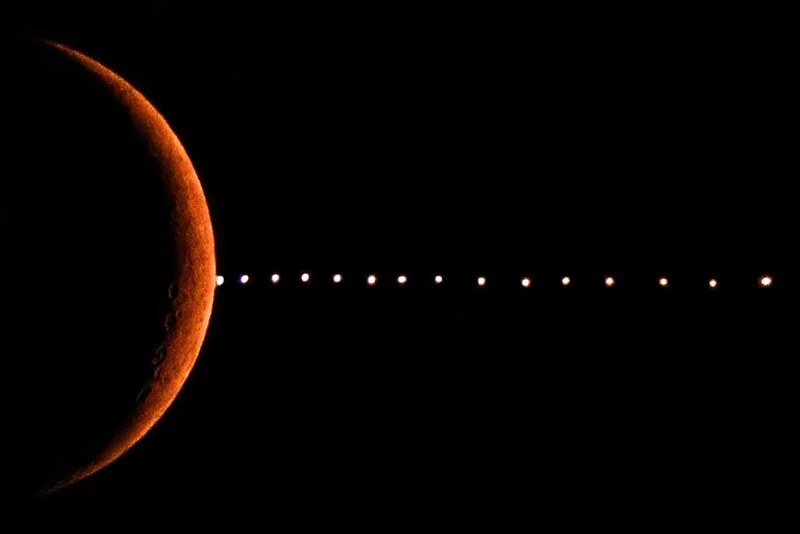
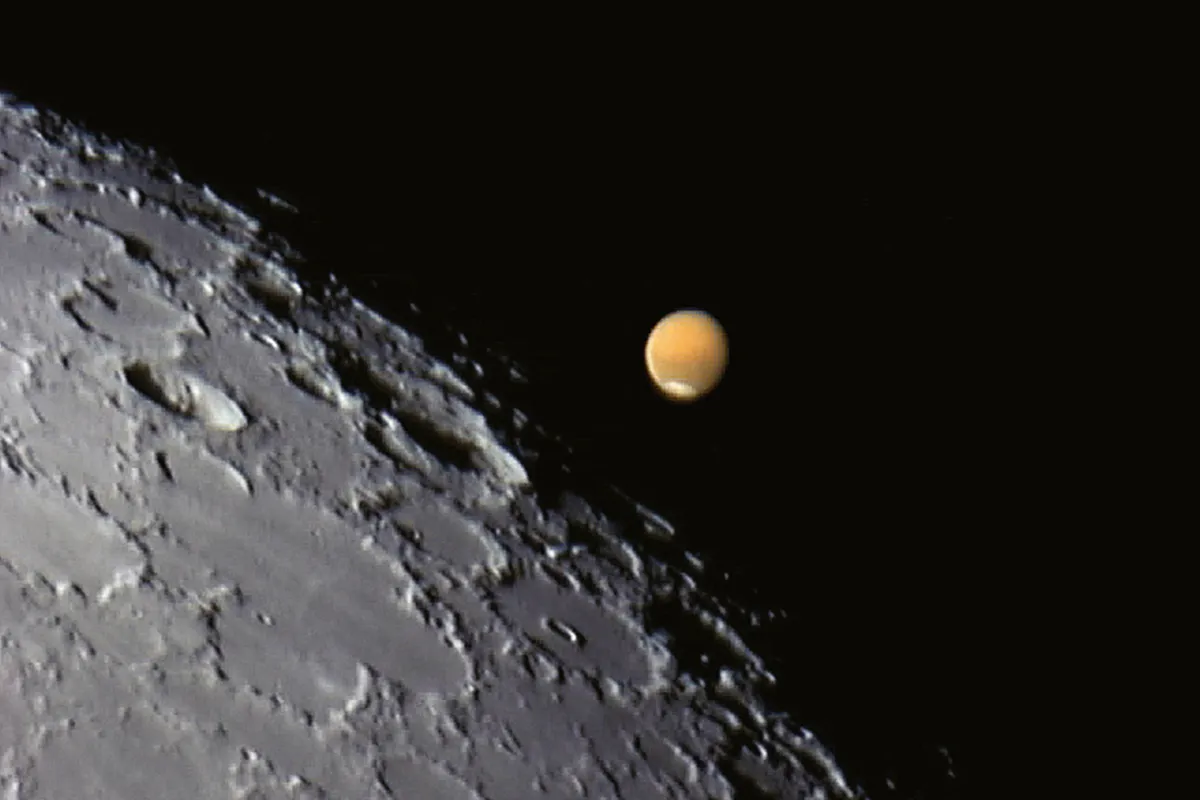
A lunar occultation occurs when the Moon appears to move in front of something more distant, such as a star or a planet.
Lunar occultations of brighter objects aren’t as common as you might think, but on the night of 23/24 May, the bright full Moon will occult the globular cluster Messier 4 in the constellation of Scorpius.
However, the M4 cluster's magnitude of +5.9 and low altitude from the UK mean this lunar occultation won’t be straightforward to observe
For more stargazing dates and advice, sign up to receive the weekly BBC Sky at Night Magazine e-newsletter and listen to our Star Diary podcast.
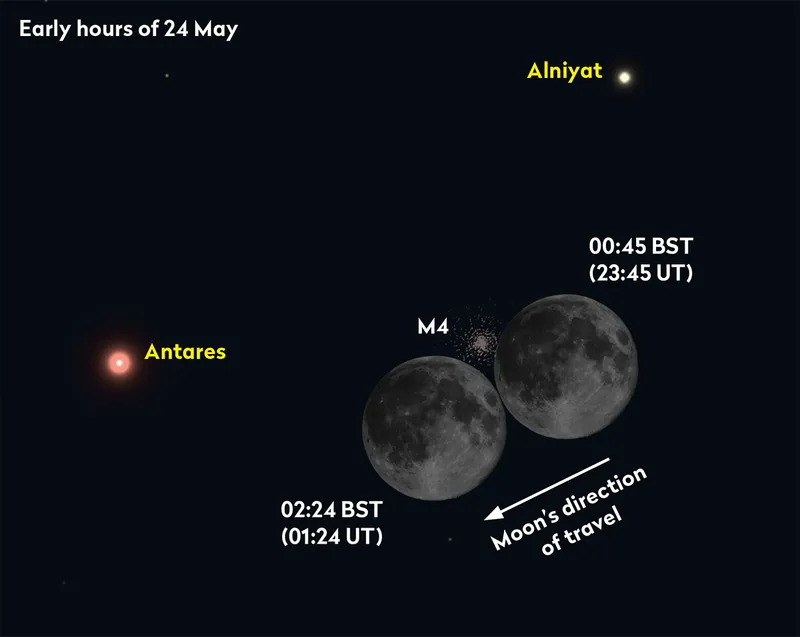
Lunar occultation of M4 timings
On the evening of 23 May, the Moon rises above the southeast horizon at 22:00 BST (21:00 UT), as the sky is darkening.
As it gains altitude, look out for the red supergiant star Antares (Alpha (α) Scorpii) making an appearance to the lower left of the Moon, with Alniyat (Sigma (σ) Scorpii) above and to the left of the Moon’s disc.
As the sky continues to darken, fainter stars will become visible.
The brilliance of the Moon’s full phase will make these difficult to see with the naked eye.
But for those with a small telescope pointed at the Moon, you may be able to see the faint glow of the globular cluster M4 just east of the Moon’s position before the lunar occultation commences.
With an integrated magnitude of +5.9 and at low altitude, M4 won’t be easy to see, but it is there.
As time progresses, the northwest edge of the Moon will get closer to the globular, passing in front of the object from around 00:45 BST on 24 May (23:45 UT on 23 May) until 02:20 BST (01:20 UT) on 24 May.
This unusual lunar occultation of M4 may be seen visually, but should also be a viable target for photography.
It will be interesting to see what results can be obtained and whether a clearer view of the occultation can be had.
As the Moon approaches setting in the early hours of 24 May, it’ll be tracking east to pass approximately half a degree south of Antares at moonset.
Observing the lunar occultation of M4
If you try to follow the lunar occultation of M4 using binoculars, the Moon’s glare will make the globular hard to see.
Use a telescope with a low- to mid-power eyepiece and you stand a better chance, but M4 will still struggle against the bright Moon.
Another way to observe the occultation is to photograph it, as the camera should be able to record the globular stars up to the point of occultation.
An image scale that will let you record a large portion of the Moon’s limb should give you a good chance of recording something.
Photographing the lunar occultation of M4
If you want to photograph the lunar occultation of M4, the weather and state of your optics will have a big effect.
Any mist or fogging of lenses will cause the Moon’s glare to spread and you’ll lose M4.
The best strategy is to grab M4 as soon as you can, ahead of the event, and experiment to get the best camera settings.
Then, during the event, apply those settings and take images at frequent, regular intervals.
Set-up
Many different camera types can capture the occulation, but it’s worth bearing in mind that DSLRs and other one-shot-colour cameras will be at a disadvantage due to a prismatic effect called atmospheric dispersion.
The atmosphere disperses light, with different wavelengths dispersing differing amounts.
The lower the altitude, the more this effect increases, due to the fact that you’re looking through a thicker layer of atmosphere.
Colour cameras capture all the dispersed light. Mono cameras aren’t immune, but you can at least limit the effect by fitting a single-colour pass filter.
An atmospheric dispersion corrector (ADC) will allow colour cameras to be used with the dispersion effects minimised too.
Capture
The relative faintness of M4 compared to the fully lit lunar surface means the Moon will be over-exposed if the cluster stars are to record well.
The way around this is to pre-image M4 and the Moon at the correct exposures.
During the lunar occultation, take sequence shots showing where M4 is located relative to the Moon, and then construct a composite using the pre-shot images.
If you do this, it’s important to make it clear that the result is a composite, preferably showing the component images in the result too.
You should also keep relative brightnesses as close to realistic as you can, so your image doesn’t give a false impression of the actual view.
It might be used as a guide for a future event – therefore it’s vital to have as much information as possible on it to detail what settings and processes were used.
Equipment
- DSLR or planetary imaging setup with a large-frame sensor
- ADC or colour pass filter
- Tracking mount
- Telescope with around 1,000mm focal length
Step-by-step
Step 1
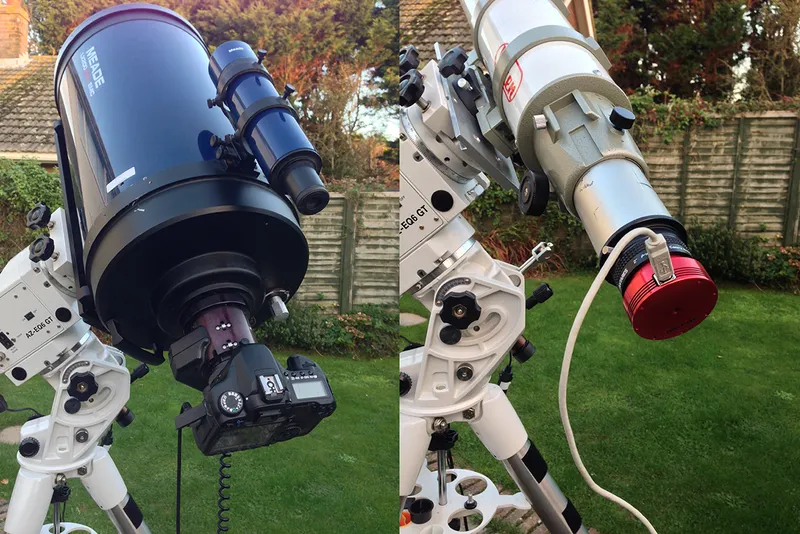
Choose your equipment. The occultation would ideally suit a planetary imaging setup with a large sensor. Aim for a focal length close to 1,000mm.
Mirror-based telescopes need to be well collimated and if you’re using a one-shot-colour camera, an atmospheric dispersion corrector is recommended.
Step 2
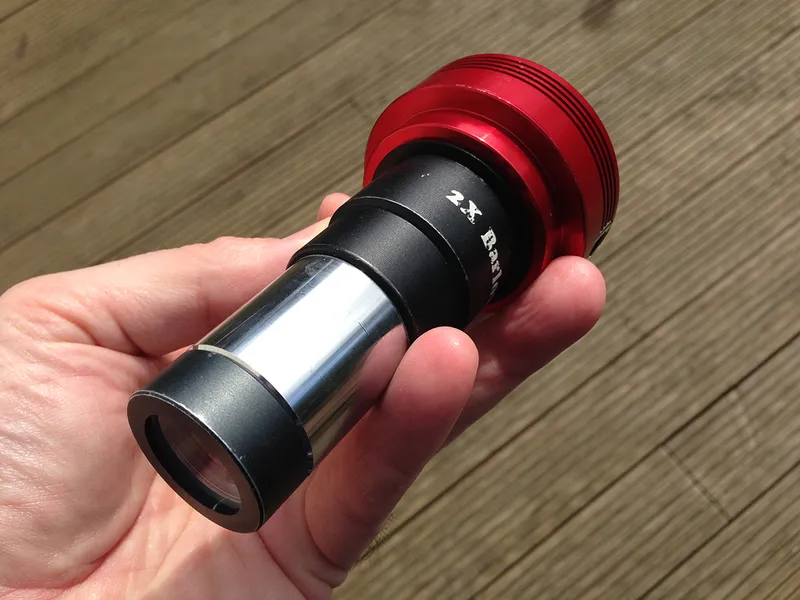
Using a Barlow lens or focal reducer, adjust your telescope’s effective focal length to give an image scale that’s comfortable to work with. Aim to produce an image where the Moon just fits inside the short axis of the frame.
Also bear in mind that M4 has an overall apparent diameter similar to the Moon at 26 arcminutes, although typical captures record only 10-15 arcminutes.
Step 3
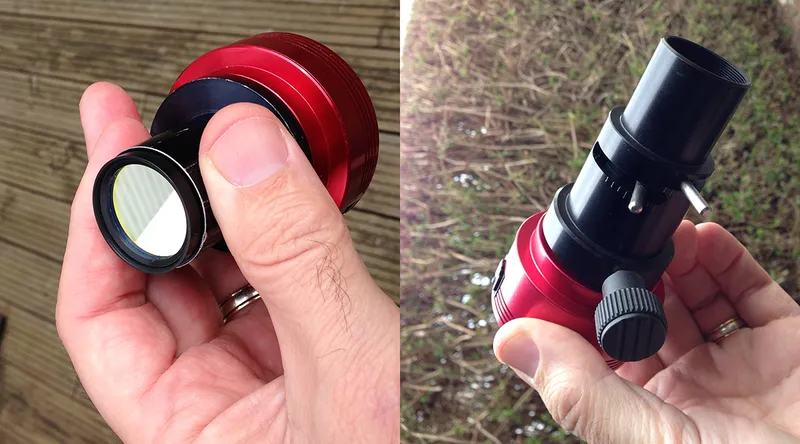
If you’re using an atmospheric dispersion corrector, set your camera to over-expose and adjust the prisms to reduce colour fringing to a minimum.
If using a mono high-frame-rate camera set for long exposures, a colour pass filter can be used to restrict the effects of atmospheric dispersion. A red or infrared pass filter will also have the additional benefit of helping to reduce seeing effects.
Step 4
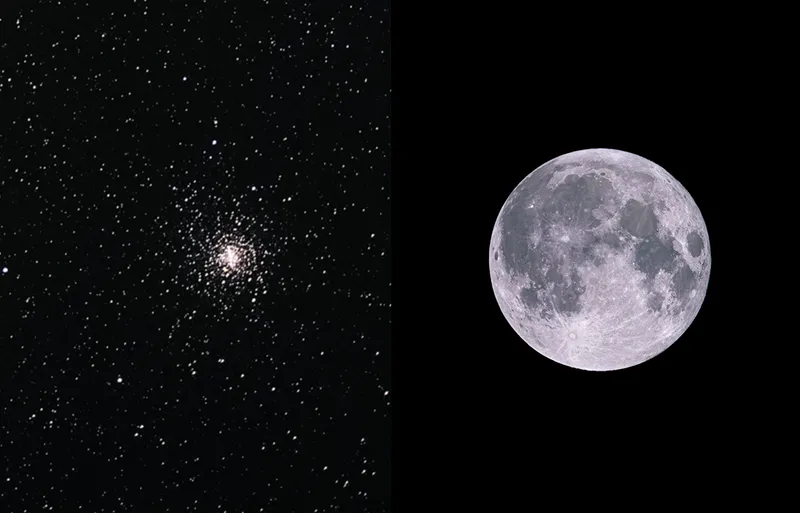
Capture both cluster and Moon separately before or after the occultation, optimising the settings for each object. During the occultation, the Moon’s surface will be over-exposed.
Here the purpose of imaging the over-exposed Moon and M4 in the same frame is simply to provide positional information for the event.
Step 5
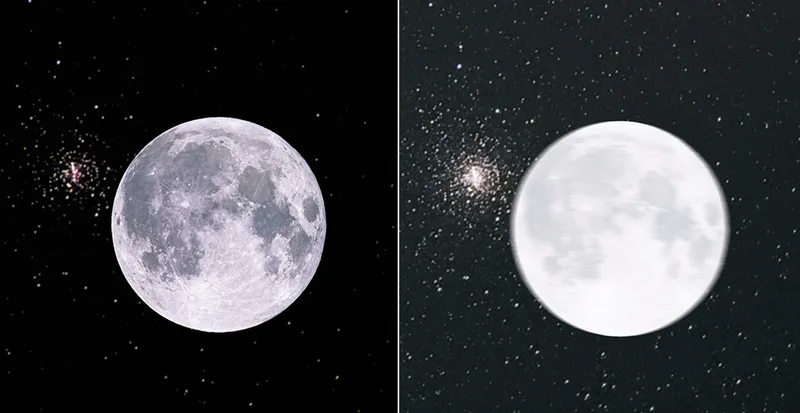
During the occultation, aim to take frequent images to give you positional information. As the globular will disappear behind the Moon’s edge quite quickly, high gain and short exposure times are best.
Shorter captures will help preserve sharp stars and a sharp edge to the Moon. Go too long and while you’re tracking on the stars, the Moon’s edge will blur.
Step 6
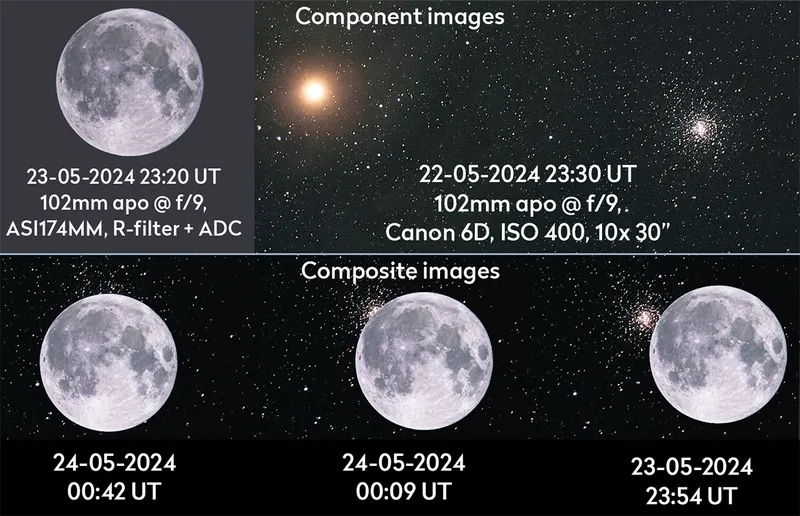
Once you’ve captured the event, use the occultation sequence for positional guidance to build a composite shot.
If you go down this route, label what processes you are using, ideally including all components on the composite to show how it was built. Date and time information should also be included.
Did you observe or photograph the lunar occultation of M4? Let us know by emailing contactus@skyatnightmagazine.com.

