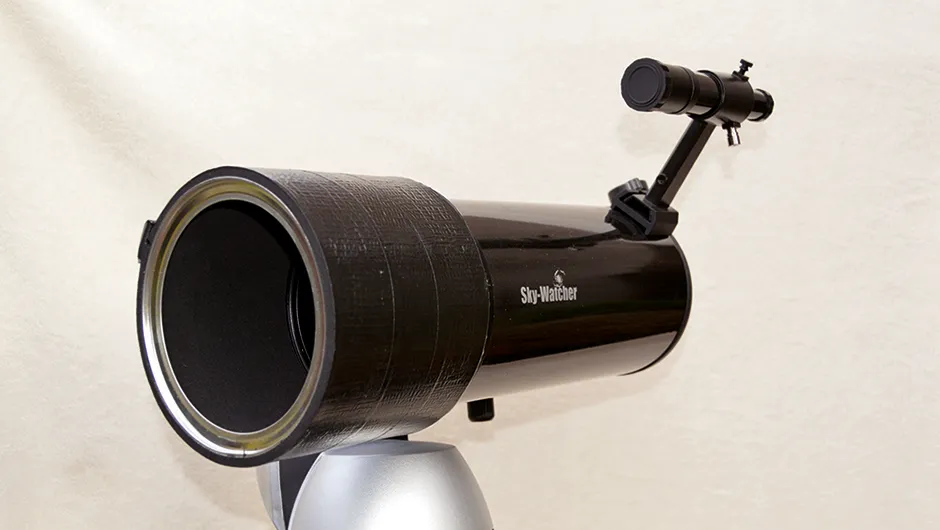
Dewing is an issue that most amateur astronomers face, with refractors and Schmidt-Cassegrains being most prone to dew forming on the front lens.
You are out observing on a clear evening but you notice bright stars growing dim, the sky looking misty and ultimately hardly anything can be seen at all.Your telescope has radiated its heat to the sky and the lens has dropped to below the ‘dew point’.
Water vapour has condensed on your lens and shortened your observing session.Irritated, you call it a night.
This can be eliminated using a dew heater, but a cost-effective alternative is to use a dew shield.
This is a tube that slides over the end of the telescope, insulates the front lens and prolongs your observing time.
Again, these can be purchased, but they are also simple to make – we show you how to do so here using a catering-sized coffee container and some neoprene.
Materials - Catering-sized coffee container to fit your telescope, 6mm self-adhesive neoprene, 3mm self-adhesive neoprene.
Tools - Craft knife, scissors, metal file, fabric tape measure, black duct tape or electrical tape, marker pen.
Catering-sized coffee containers are perfect for this project and are suitably robust, but you’ll need to find one with a diameter that matches your telescope.
Ours came from a canteen, but you could also ask a local café or restaurant if they have any they are going to be throwing away.
Adhesive-backed neoprene on both the inside and outside of the container provides insulation and a barrier to water vapour – if your container is cardboard this will prevent it from becoming soggy.
The neoprene also helps the dew shield fit snuggly over the telescope tube and, being black, prevents any reflections on the inside.
Start by removing the base of the container, carefully cutting around the interior rim using a craft knife.
Take care to keep as close to the rim as possible and not to squeeze too hard as you cut, otherwise you may distort the tube.
Once the base has been removed file off any sharp edges so you can’t injure yourself or rip the neoprene.
Measure the outside of the container and take a note of the circumference, then cut the neoprene to the same length.
This ensures that the neoprene will wrap completely around the container.
Fixing the neoprene
Remove a small portion of backing from the neoprene and stick down the end on the outside of the container, ensuring the edge is flush with the rim.
We found that removing a bit of backing and sticking that bit down is the most effective way as the adhesive is strong.
Doing it like this also allows you to make adjustments as you go along.
Trim off any excess neoprene that sticks over the rim, then cut an additional strip of neoprene and use it to cover the seam.
You will need to measure the inside circumference of the container and then cut your neoprene to match.
The length of internal neoprene should be in the region of 20mm less than the length of the container.
Carefully apply the neoprene to the inner surface just as you did before.
Lining the inside can be awkward, so you may find it easier to cut this piece of neoprene into several panels and attach them sequentially.

Coffee containers have a rim where the lid fits.
You need to push the neoprene up against this when lining the inside, leaving a gap at the other end.
Fill this gap with thinner neoprene to create a ridge for the telescope tube to rest against.
Cut a shorter length of neoprene to cover any seams where the ends meet.
Finally wrap the outside of the dew shield with black electrical tape or black duct tape to give the neoprene extra protection from nicks and tears.
An extension of the project would be to combine it with a dew heater band built into the rim.
This will ensure that your optics will remain clear for the duration of an observation session, as even with a dew shield the lens will eventually mist up.


