All Image Credits: Pete Lawrence
Skill level: beginner
WARNING: Do not look directly at the Sun with the naked eye or any unfiltered optical instruments. Read this article carefully before beginning.
The Sun is a very gratifying object to observe.
It is dynamic, with features on its visible surface that sometimes appear to change over the course of just a few hours.
It is also rather convenient in that you can only observe the Sun during the day when it is generally warm – this is the comfortable side of astronomy!
Being so close, our star offers us a unique opportunity to study a stellar body in detail.
However, this closeness also carries danger with it, so you need to be very careful when attempting to view the Sun through a telescope.
There are various ways to do this, but the safest is to fit a full-aperture white light filter over the front end of your telescope tube.
Theterm ‘white light’ means that you’ll see the Sun as it is normally, but filtered and greatly dimmed to protect your eyes.
The resulting view has good contrast and neutral colour.
These filters can be bought ready-made, but they are relatively simple to make yourself using sheets of solar film cutto size.
Baader Planetarium’s AstroSolar film is available in two grades: OD 3.8 is for imaging only, while OD 5.0 is suitable for visual observing and imaging.
OD stands for ‘optical density’ – the higher the number the dimmer the image.Thousand Oaks Optical also supply solar film in sheets.
Creating the filter will take about an hour.
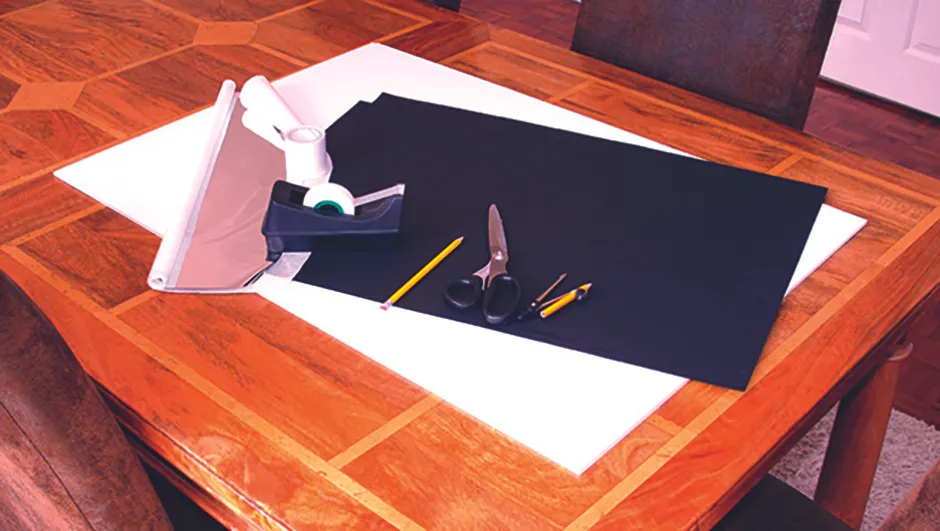
In addition to the solar film, you’ll also need some thin card, sticky tape and double-sided tape.
Once built, your solar filter will be able to convert a regular astronomical telescope into one suitable for white-light solar viewing.
It’s worth checking the filter for pinprick holes and tears each time you’re about to fit it.
To do this, simply hold it up to the Sun and inspect it visually. If you find any, discard the filter and make a new one.
When you use the filter, it’s important to remove or cap your telescope’s finder.
This prevents it from being damaged by the Sun’s intense rays and removes the urge to look through it to line up the main instrument!
Always make sure the telescope is pointing away from the Sun before fitting the filter. When you’re done observing, do the same – aim the telescope away from the Sun before removing it.

Tools and materials
Card
An A2 sheet of thin, bendablecard cut into 50mm-wide strips forms the filter’s slip-on wall
Ruler and pencil
Essential to ensure you mark out the card and solar film to the correct size, making the filter safe to use
Scissors
Make sure they are sharp so you don’t damage the solar film as you cut
Sticky Tape
Both normal and double-sided tape are invaluable for easy construction
Solar Film
The main filter material is generally available in A4 sheets, but is sometimes available in larger rolls
Keep it covered
If your telescope aperture is too big to entirely cover with solar film, you can use a mask made from stiff card to cover over it; then cut a smaller hole in this mask and cover that with solar film.
Make sure that the mask fits over the entire aperture and that no light can leak around its edges.
For telescopes with a central obstruction, such as reflectors or Schmidt-Cassegrains, cut the aperture hole off centre so the secondary mirror doesn’t block it.
Once the filter’s fitted, you’re ready to view the beauty of the white light Sun.
With it, you’ll see dark sunspots and bright faculae embedded within the shaded edges of the Sun’s disc, a real effect known as limb darkening. Sunspots generally occur in groups or active regions.
A typical sunspot has a dark inner area, the umbra, surrounded by a lighter one, the penumbra.
The visible surface of the Sun is called the photosphere. A 6-inch telescope should reveal it as a fine, rice-grain pattern called solar granulation.
This represents the tops of vast energy-transferring convective cells working beneath the Sun’s surface.
Keeping a daily record of the Sun’s activity is a great way to create a connection with our nearest star.
Over the course of a few days, you’ll start to reveal the dynamic changing nature of its ‘surface’ features and reveal just how these features appear to rotate across the Sun’s disc.

