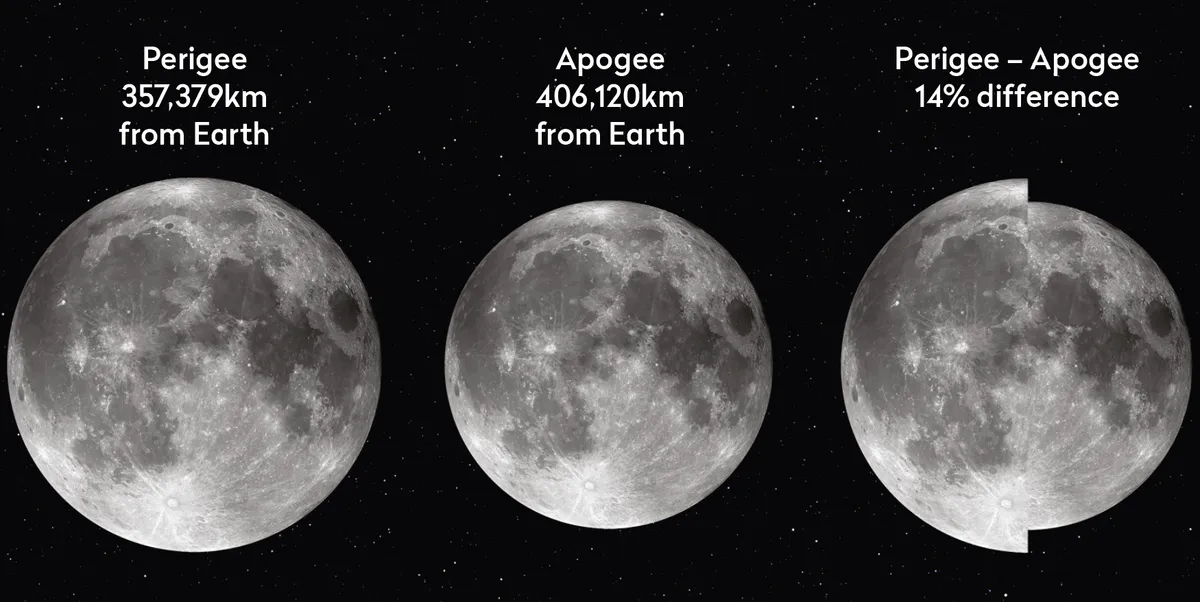
Supermoons, micromoons and all the in-between Moons occur because the Moon’s orbit around Earth (or, more accurately, around the Earth–Moon barycentre) isn’t circular but elliptical.
This means the Moon’s physical distance from Earth varies over the course of its orbit. As a result, its apparent diameter changes too.
More photography guides

Recording the differences between supermoons and regular Moons is surprisingly easy.
But you can also capture the difference in apparent size of the Moon over the course of a single cycle.
In this guide we'll show you how.
Quick tips to get started
To photograph the difference in size between Moons, you need a camera, preferably attached to a telescope or long-focal-length lens, that’s able to capture the entire disc of the Moon in one go.
The larger the image, the easier it will be to see the effects, but the critical point is you must use the same equipment setup for every image.
The Moon’s physical distance also varies slightly between rising, transiting past the south point and setting.
That’s because when it’s rising or setting, it’s approximately one Earth radius farther away than when it’s due south.

The Moon's apparent size explained
The Moon's closest approach occurs when it’s due south and its altitude matches your latitude in degrees.
In this position, the Moon, you and Earth’s centre would all lie in a straight line.
This variation in apparent lunar size due to the Moon not being due south is, however, quite small.
Even assuming a full Earth radius, the difference would only be around half an arcminute.
Typically, the added distance will be less than a full Earth radius and consequently doesn’t warrant any real concern.
That’s good as otherwise you’d need to take each shot when the Moon was at the same cardinal position above the horizon (eg due south).
Unpredictable weather, and the fact that some phases can’t actually be seen from some locations unless the Sun is up, would make this extremely difficult to achieve.

How to do it
The basic idea of this project is to collect as many images of the Moon as possible throughout a single lunar cycle – and note, it does need to be the same lunar cycle.
Tempting though it would be to fill in any gaps (say, when your imaging session gets clouded out) with phase images from a different month, that won’t work, as the Moon’s phase versus its orbital distance will have shifted slightly.

As a result, there are really two challenges here. The first is to catch enough full-disc images for comparison.
The second is to present your images in such a way that you can directly compare the Moon’s diameter.
Here, first orienting each image the same way is useful.
With crescents, the position of the cusps helps greatly, but it’s a little trickier with gibbous Moons, especially near full Moon.
Then you’ll need to cut a narrow vertical strip to contain the full diameter and add it to a growing strip chart that will reveal how the Moon’s apparent diameter changes over a lunar cycle.
Make the strips narrow – that way, any clouded-out shots (that result in gaps in your chart) won’t be too obvious.
Share your images with us and they could appear in a future issue of BBC Sky at Night Magazine.
This guide appeared in the October 2025 issue
