In this Photoshop tutorial we'll show you how adjusting RGB channels will help draw the detail out of your image of the Andromeda Galaxy.
Most astrophotographers start out using a DSLR camera. These versatile cameras produce detailed deep-sky images, but while narrowband data from mono cameras creates clear contrasting colours, DSLR data can be complex to process.
This is because of the way light is distributed onto the camera sensor. Narrowband filters allow separate processing of Red, Green and Blue (RGB) channels, whereas DSLRs and one-shot colour cameras pick up the wavelengths of light simultaneously.
The sensor distributes this light via its own RGB filter arrangement, the Bayer matrix. If RGB is managed carefully, you can bring out additional details from DSLR images while maintaining a natural appearance.
If you need more help with your galaxy astro imaging, have a read of our guides on deep-sky imaging for science, using PixInsight to enhance a galaxy's brightness or a tutorial on how to use DeepSkyStacker for astrophotography.
If you need help locating the galaxy, read our guide on how to see the Andromeda Galaxy.
Andromeda is set to collide with our own Milky Way galaxy in the distant future. Find out more in our guide to the Andromeda-Milky Way collision.
Tips for astrophotography processing with Photoshop
1. Make small changes. You don’t want to overstretch the data and lose details around the core.
2. Every time you make an adjustment, start a new layer to build on your progress.
3. Change blending mode to Colour when adjusting Selective Colour or Hue/Saturation – find it in the drop-down menu above Layers.
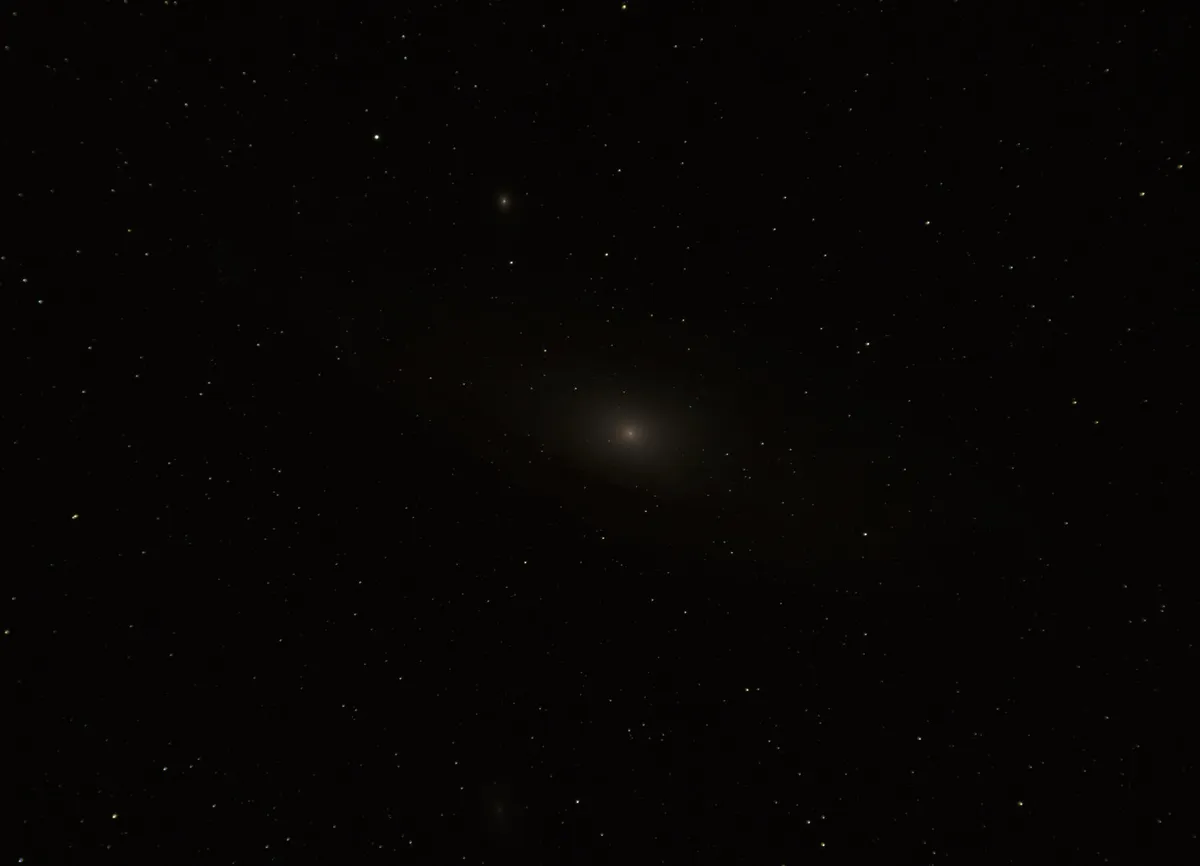
Get started processing your Andromeda image
RGB control is done via three main settings: Levels, Selective Colour and Hues/Saturation.
Each of these is in the Adjustments menu. Click Image > Adjustments. With these functions, you can align and alter colour channels.
If not done in gradual stages, you risk making your process too severe. We recommend performing more than one colour ‘stretch’ at stages throughout processing, in order to add gradual colour developments.
After stacking files in Sequator, open the TIFF file in Photoshop: click File > Open and crop the image by clicking Image > Crop. This is an important step before the main process.
When stacking images over several hours – or from two different nights – your image-alignment can shift, causing uneven colours around the edges. By cropping these out beforehand, we prevent anomalies affecting the colour balance.
Our image is ready for processing but at this stage it looks dull (see image above). We suggest starting with Levels: click Image > Adjustment > Levels.
This enables a manual colour balance to ensure you haven’t got one dominant colour overtaking the process. This can vary between cameras: for example, a modified DSLR will have a dominant red channel.
The Properties tab in Levels (Red box) allows you to select each of the RGB channels separately, starting with Red(see below).
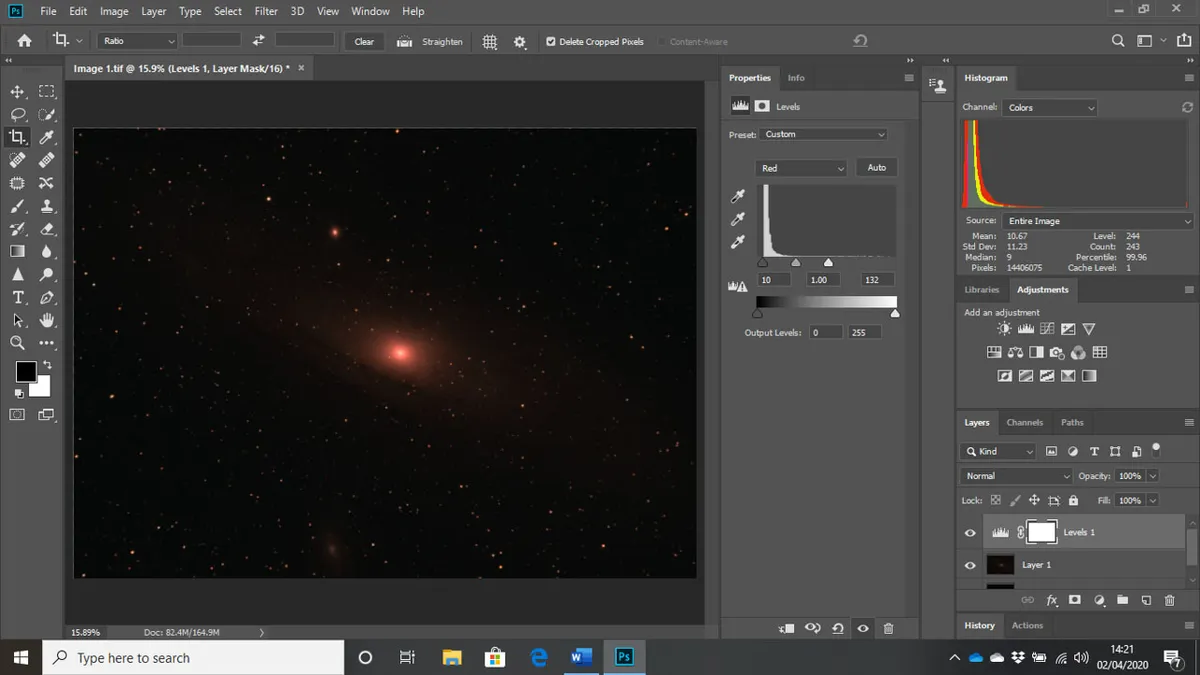
Make sure the Histogram channel on the right-hand side is set to Colours rather than RGB so that you can monitor changes. Move the sliders so that the left-most dark tab is touching the edge of the Redhistogram.
Next, drag the right-most white tab (which will also move the inner grey tab) until the grey tab is near the right-hand side of the histogram (see below).
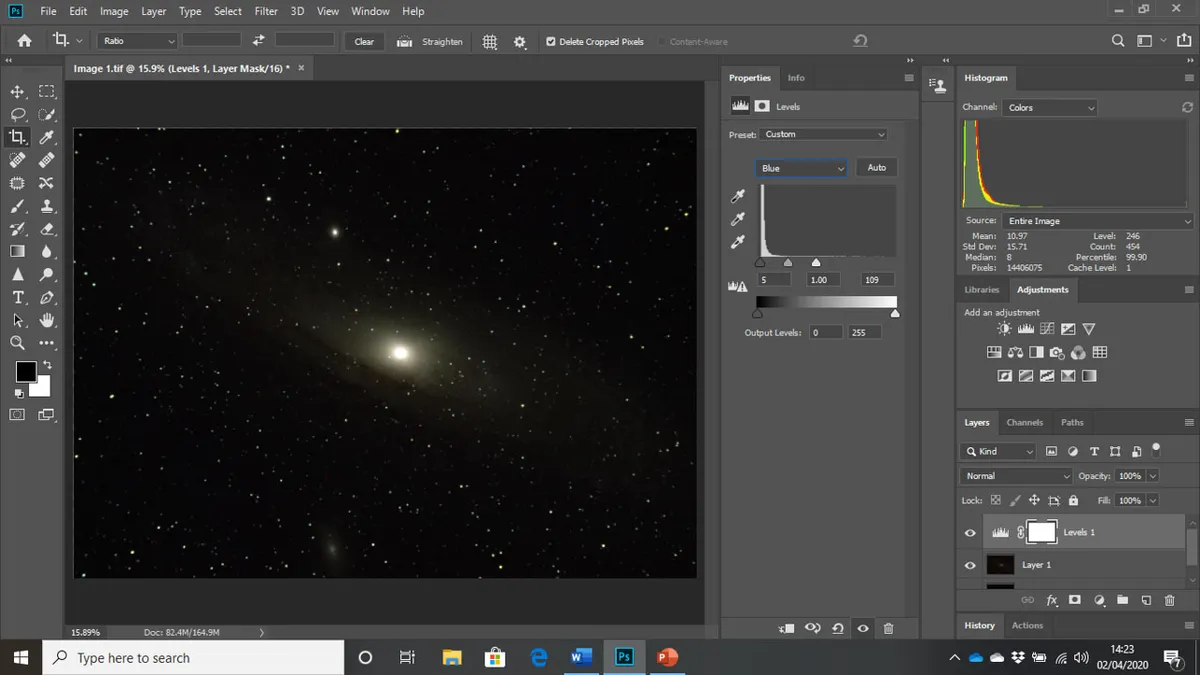
Repeat for Green and Blue channels then right-click the layer and select Merge Down. We are aiming for a Histogramwhich shows all colours contained evenly within the data.
Hold down ‘Shift, Ctrl, Alt, N and E’ to create a new layer that retains these changes.
We repeat this process again. For this second attempt the histogram for each channel is wider, allowing us to make finer adjustments.
The M31 image is showing greater colour detail, and the background looks natural.
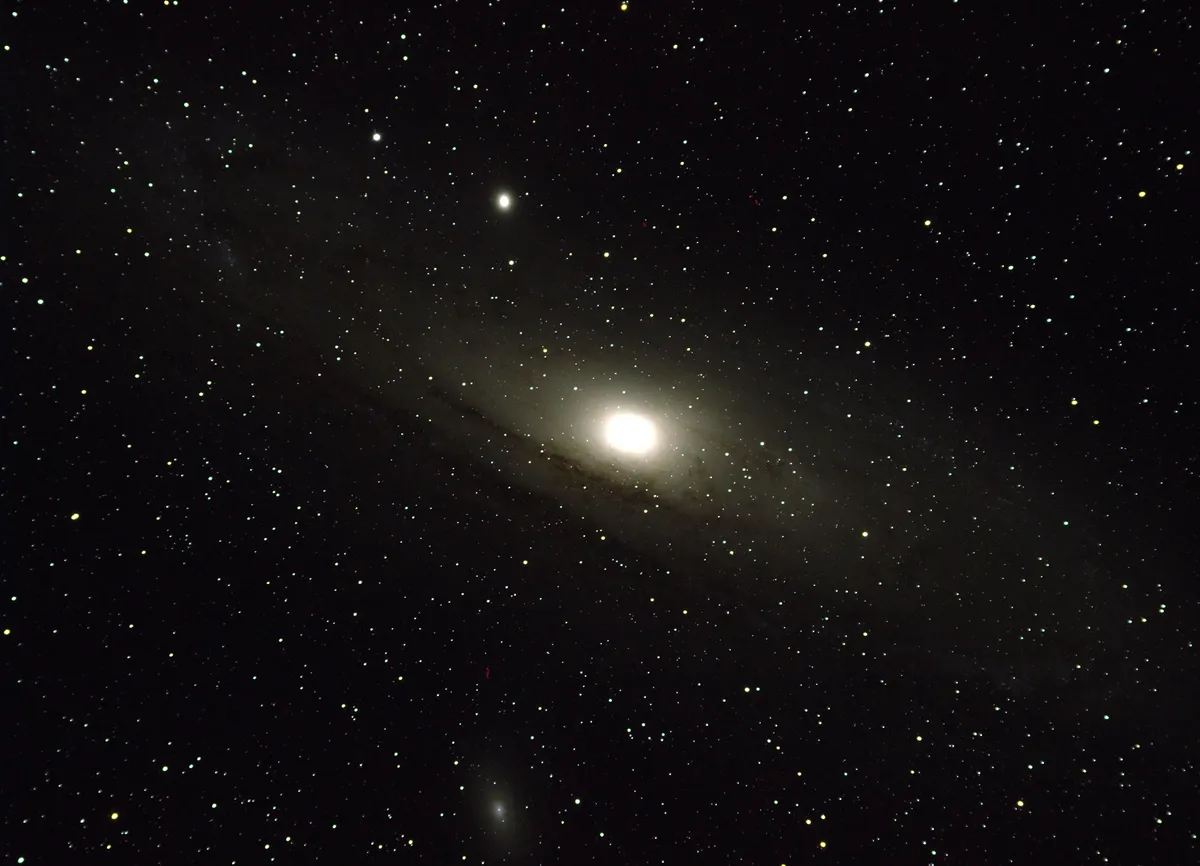
Again, use Merge Down and create a new layer. As the central area looks a little green, we can adjust this in Selective Colour and Hue/Saturation.
Both settings are also in the Adjustments menu (click Image > Adjustments). When performing tonal or saturation adjustments, it’s worth changing the blending mode (second drop-down menu in the Layers window) from Normal to Colour. This allows colour adjustment without altering image brightness.
Selective Colour allows you to modify the tones of each colour by altering Cyan, Magenta, Yellow and Black(CMYB) levels.
We use the hand-tool in the Hue/Saturation properties window to click on areas we think need a colour boost.
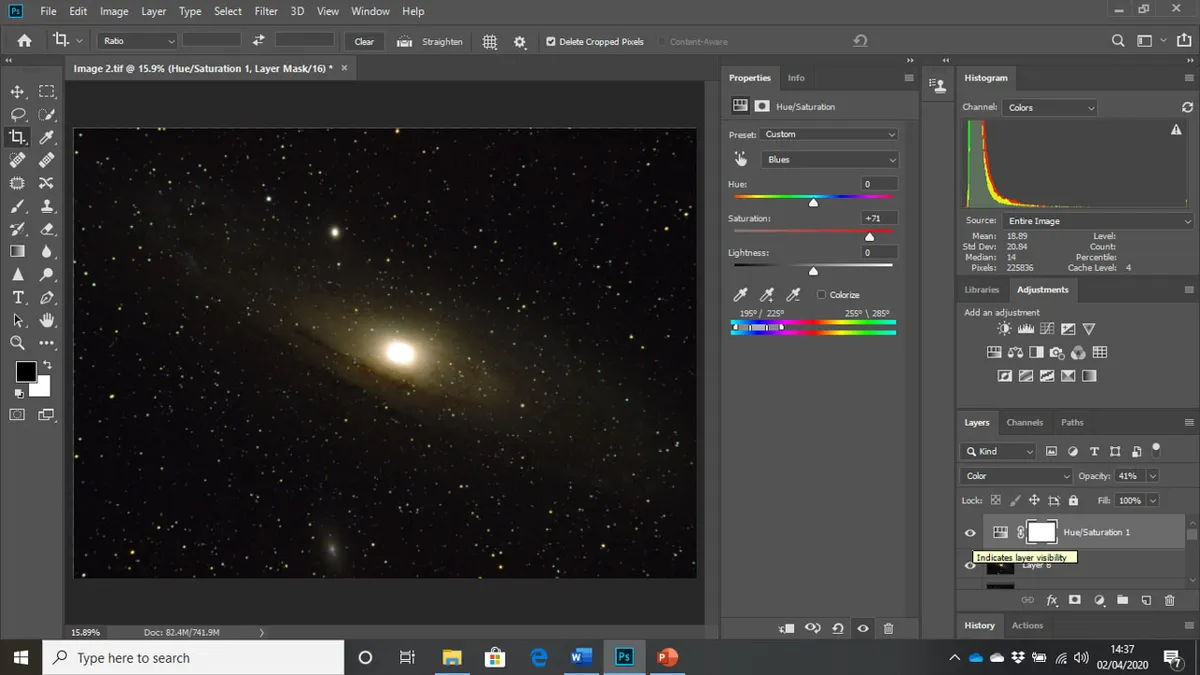
For M31 we concentrate on red, yellow saturations round the core, and blues and cyans round the outer edges. Create a new layer for each adjustment.
You can use the Opacity slider (situated above Layers) to control the strength of saturation adjustments for each layer.
Our final image (see at the very top of this article) has undergone the above colour adjustments. In order to extract its full potential, we can use other provisions from the Adjustments menu, including Brightness/Contrast and Curves.
We also suggest applying masks to protect or highlight various regions and using noise reduction techniques to remove unwanted artefacts.
One of the key ingredients for astrophotography, however, is good colours, and the above Photoshop settings will help you achieve this.
Charlotte Danielsis an astronomer, journalist and aircraft broker. This guide originally appeared in the June 2020 issue of BBC Sky at Night Magazine.


