When creating high-resolution lunar mosaics you need to plan your imaging session.
It takes a long time to capture the required number of AVI movie files, so the position of the Moon in the sky changes significantly.
Taking into account the field of view of your camera and the ability of your telescope, it’s always a good idea to capture more panes with greater overlap rather than miss one part of the Moon.
More on this is available in our guide on how to photograph the Moon.
Our starting AVI movie files were captured through a 5-inch telescope with a DMK 41 CCD camera.
For the panes of the sunlit side of the Moon’s disc you should ideally take thousands of frames, but hundreds of frames are enough for panes of the darker portion along the terminator.
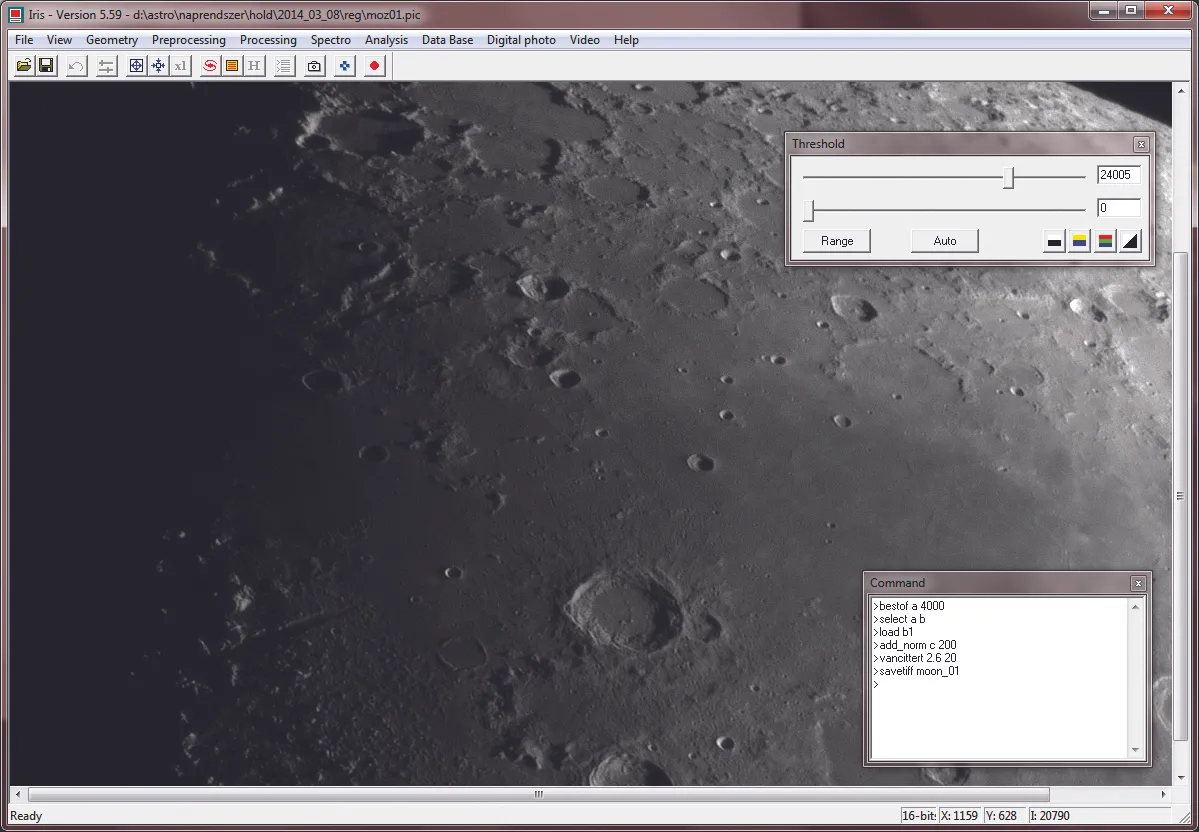
For pre-processing, we’re going to use IRIS, a small but powerful freeware program.

Click File > AVI Conversion to open a dialog box and select the AVI movie file you would like to process, then load it into the program.
Next, you need to do a quality analysis and grade the single frames in a decreasing order. Use the Best Of and Select commands for this activity.
Once done, select Processing > Planetary Registration (1) from the top navigation menu.
In this menu, you can align the frames to the sharpest one. The next step is to stack the aligned frames by using the Add_Norm command. At this point, only the sharpening is missing.
Here a Van-Cittert deconvolution can be a useful technique. To apply that, use the Van-Cittert command.
You need to define two values in order to run it. The first value is the FWHM radius of the stacked image, the second value is the number of iterations.
The values of the Van-Cittert deconvolution are dependent on the sky conditions, therefore each time you apply it you need to find the best combination.
Save your work by using the Save TIFF command; this will create a 16-bit TIFF image in your working directory, which can be loaded in many programs for post-processing.
Process all of the panes with this same workflow for consistency.

You can use Photoshop to stitch the pre-processed panes together. First create a high-resolution base image with a black background.
Define its size based upon the scale of your captured panes. It is practical to start the stitching along the terminator where the most detail lies.
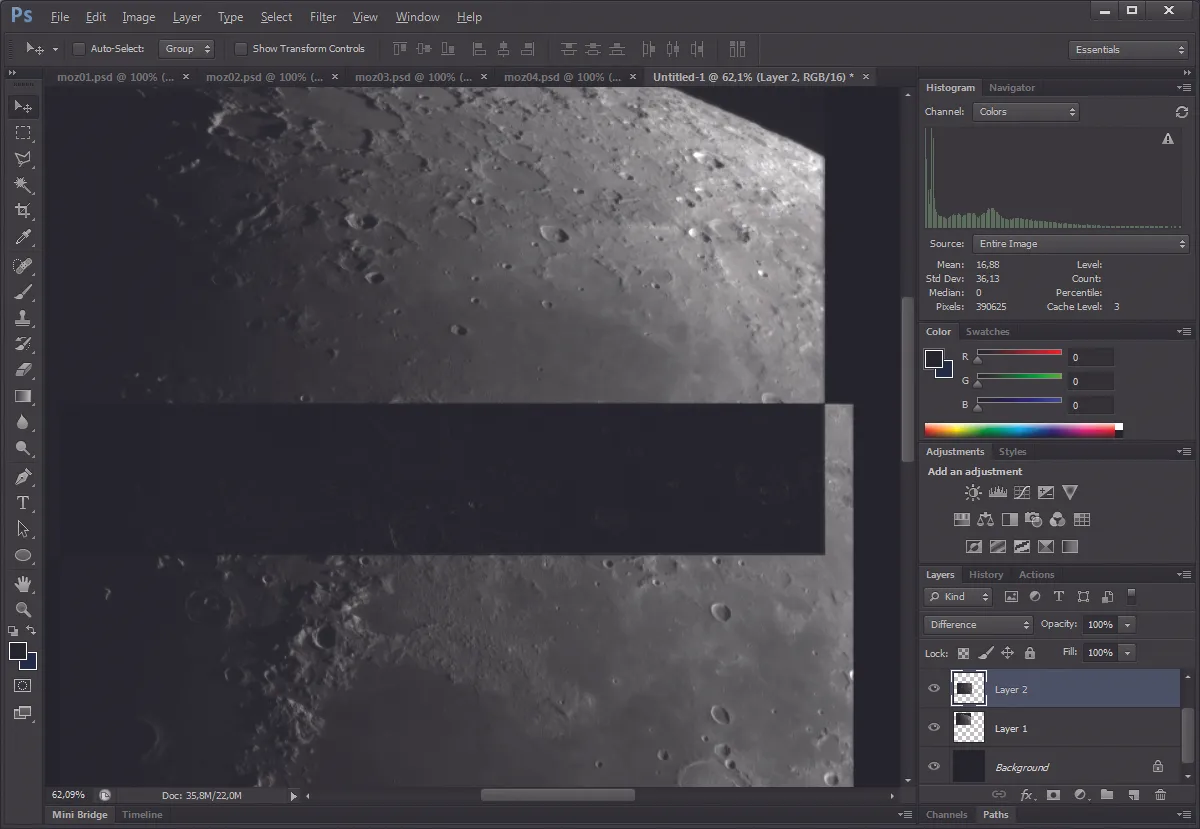
Open the first pre-processed pane, copy it as a new layer to the base image. Load another pane which is directly next to the previously opened one, and paste it to the same place as a new layer.
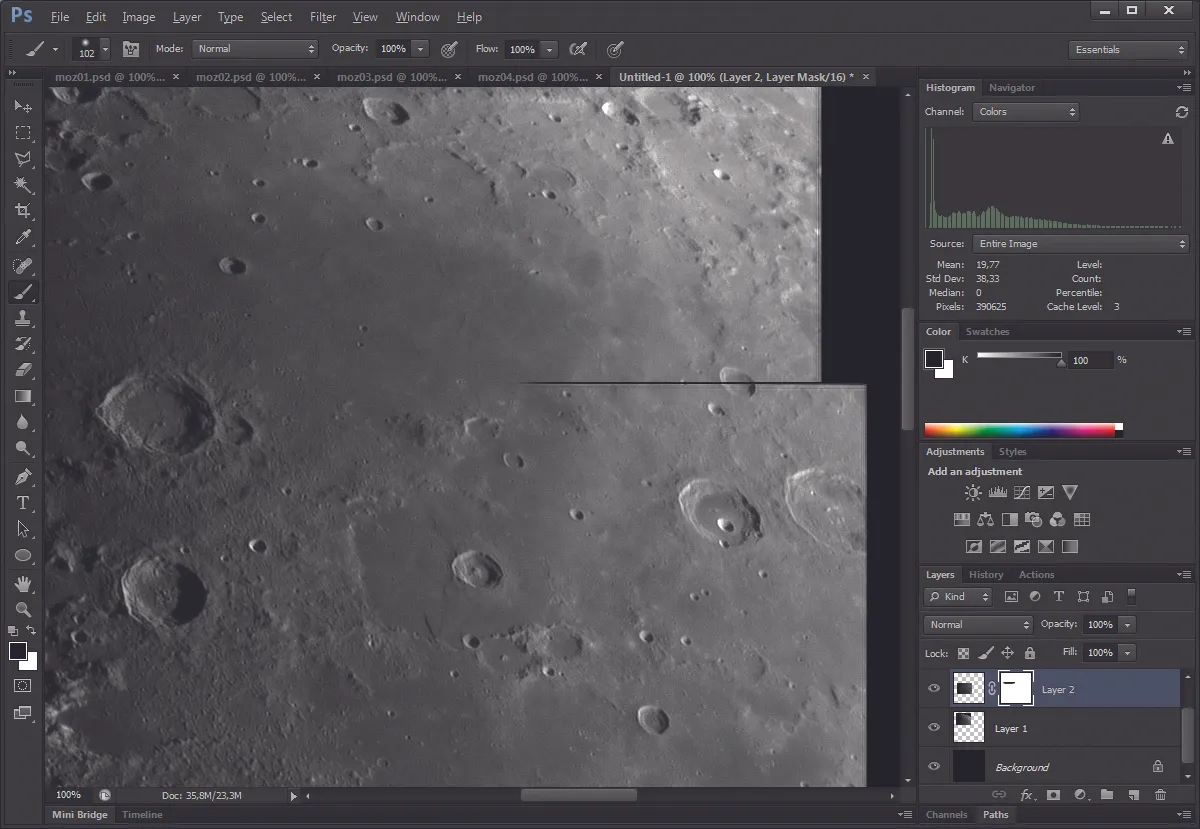
If you adjust the top layer blending mode to Difference, you can easily align the two panes by using the move tool. Once done, set the blending mode back to Normal.
Then create a mask on the top layer by clicking Layer > Layer Mask > Reveal All. On this mask, paint a gentle transition on the overlap area with the brush tool.
Edit the brightness and contrast as necessary using Levels or Curves, both of which can be found by first clicking Image > Adjustments.

Follow this stitching process until the daylight portion of the Moon’s disc is completed, then click Layer > Flatten Image.
Now centre a different file and using the same process, stitch together the dark side as well.
You’ll end up with two files, one of the night portion and one of the daylight portion of the lunar disc.
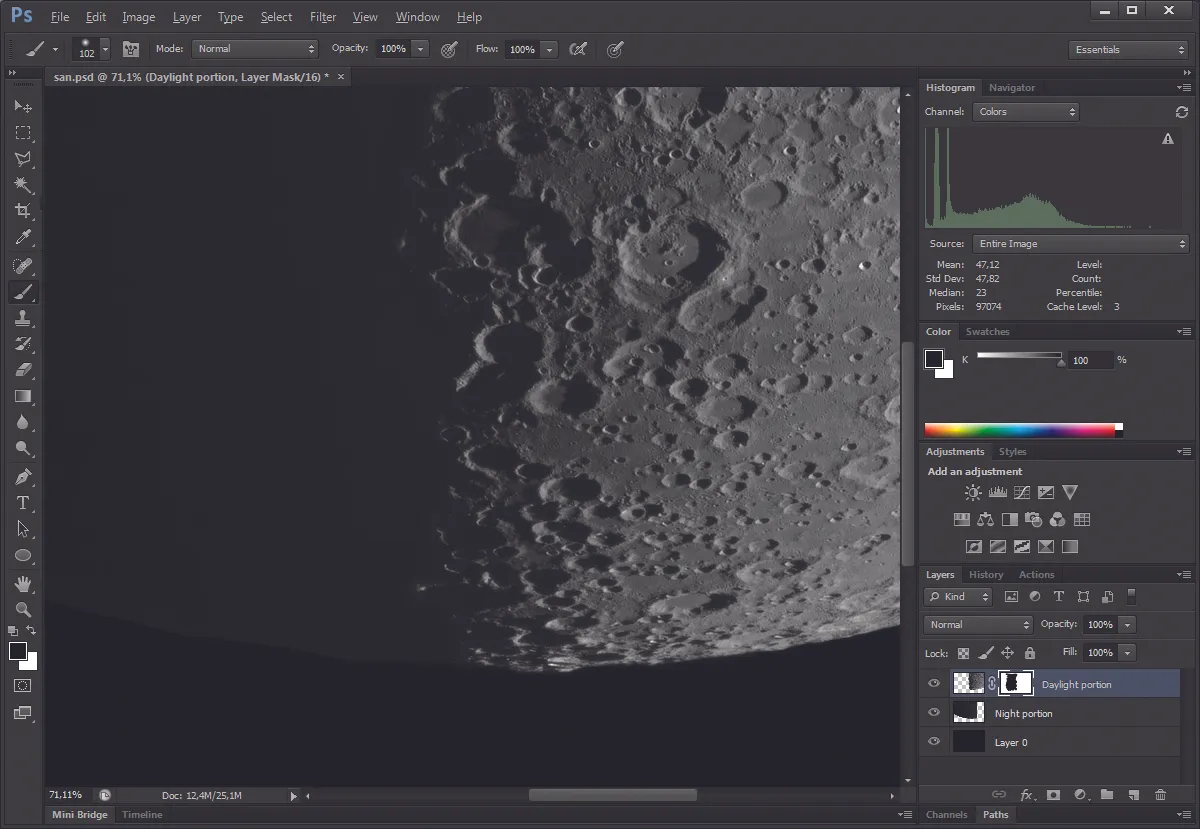
Copy the two halves into the same image but on different layers. The night portion needs to be the lowest layer.
Adjust the brightness of the dark side with Levels or Curves until you get a natural view of the Moon.
Now, hover your mouse over the sunlit side layer and generate a layer mask as described above.

Finally, use brush tool to create the silky transition on the layer mask along the terminator.
When you are happy with your result, click Layer > Flatten Image to merge the two layers.
This article originally appeared in the August 2016 issue of BBC Sky at Night Magazine. András Papp won the Our Moon category of 2015’s Insight Astronomy Photographer of the Year competition with this image.
