DeepSkyStacker is a useful piece of freeware that allows you to register (align) and stack multiple images into a single frame, revealing detail that is difficult to capture otherwise. For astrophotography, this means you can make use of short exposure images for captures of deep-sky objects.
First we’ll cover how to register a group of images, then we'll look at how to stack them. You can download the program from http://deepskystacker.free.fr/.
If you already have the software installed, make sure that you have the most up to date version. Longer exposures are better of course, but require accurate tracking. If your skies suffer from light pollution, you may also find that it quickly swamps a long-exposure image.
Taking shorter exposures is one way to compensate for this and also prevents stars from trailing.If you were to combine 20 exposures of 30 seconds each, the data for them all is added together, so the final image gives similar results to a single 10-minute exposure.
For more equipment advice, read our guides to the best cameras for astrophotography and the best telescopes for astrophotography.
There are two important prerequisites when it comes to actually capturing your photographs: make sure you set the camera to save your images in the RAW format, not Jpeg.
You should also ensure that all other in-camera processing functions, such as long-exposure noise reduction, are switched off.
All the processing needed can be performed in post processing after the files have been transferred to a computer.
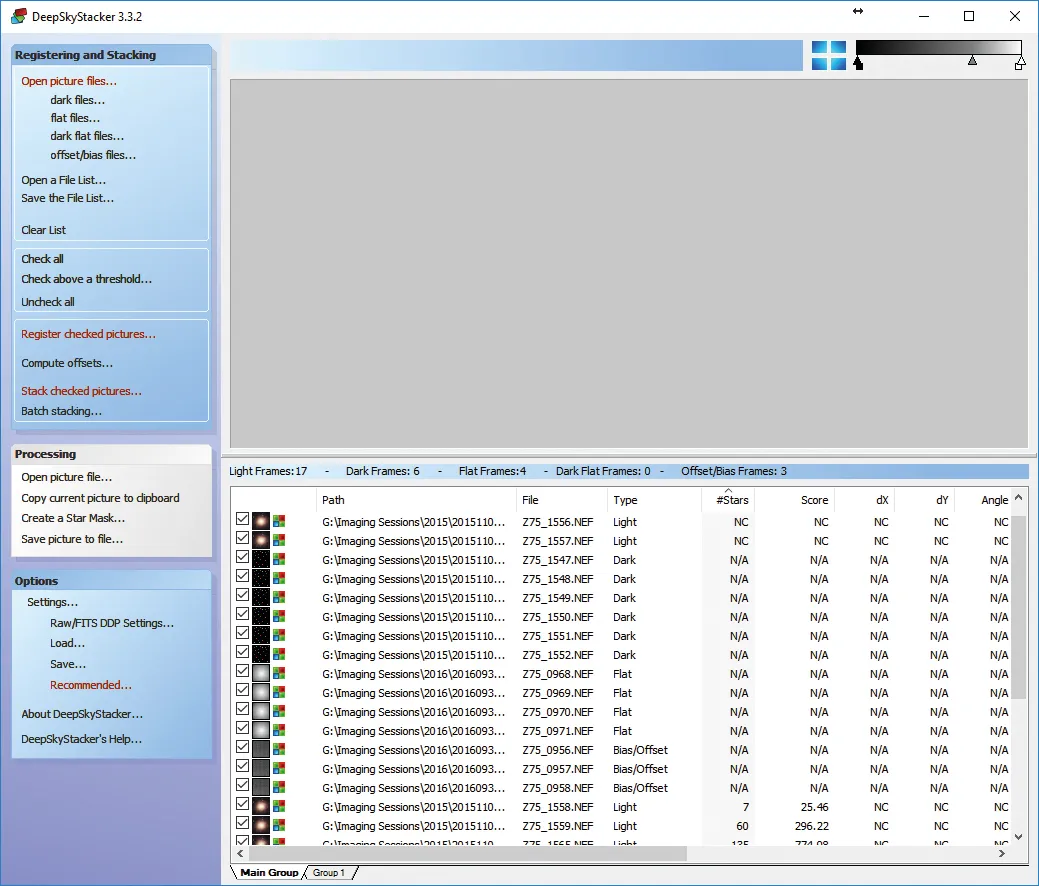
Once DeepSkyStacker is installed and running, open the images to be stacked (known as your light frames) by selecting Open Picture Files.
If you have captured dark, flat or offset/bias calibration frames, then open these too. Don’t worry if you haven’t, as they won’t prevent you from completing the rest of this tutorial, but they will markedly improve your final image if they are available.
The list of images you have opened will appear in the bottom window.
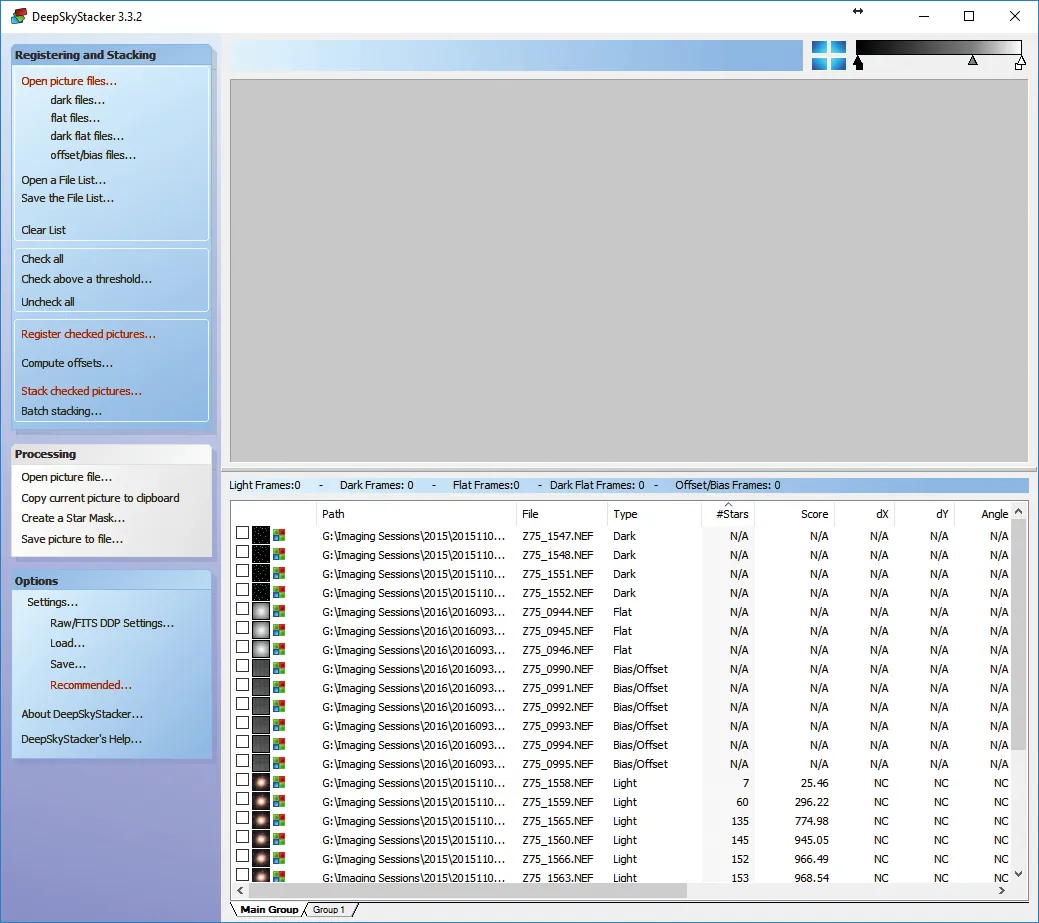
Now you need to prepare your images for registration. Click on Check All in the left-hand menu; this will cause a tick to appear beside each image.
Now click on Register checked pictures. In the window that pops up, untick the box Stack after registering.
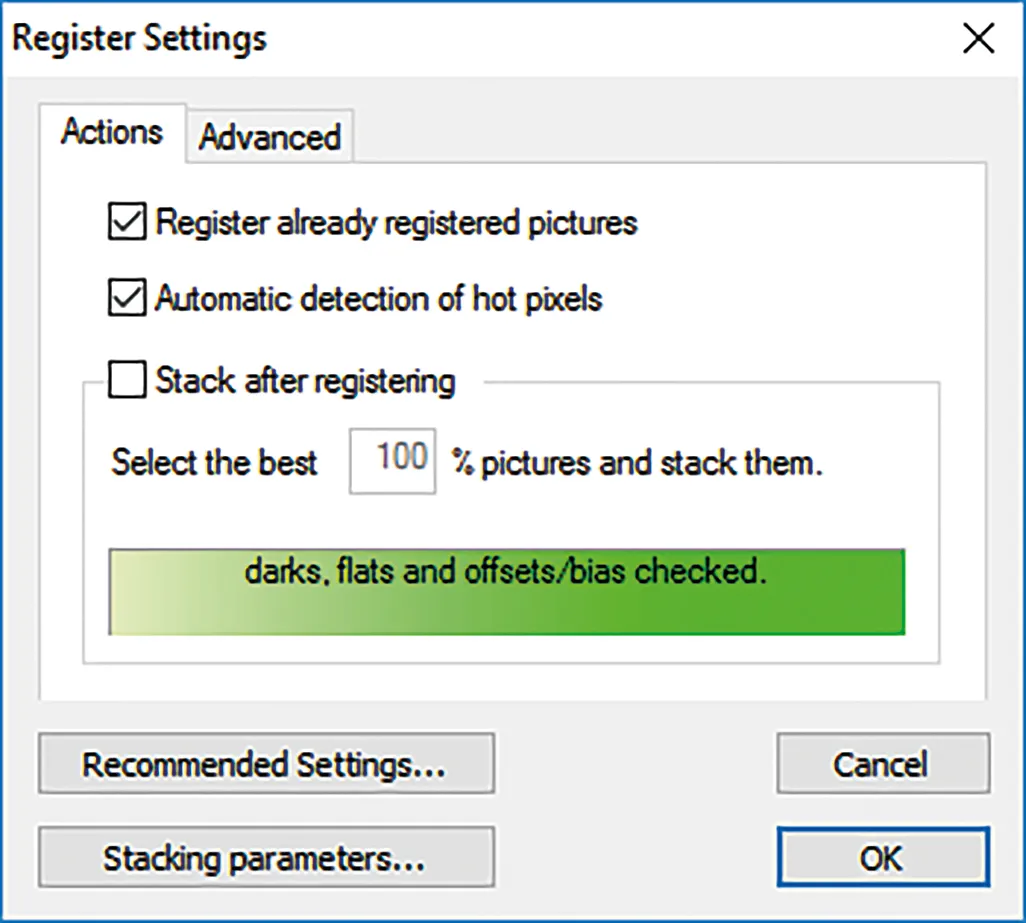
Finding enough stars
Now switch to the Advanced tab within the pop-up and click Compute the number of detected stars.This causes DeepSkyStacker to scan the first file in the list and calculate how many stars are visible.
The number of stars detected will vary depending on the image being registered, of course, but ideally you want it to find around 150. Moving the slider to the right-hand side makes it less sensitive.
If fewer than 150 stars are detected, try again by selecting a different image – you do this by simply clicking on the image you want to try.
If too few stars are detected, the software may not be able to stack the images. If too many stars are registered, the software will work extremely hard in the final stacking process and will take an extremely long time.

When you are happy with the number of stars, click OK. The software will begin scanning the images; this can take a while.
During this process DeepSkyStacker is looking for sharp pinpoint stars, mapping the position of them in each image.A small text file of this star map is saved for each image within the same directory.
Once finished, the list of light frames in the bottom window will now display several parameters. The important ones to look at are #Stars and Score.
#Stars is hidden way over to the right in the default setup. Scroll across and drag this column farther over to the left-hand side.
The higher the figures within these fields, the better the image is for stacking. The figures will vary from image to image, but there may be an image or two that scores much less than the others. These are, possibly, worth removing from your final image.
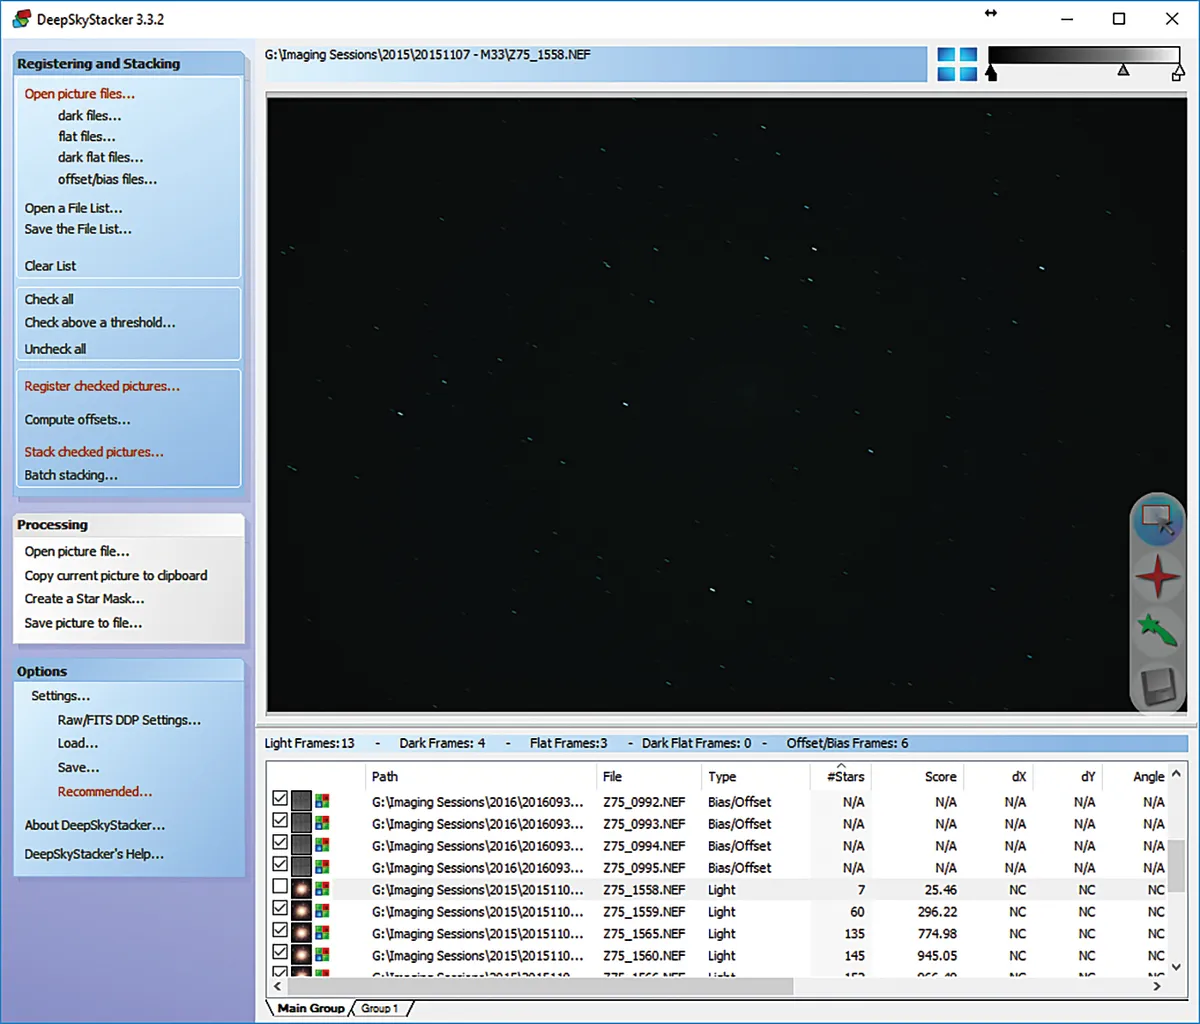
To investigate an image, click on it once. When the top bar turns blue, that image is the one being displayed.
Inspect it to see why it has a much lower score. Has the scope wobbled and produced small star trails, for instance?
If the score is too low, click on the box containing the tick next to the image and remove it. This image will no longer be included in the final stacking process.
Once you have removed any below-par frames, the registration is complete. These files are now ready for stacking.
How to stack with DeepSkyStacker
In the lower windowof DeepSkyStacker will be the list of files, some of which may not be selected, depending on the quality threshold you are working to.
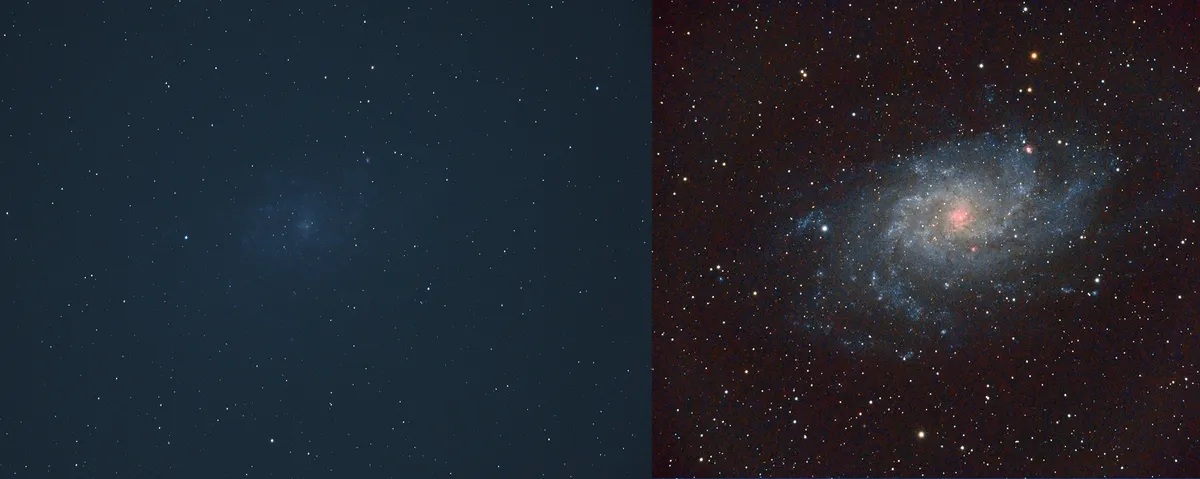
You’ll see that in the preview no trace of the celestial object that forms the focus of our endeavours – the Triangulum Galaxy, M33 – can be seen in the field of view of the individual frames.
Stacking the frames together will help to coax that detail out.
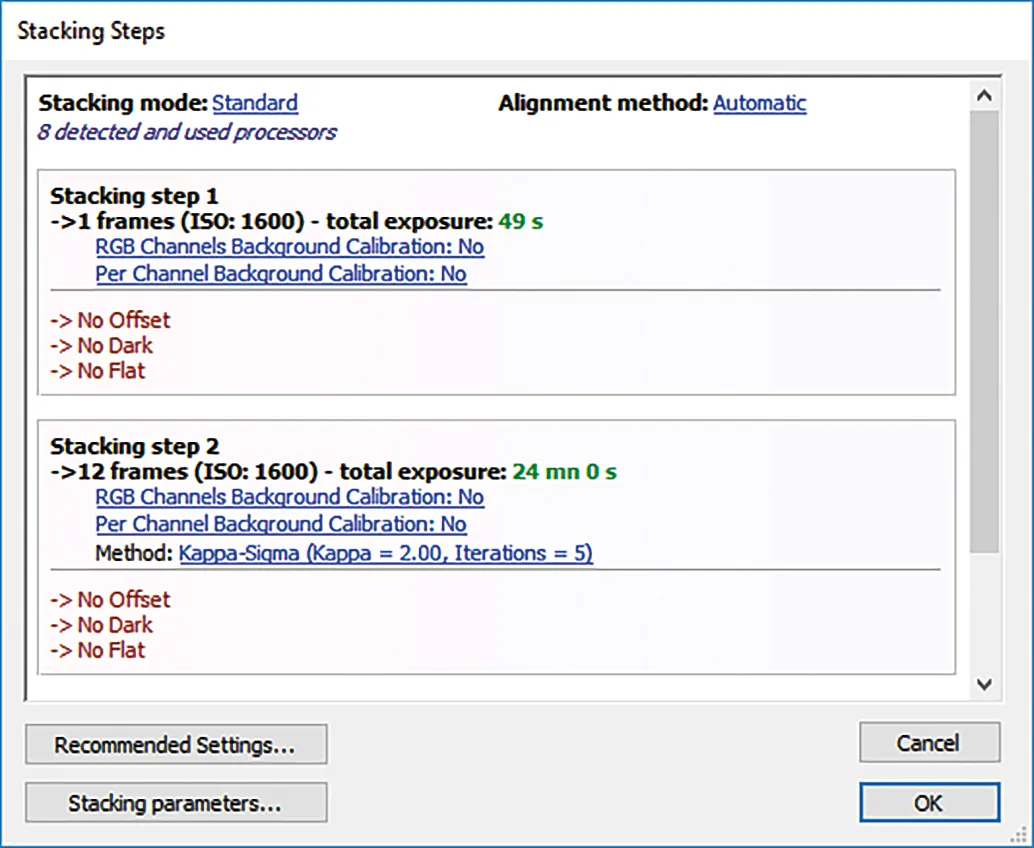
Start by clicking Stacked Checked Pictures from the left-hand menu, which will cause a window to open.
We need to make several changes here before stacking, which is why you untick the Stack After Registering box when registering your images in the first place.
Building the image
Click on Stacking Parameters and then navigate to the Light tab. The options in this window allow changes to be made in the way the software uses the data on light levels within the images.
The two Kappa-Sigma Clipping settings act in a way to remove anything from the stacked image that isn’t consistent between single frames – so, for example, interfering aircraft or satellite trails will be eliminated from the final stacked image.
This feature is extremely useful when stacking frames of a comet, as stars tend to fade from view due to the comet’s movement.
The Entropy Weighted Average (High Dynamic Range) option uses all the data in each frame to build up the final image.
If you used a full frame camera, this setting could cause your software to overload while processing. Experiment with the different stacking modes to see what comes out best with your images.
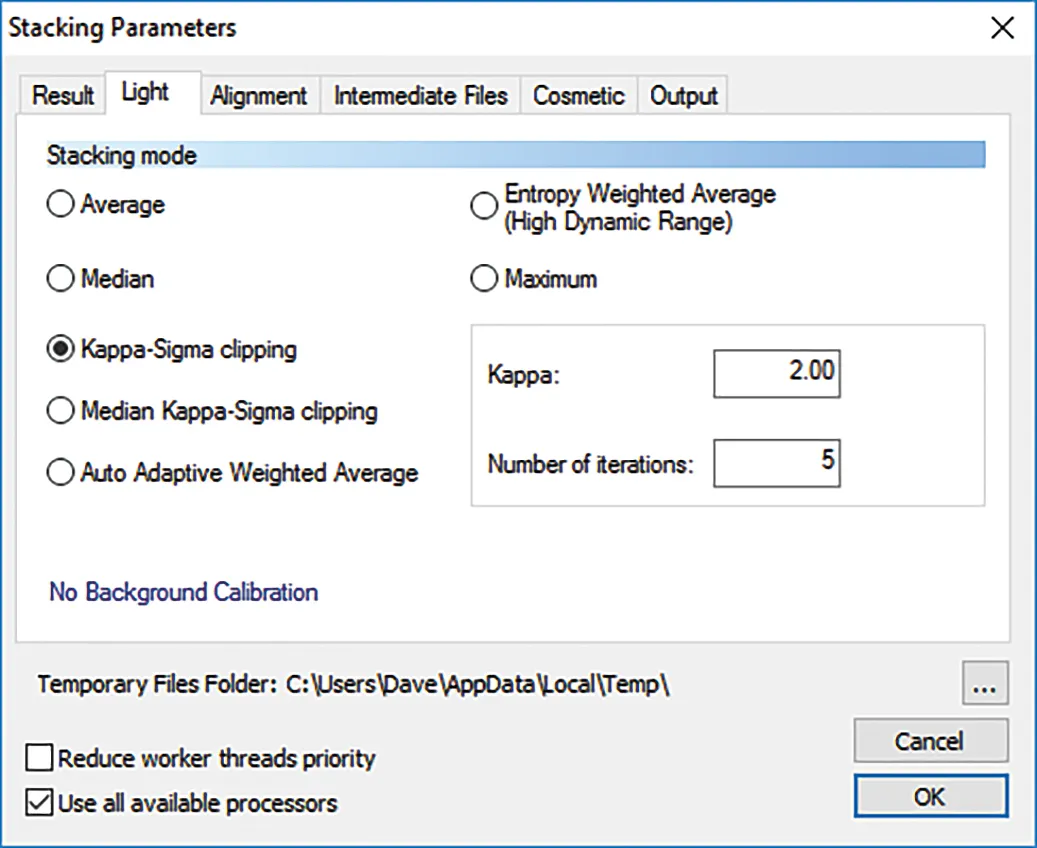
Below these stacking options, make sure that RGB Channels Background Calibration and Per Channels Background Calibration are both set to No. It should say No Background Calibration.
Once you are happy with the settings, click OK. The software will start stacking the images.
If you have made a mistake at this point and would like to stop the stacking process, don’t be led into thinking that clicking on the stop button will halt proceedings – it doesn’t.
Cleaning up the stack
When stacking is completed, the final stacked image will be previewed in the window. Some faint detail in the galaxy’s spiral arms will now be visible in the image.
The data within each of the frames has been added together to increase the depth of the final image and increase the signal-to-noise ratio.
In this case, no flat fields were applied to the image, something evidenced by the presence of a lighter area in the centre.
The vignetting around the edges will need to be removed in post-processing. Below the image, colour adjustment tools are visible, though these are best left well alone – you will have greater control over these parameters using your preferred image processing software than you do in DeepSkyStacker.
One annoying problem encountered by some is that DeepSkyStacker sometimes saves the image in a format
that cannot be opened in image processing software.
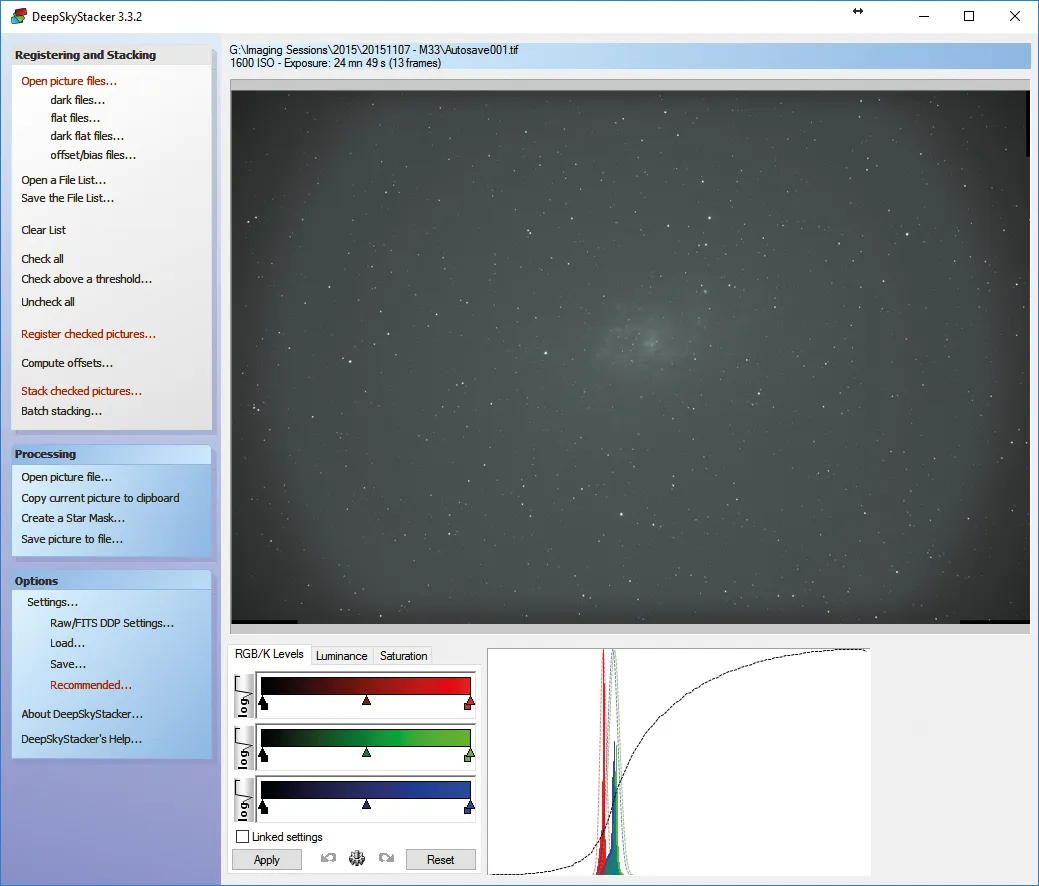
One way around this is to click Save Picture to File from the menu under Processing to save with a file name of
your choosing.
Note that by default it saves the image in the last folder a similar image was saved in, not the current working folder, so ensure the new file is saved in the place you want it to be.
Once the stacked TIFF file has been saved it is now ready for final image manipulation to bring out the best from all that hard-earned captured data.
Our final image of the Triangulum Galaxy, shown as the main image to this article, was created using data captured from a light-polluted back garden.
This was a combination of 13 two-minute exposures, registered and stacked using the procedure described.
Dave Eagle is the founder of Bedford Astronomical Society.