The best way to produce your own full-colour image of Saturn is to first capture a correctly focused and exposed video of the planet, a minute or so long, using an astronomical digital camera at the focus of your driven telescope.
Here I’ll explain how you then process this video to create a single final image of the planet.
I’ll assume you are using a colour digital video camera as this is the easiest way for you to produce a full-colour image.
At the processing stage, you use special software to break your video down into separate frames, rate each frame for quality, then align the best ones so that they all lie exactly on top of one another.
Read our guides on image processing and how to improve image processing.
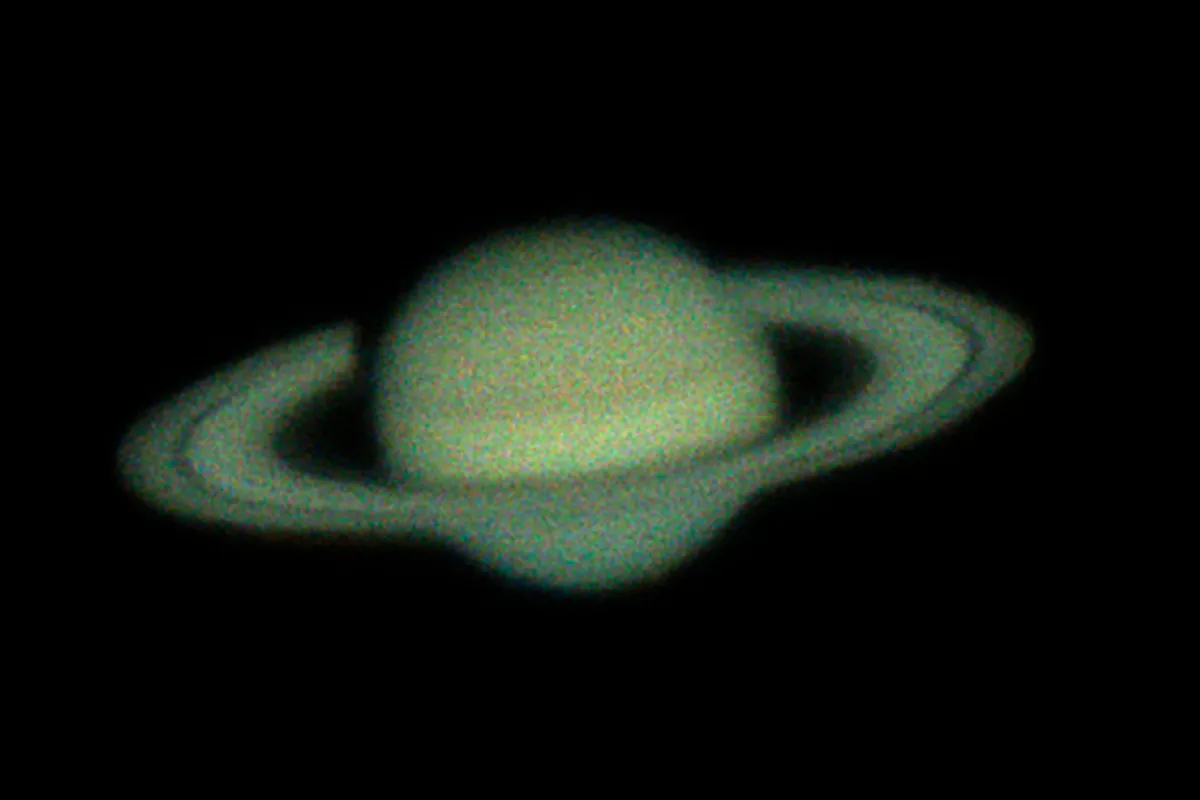
This results in a single-frame stack. This stack is effectively a long-exposure image made up of lots of carefully aligned single, short exposures.
The long exposure averages out the chaotic movement in our atmosphere and also means the noise is much reduced compared to the much shorter-exposed individual frames.
This allows stretching and local contrast enhancement methods to be applied that would be pointless for the much noisier single frames.
You may be surprised that a single piece of freeware called AutoStakkert! can accomplish all of the initial stages described above.
Start the program, click Open in the control box and import your Saturn video.
Select the settings so that your screen looks like that shown in the image below.
Read our guide on how to photograph planets
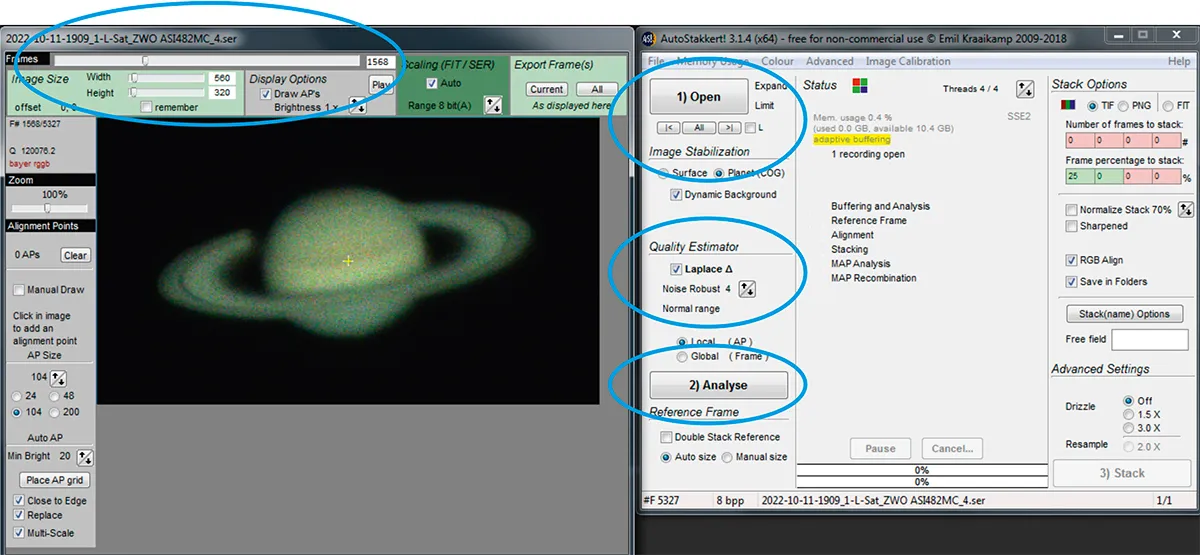
Next, hit Analyse to sort through the frames and assess each one for the presence of planetary detail.
Once this is complete, move the slider at the top of the preview window to go through the frame sequence, which will now have been ordered from best to worst.
Check that the planet is stationary as you move the slider and that the progression is indeed from good at the start to bad at the end.
To reduce noise, alter the Noise robustsetting, trying higher values for more noisy frames or lower values for less noisy ones, then re-analysing until you best accomplish this progression.
The next step is to set the alignment points for the stacking process.
To the left of the preview screen, pick a size of alignment box and click Place AP grid to auto-place the boxes.
You want about 10–30 alignment boxes over the planet, as shown in the image below.
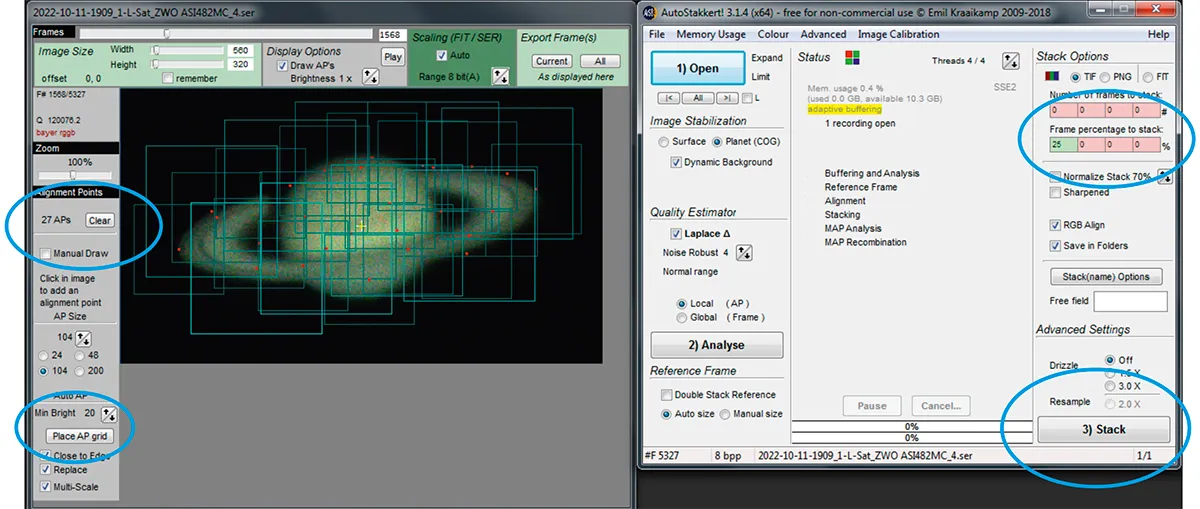
If there are too many or too few, hit Clearand retry with larger or smaller alignment box sizes.
You are now almost ready to stack. First, set the percentage of frames you want to keep and enter this in the upper right corner of the control box.
Enter a value like 25% for average seeing, then click Stack to initiate the alignment and stacking of the best frames.
This may take a while for a large video, so be patient. Once done, the result will be auto-saved.
You are now ready to stretch the local contrast to bring out the detail.
This is done in RegiStax 6, another piece of free astro software.
Download and install it, then hit Select and open the image previously saved by AutoStakkert! RegiStax will then jump straight to the Waveletprocessing tab.
You can find out more about this in our guide to wavelets in Registax.
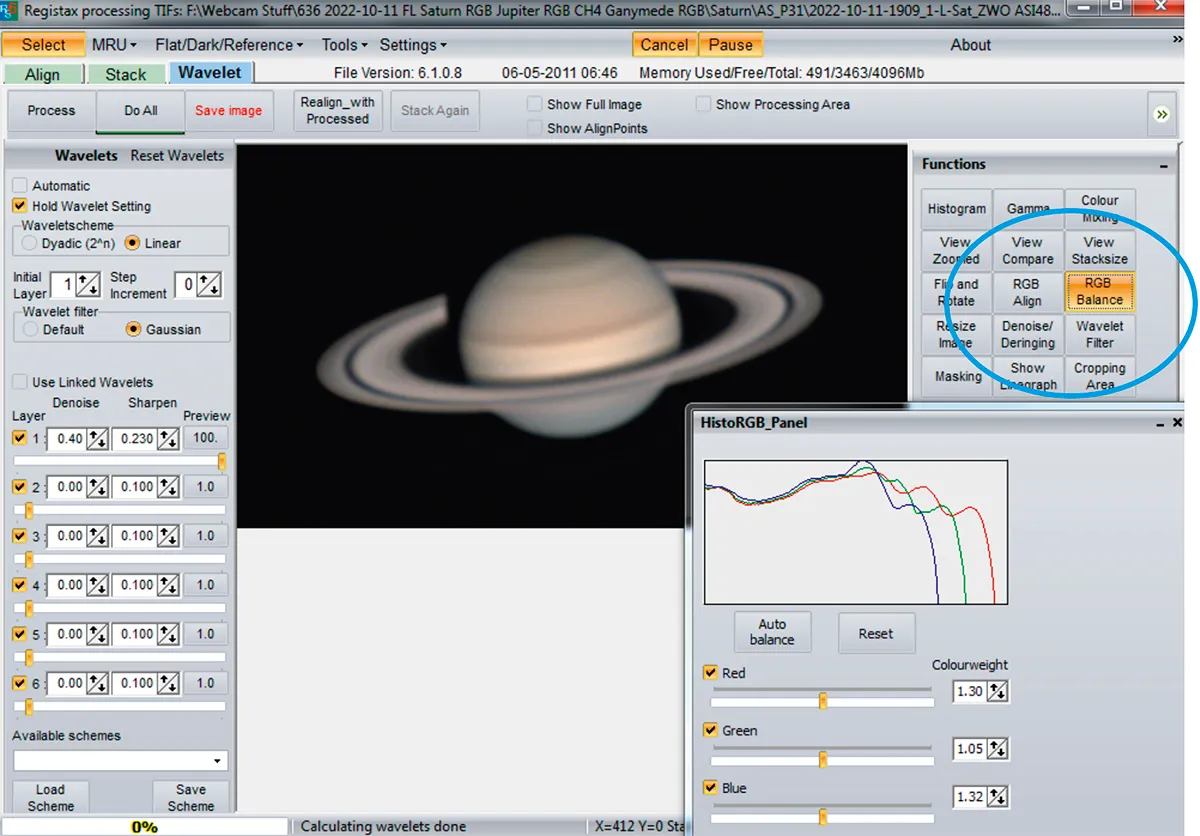
Here, select Linear and Gaussian as shown in the image below, and move the slider in the top level to 100%.
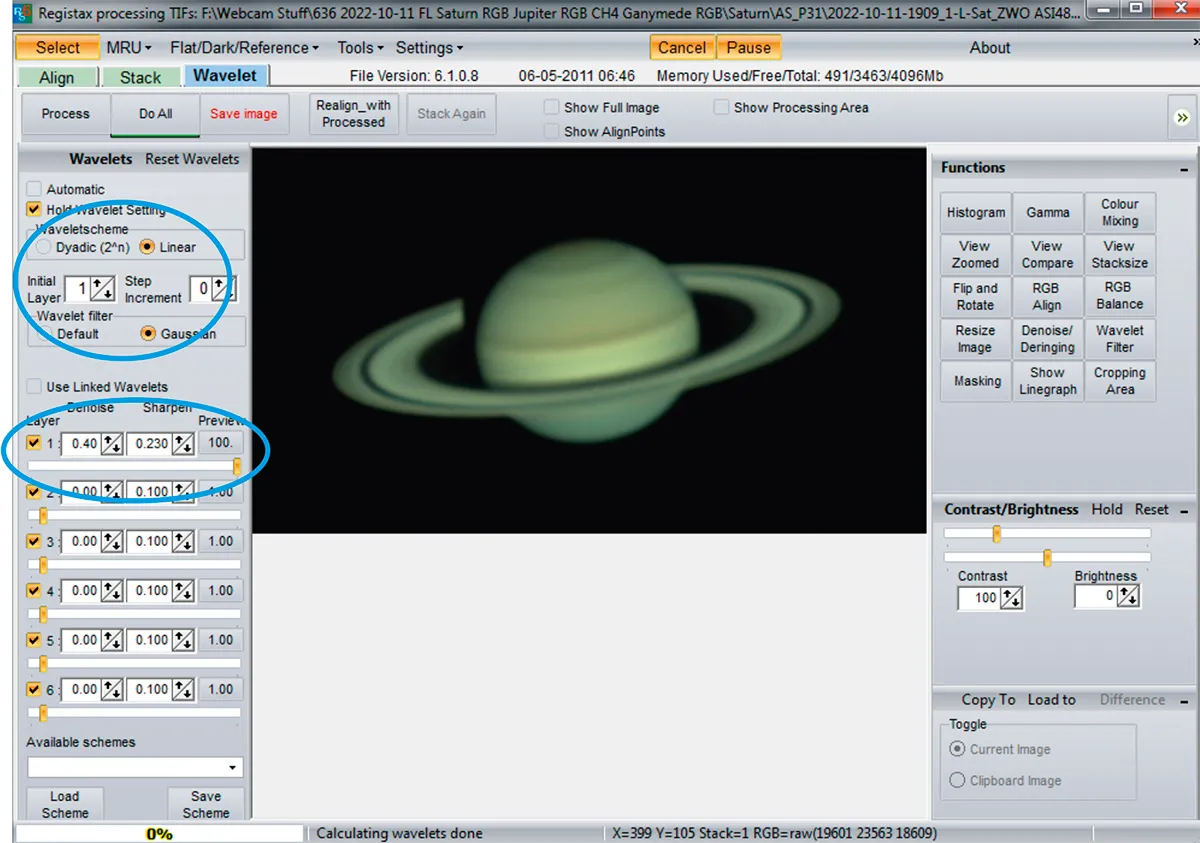
Next, increase the Sharpen value in this top level a little, to bring out the contrast; this will increase the noise, so then increase the denoise value too.
Play around with these two values until you have a sharp and smooth final image.
It’s tempting to overdo it and stretch the contrast too much, so try to keep it natural-looking, even if that means holding back a bit on the sharpening.
The final steps are to use the RGB balance button (see image below) to get the colour balance correct and boost the brightness.
For Saturn, the right colour for me means the inner, bright ring (known as the B ring) is essentially grey, so move the three RGB sliders to achieve this and boost the brightness until the brightest colour is just short of the right-hand end of the RGB histogram window.
Finally, save your final finished image of the ringed planet. You can see ours at the very top of this article.
3 quick tips
- Record videos when the air is stable and still, such as when high pressure is present, as the seeing will be better then.
- For best functionality, record your videos in SER format using the camera control programs FireCapture or SharpCap.
- In AutoStakkert!, adjust the planet edge overlap of alignment boxes by clicking ‘Close to edge’.
Are you an astrophotographer? Whether seasoned or beginner, don't forget to send us your images.
