How to create a synthetic green channel in astrophotography

How to create a synthetic green channel in astrophotography

Find out how to produce a full-colour photo of a planet using only two channels and creating a synthetic third channel to fill in the gap.

Magazine gift subscriptions - from just £18.99 every 6 issues. Christmas cheer delivered all year!
Published: March 15, 2021 at 11:37 am

Unlike many objects in the night sky, some of the planets can be rather challenging to image, because they rotate quite quickly.

This is especially awkward if you’re imaging with a mono camera through red, green and blue (RGB) filters. You have to find time to image the planet three times, just to get enough captures to create one full-colour image.

If you take too long imaging Jupiter, Mars or Saturn, you’ll introduce motion blur in the final picture. But it’s possible to speed things up by missing out one of the filter colours completely, recreating it from the other two captures.

Although this may seem somewhat drastic, it’s surprisingly effective on Mars and Jupiter, producing results that are hard to differentiate from full RGB images in terms of detail.

Below we'll show you how to create a synthetic green channel and cut your RGB imaging times by a third.

You might also like to check out our tutorial on how to derotate planetary images. For more tutorials like this, visit our astrophotography guides webpage.
Create a synthetic green channel: step-by-step

Step 1

Leave out the green

[caption id="attachment_59853" align="alignleft" width="1200"]How to create a synthetic green channel. Credit: Pete Lawrence Credit: Pete Lawrence[/caption]

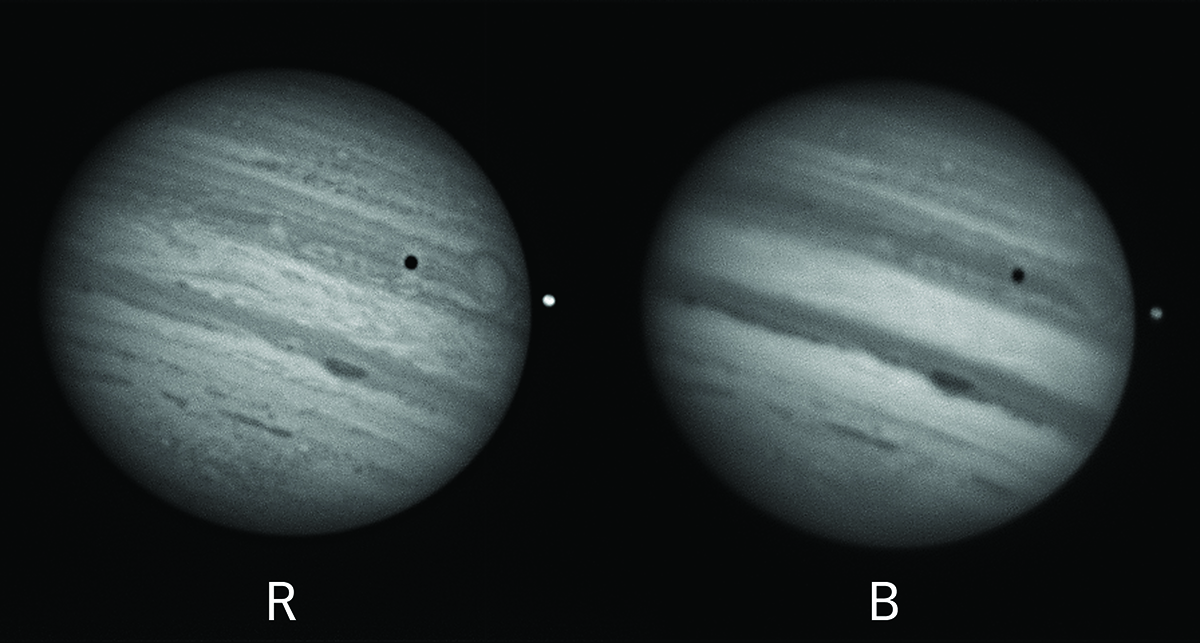
The process begins at the telescope where, for Jupiter and Mars, you capture just the red (R) and blue (B) filtered images, leaving out the green (G) filter completely.

Step 2

Register and stack

[caption id="attachment_59854" align="alignleft" width="1200"]How to create a synthetic green channel. Credit: Pete Lawrence Credit: Pete Lawrence[/caption]

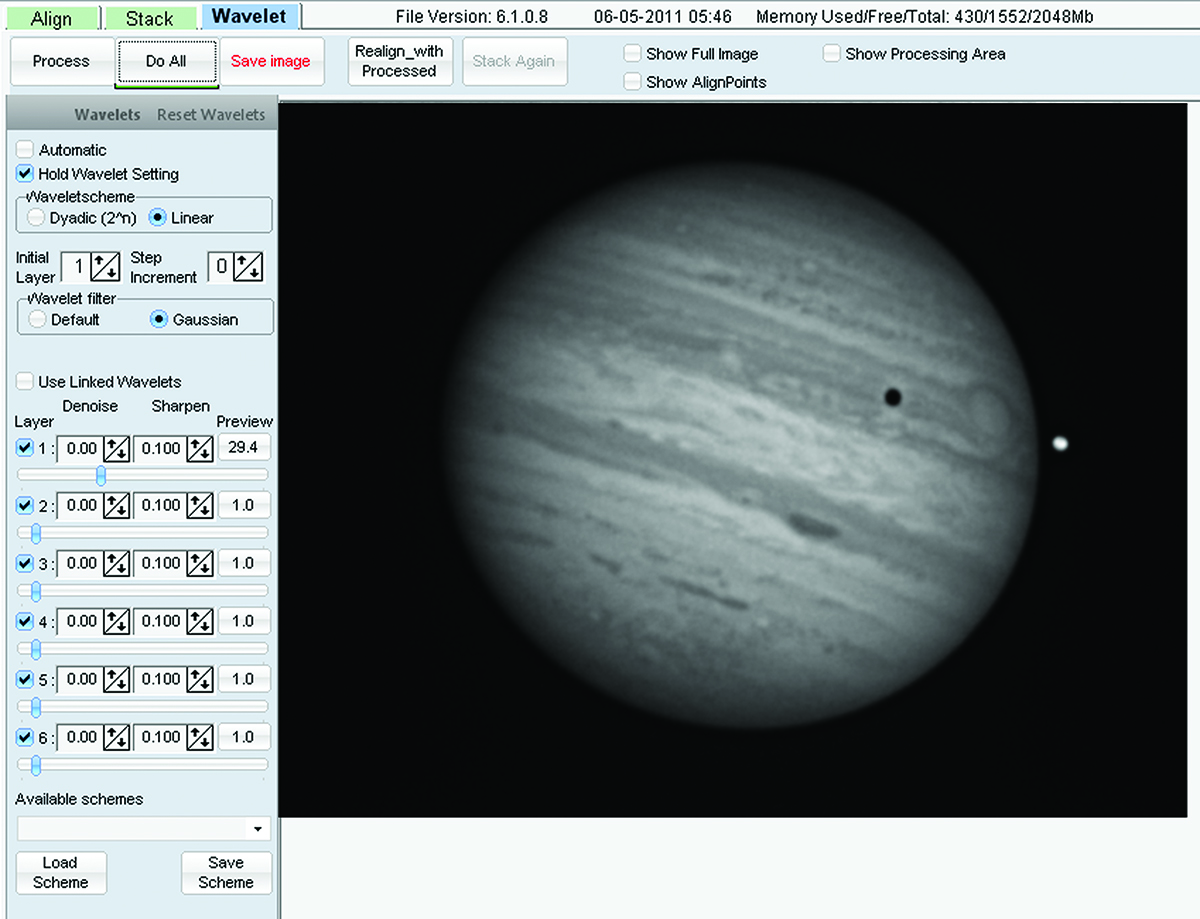
Process all the captured image sequences using your favourite registration and stacking software. Apply a gentle wavelet sharpen at the end of each processing run.

Step 3

Load as layers

[caption id="attachment_59855" align="alignleft" width="1200"]How to create a synthetic green channel. Credit: Pete Lawrence Credit: Pete Lawrence[/caption]

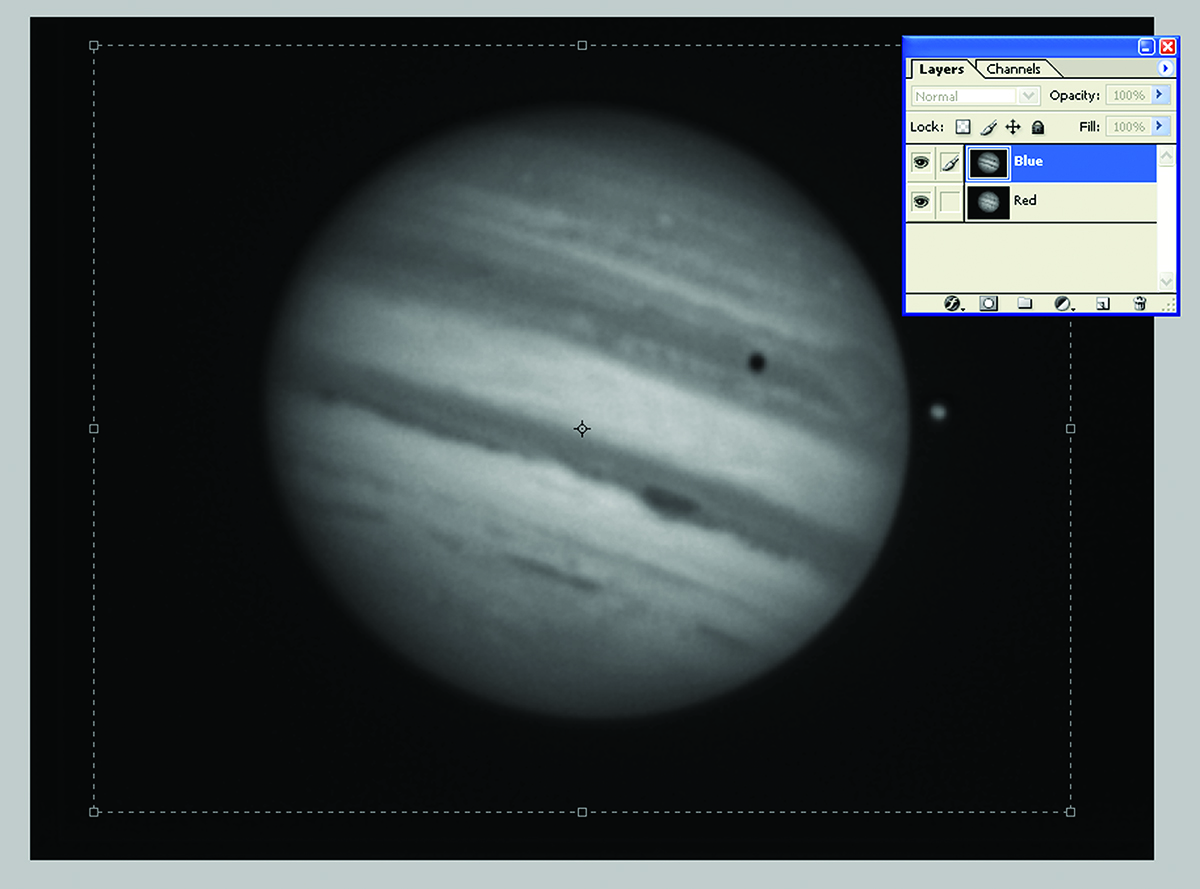
Select two sequential RB images and load as separate layers into a graphics editor. Align both images and name the layers ‘Red’ and ‘Blue’. Remove any edge gaps by cropping.

Step 4

Duplicate and merge

[caption id="attachment_59856" align="alignleft" width="1200"]How to create a synthetic green channel. Credit: Pete Lawrence Credit: Pete Lawrence[/caption]

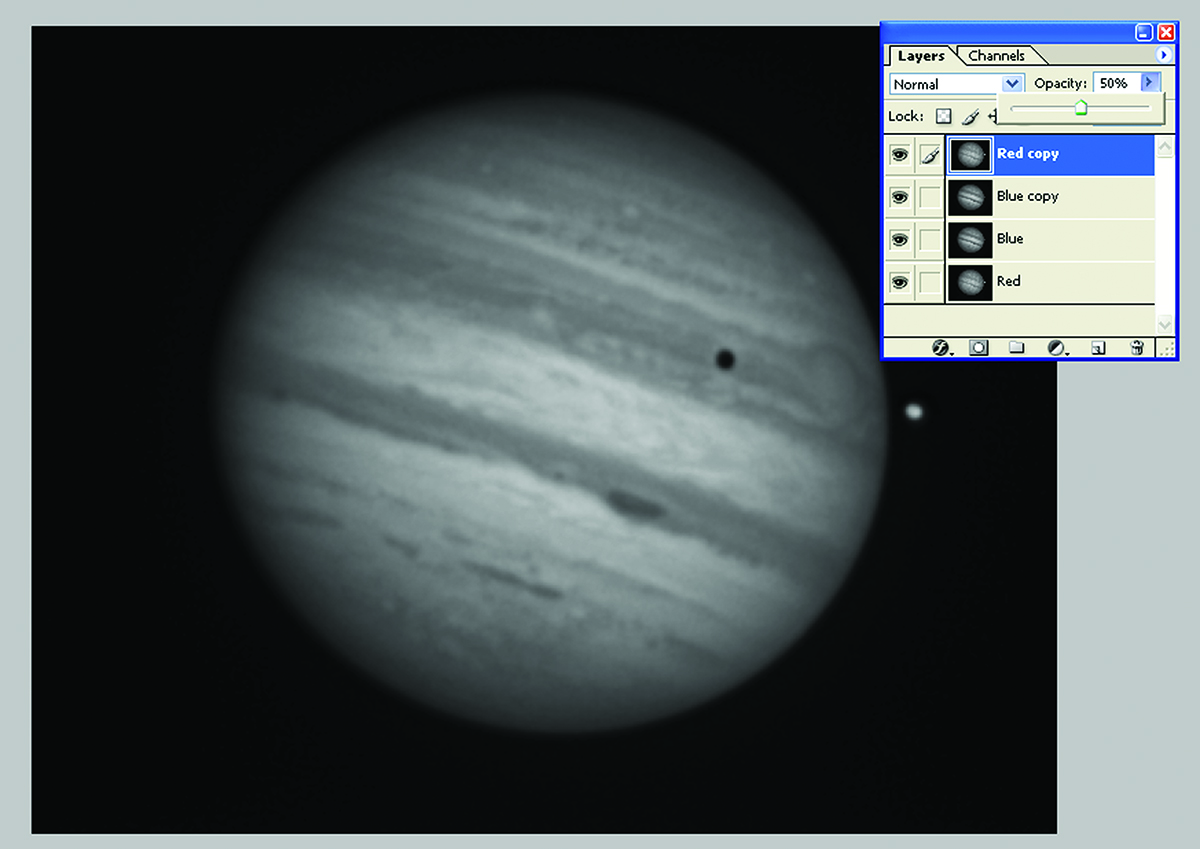
Duplicate the Red and Blue layers and bring the duplicates to the top of the stack. Make the top one 50% transparent and merge them. Label the new layer ‘(Green)’.

Step 5

Switch to channels

[caption id="attachment_59857" align="alignleft" width="1200"]How to create a synthetic green channel. Credit: Pete Lawrence Credit: Pete Lawrence[/caption]

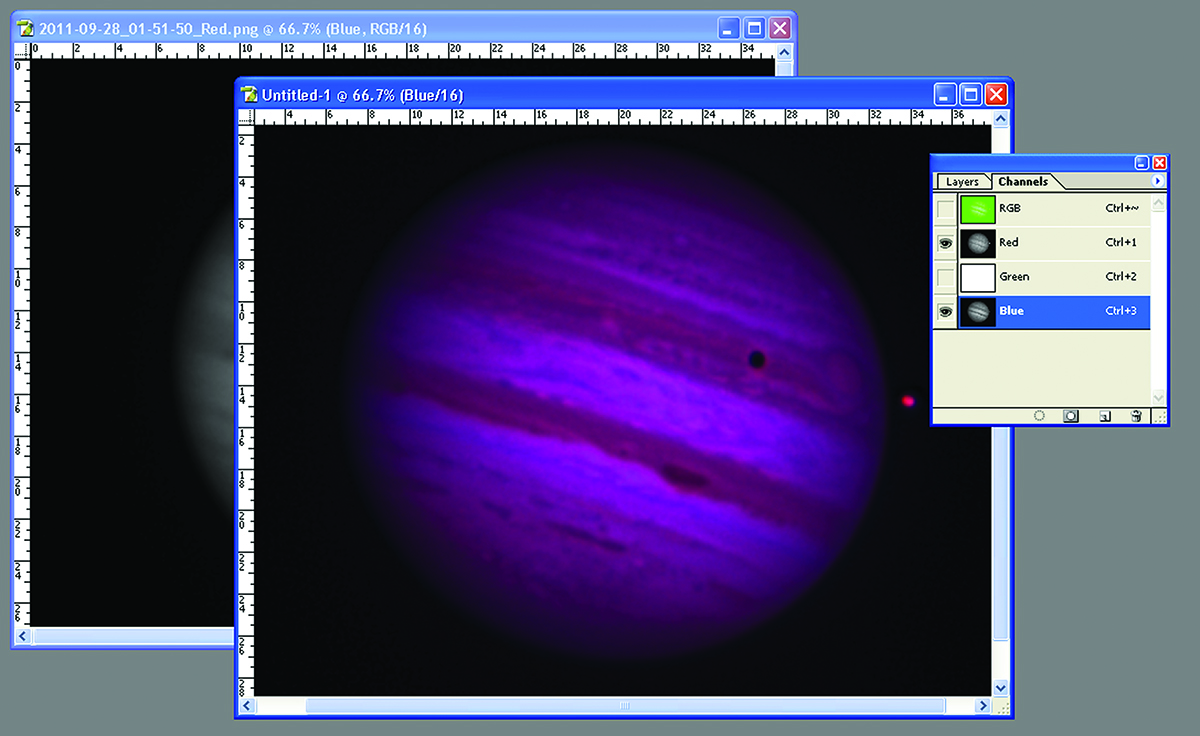
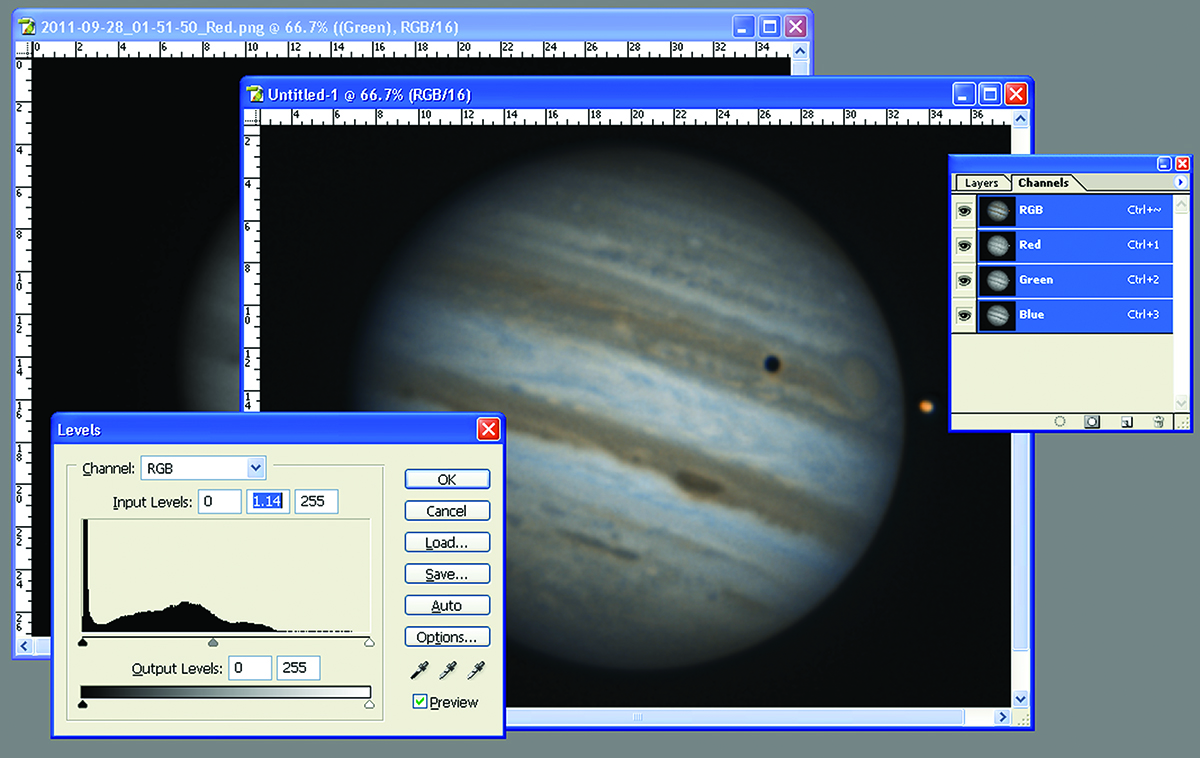
Create a blank RGB image with the same dimensions and paste the Red, Blue and (Green) images from the working image into the blank’s R, G and B colour channels.

Step 6

Activate

[caption id="attachment_59858" align="alignleft" width="1200"]How to create a synthetic green channel. Credit: Pete Lawrence Credit: Pete Lawrence[/caption]

Make sure the RGB channel is selected to automatically activate all the channels. Then adjust using levels
and curves to bring out the image’s full colour potential.

Pete Lawrence is an experienced astrophotographer and a co-host of The Sky at Night.

This website is owned and published by Our Media Ltd. www.ourmedia.co.uk
© Our Media 2024