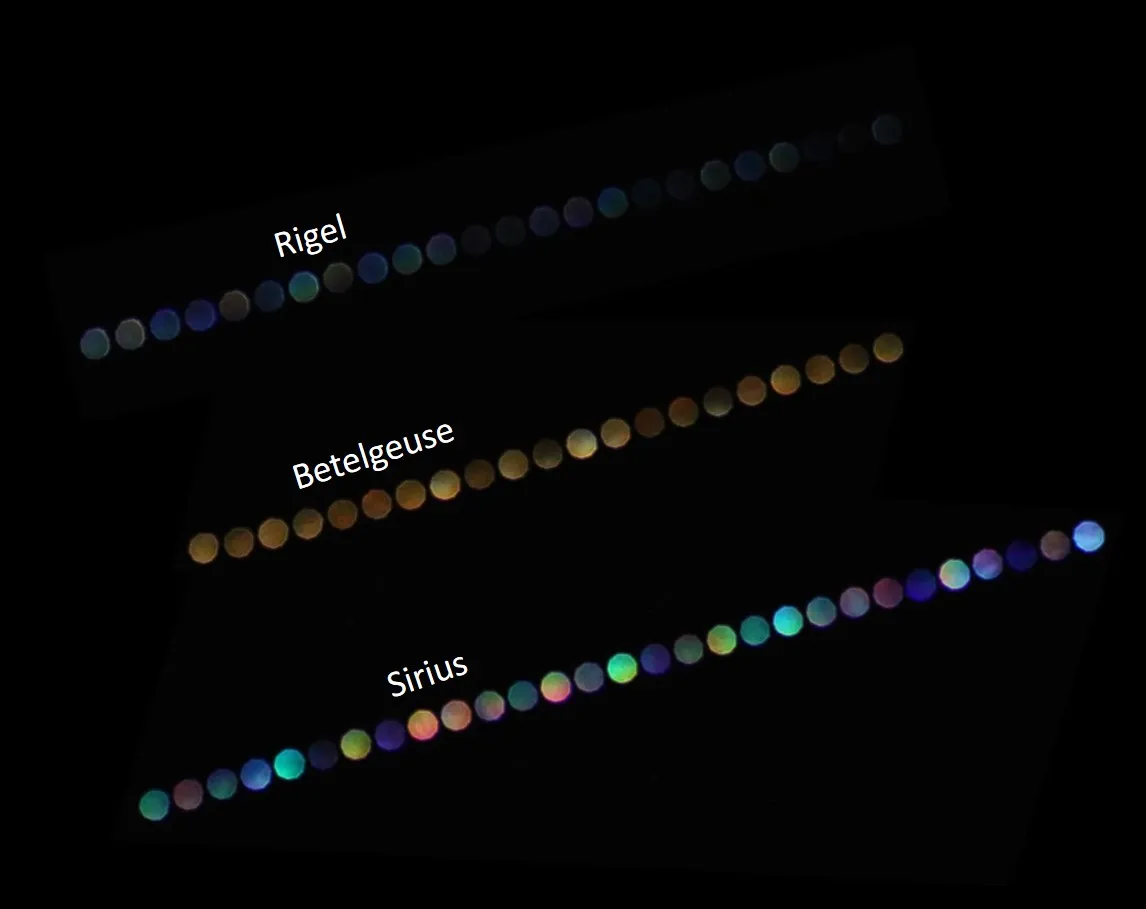
The star Sirius displays myriad colours as its light travels through our turbulent atmosphere. The sight of twinkling Sirius demands attention and even a few seconds of observing will reveal a rainbow of colours.
We’re going to look at one of the easiest ways to capture these changing colours of the star in an image by using a simple defocus technique and a free stacking software: in this case StarStaX.
To capture the colours of Sirius you’ll need a DSLR or mirrorless camera with a zoom lens of at least 150mm, with 200mm–400mm being ideal. We used a 250mm lens set to the maximum 250mm focal length. Keep yours in pristine condition with our guide on how to clean a DSLR camera.
This type of shot does not require tracking, so you will not need a tracking mount: a basic tripod will be fine.
Choosing an evening when the air is turbulent will also help to bring out the range of colours displayed by Sirius. Ironically this is one of the few times that most of us wouldn’t usually do any observing or imaging.For more on this, read our guide to astronomical seeing.
And if you're just starting out, read our beginner's guide to astrophotography or our DSLR guide.
How to photograph Sirius and reveal its colours
Start by selecting the manual or ‘bulb’ setting on your camera and centre Sirius in the viewfinder. Normally for astrophotography we would be aiming for perfect focus, but for this type of shot we need the star to be slightly out of focus to bring out the colours.
While viewing Sirius in the viewfinder or on the display screen, set the lens focus to manual and turn the focus ring so that the star appears as a disc.
You should be aiming for Sirius to be captured as a large and bright circle that displays some obvious colours of its twinkling.
Start with the lowest f/-stop that your lens will go to (eg f/2.8) and then take a picture with a one-second exposure at ISO 200. If the resulting image is too dark then increase the exposure slightly.

Remember that an exposure that’s too long will result in a white image, so this shouldn’t be increased too much. Take a series of test images until you are happy.
The next stage is to capture a series of images that you can subsequently stack together to create a final composition.
Move the camera up and to the right so that Sirius stays in view but is located towards the bottom left of the frame. With time, the star will move up and to the right of the frame.
Using the camera’s internal intervalometer or a remote shutter release cable, set the camera to take a continuous series of pictures to capture this. In our example, this took about 20 minutes and resulted in 720 pictures.
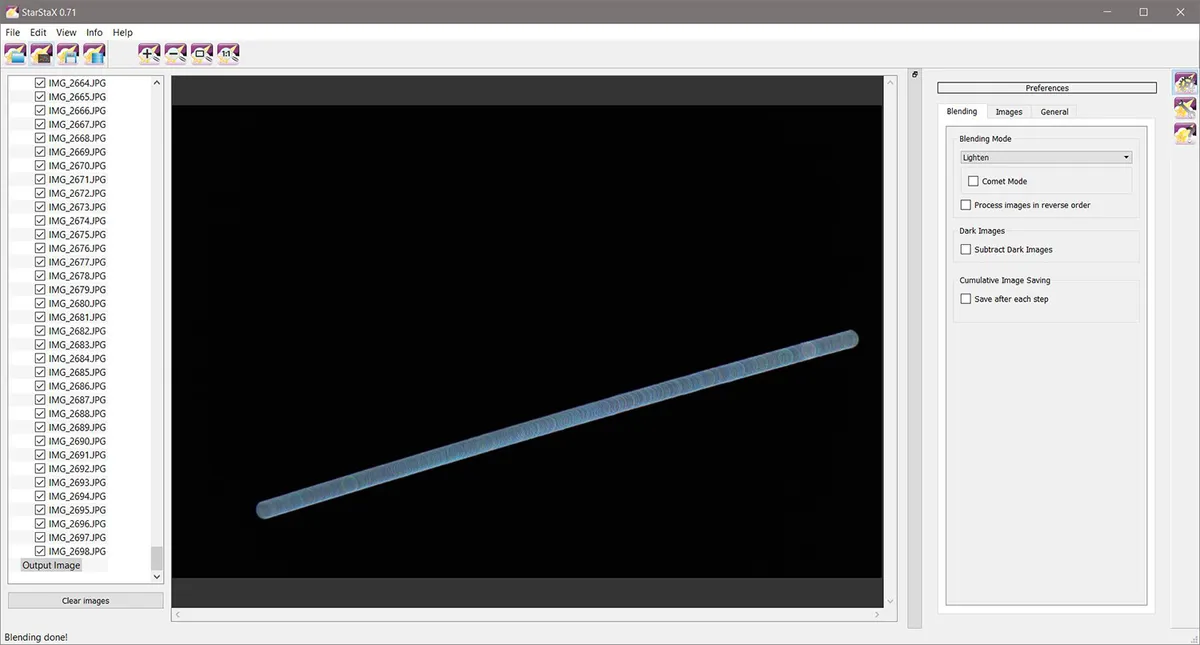
Download the images and then drag and drop them into the left-hand window of the StarStaX software. Next, click the ‘Start Processing’ icon from the options at the top left.
The software features various stacking options, but the default settings are fine for our image. The software will run, stacking all the images in turn and the result will initially be a poorly defined streak of colour (see above).
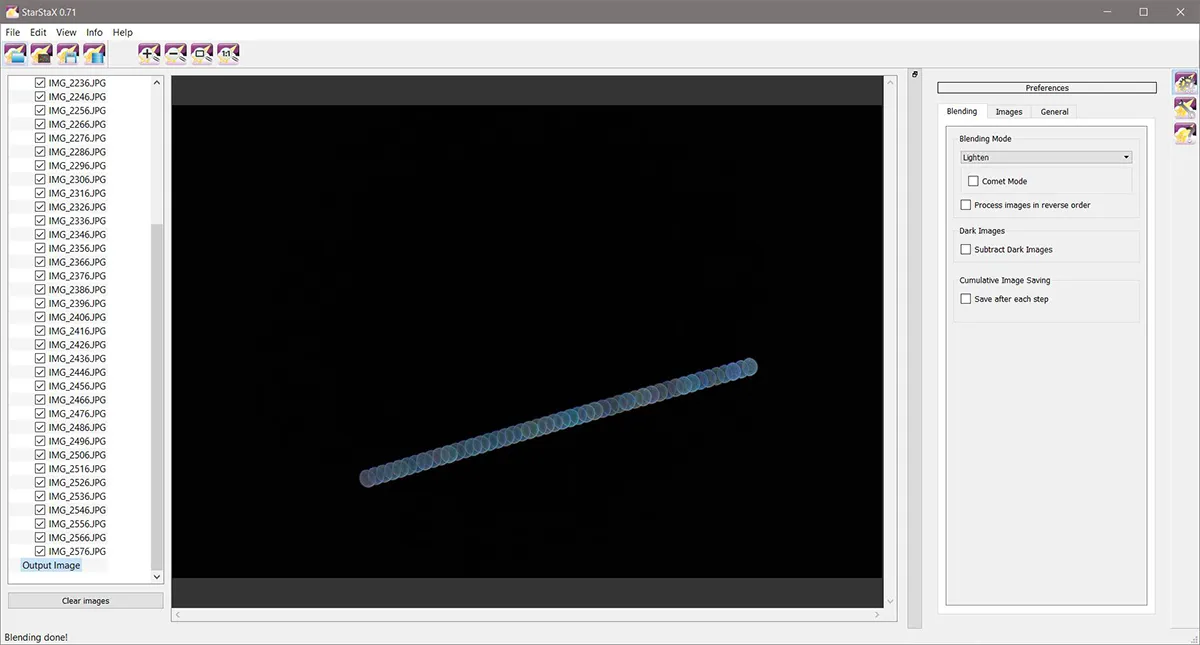
To make the result more aesthetically pleasing you can repeat the process using fewer images.
There are two options: you can either clear the images and then drag and drop a selected range, say one in ten and stack again, or untick the images you don’t want from the list in StarStaX and repeat the stacking process.
Try out different combinations until you’re happy.
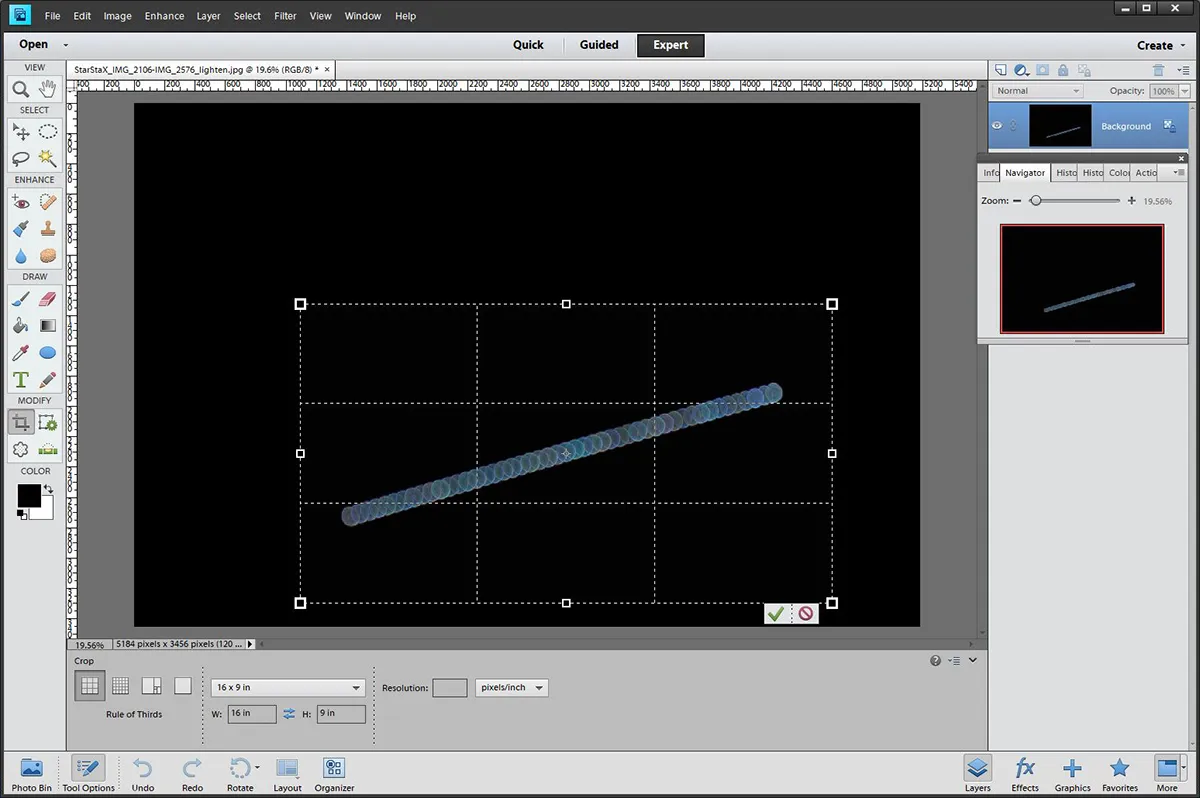
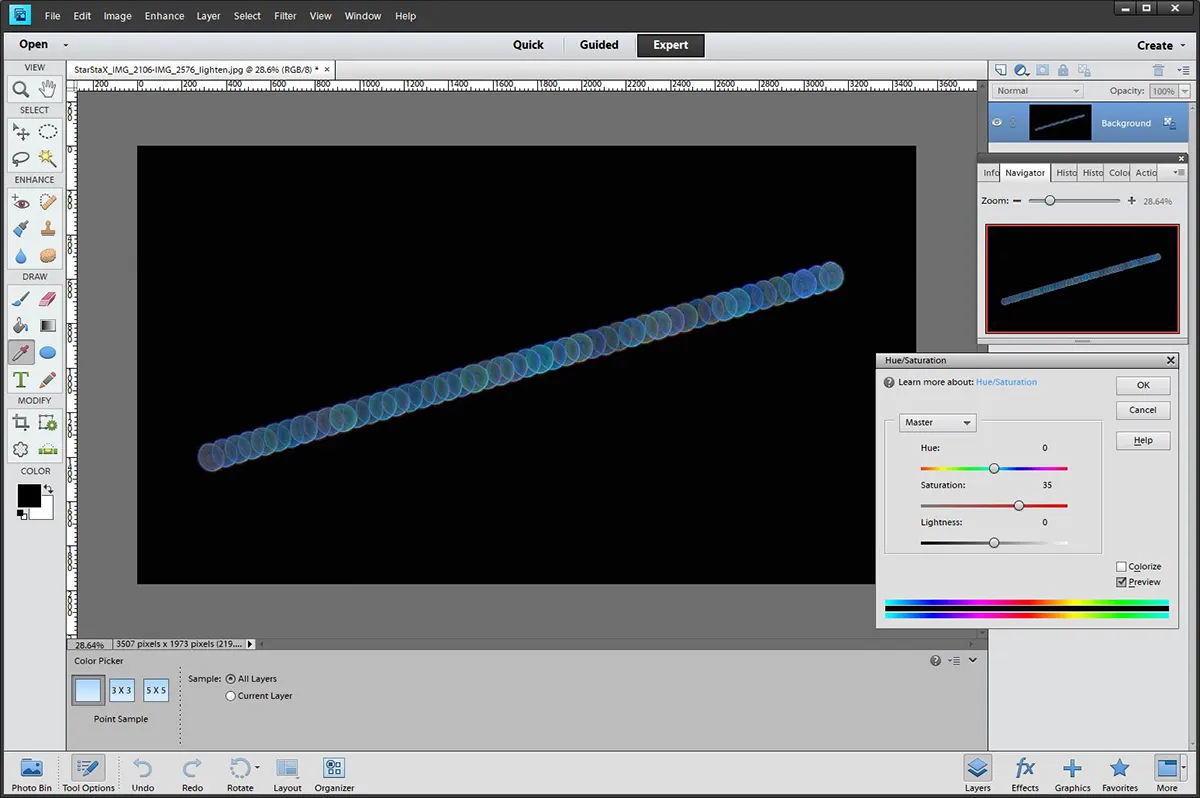
In Photoshop, crop the image so there is an even amount of black space around the stacked frames (see below)
You can also increase the ‘Saturation’ a bit with the ‘Hue/ Saturation’ settings to enhance the colours (see below).
Our final picture (at the top of this article) used a range of images from the middle of the original set and then one in ten of those were chosen for the final composite. It gives the impression of a series of captured Sirius twinkles as it moves through the night sky.
For more on the science of why this is happening read our guide Why do stars twinkle?
Photograph a twinkling star: 3 top tips
1. Resist the urge to check the progress of your captures as you may wobble the camera between shots.
2. Switch on the camera’s ‘noise reduction’, to automatically remove dust shadows and hot pixels from each frame.
3. Don’t use images from the extreme edge of the frame, as these may not be circular due to lens distortion.
For more advice on astro imaging equipment, read our guide to the best cameras for astrophotography.
Have you managed to photograph a twinkling star? We'd love to see it! Let us know by emailing contactus@skyatnightmagazine.com or get in touch via Facebook, Twitter and Instagram.
Steve Brown is a North Yorkshire-based astrophotographer who was highly commended in the Astronomy Photographer of the Year 2020 awards ‘Stars and Nebulae’ category with ‘Stunning Sirius’.
This tutorial originally appeared in the March 2021 issue of BBC Sky at Night Magazine.

