White balance is one of those camera settings that is easy to leave on automatic. For daytime photography, modern cameras do a pretty good job of setting it, and if you shoot your images as RAW files you can adjust them later on in software such as Lightroom.
It is an adjustment, using a colour temperature measured in Kelvin, of the ‘colour’ of white in an image, which goes on to affect every other colour in the photograph you’ve taken.
How so? Lower temperature settings include more light with longer wavelengths and result in a warmer look, and as you lower it further a strong yellow cast invades the image.
Read more astrophoto processing guides from Ian Evenden:
- How to remove light pollution in your astrophotos
- A guide to Photoshop Levels and Curves
- Colour saturating the Moon in lunar astrophotos
Going the other way gets you a cooler look, followed by a strong blue cast if you push it too far, as the higher settings contain more shorter wavelengths of light.
This can seem a bit backwards, as we’d naturally expect the higher temperatures to be warmer.
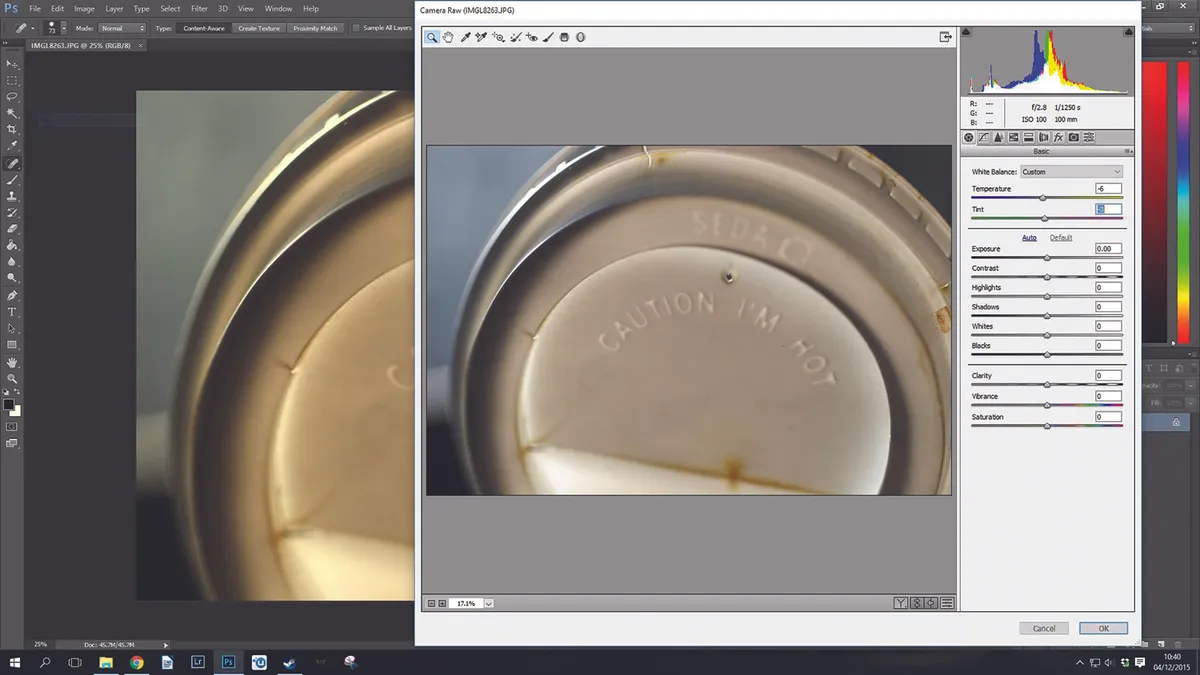
What you’re looking for is for whites to be white. When you’ve achieved this, all of the other colours in your photo should be accurate too.
To assist with this, modern DSLRs have an automatic white balance mode, some presets to cover common types of lighting such as daylight or tungsten bulbs, and the ability to set a custom white balance.
To set white balance manually, photograph a white or light grey card or a suitable substitute under the same lighting as you’re going to take the photos.
Make sure it fills the frame. Then, dig into the menus until you find Custom White Balance (Canon) or Preset Manual (Nikon) and select the image you just shot.The camera will use this as the basis for a custom setting.
Taking pictures of the night sky requires a slightly different technique, however, especially if you’ve got a modified camera.
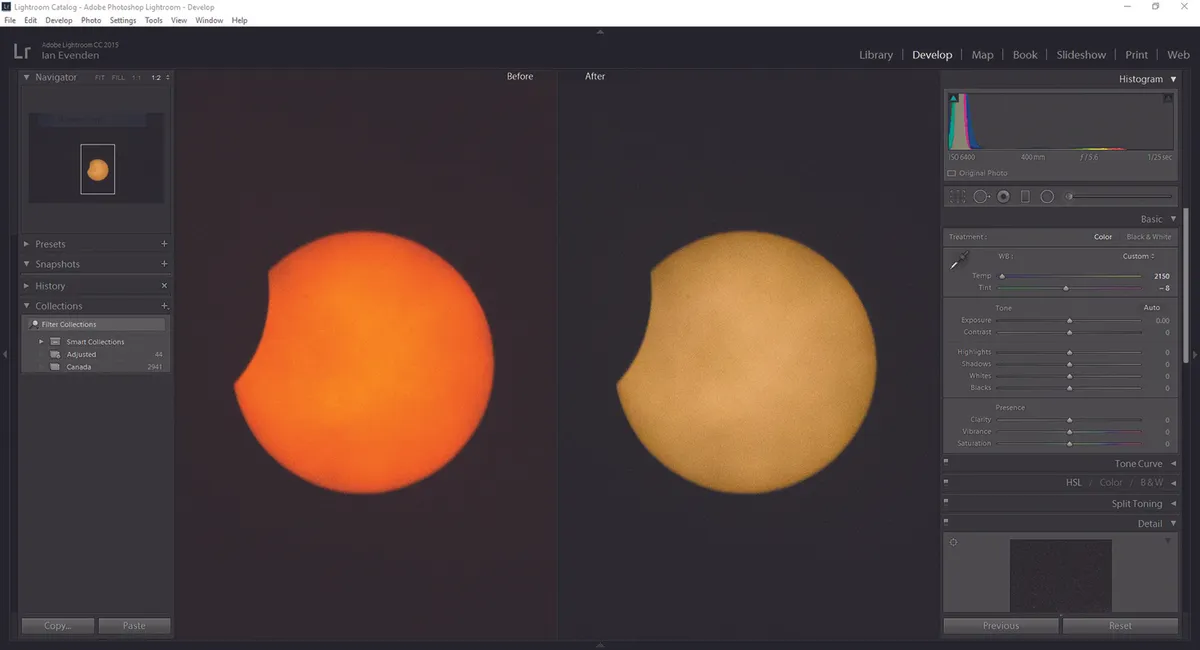
A custom white balance that errs toward the blue end of the spectrum can be used to remove an orange sky glow, and vice versa for a blue one.
You could prepare a photo in advance, stored on your camera’s memory card, to set a custom balance based on likely light pollution levels, but it’s much easier and faster to leave your DSLR’s white balance on auto and sort it out in post-processing.
Shoot your images in RAW format rather than as Jpegs and the blue/yellow white balance setting becomes a slider in your processing software, often accompanied by a green/magenta one called Tint.
Through a combination of these, you can remove the glow from the sky and restore stars to something resembling their proper colours.
If you want to shoot Jpegs, all is not lost, as Photoshop CC’s ability to run Camera RAW as a filter on any image gives you some control over your image’s white balance, and the Color Balance adjustment layer can also be brought into play.
There’s no substitute for the extra data captured in a RAW image, though.
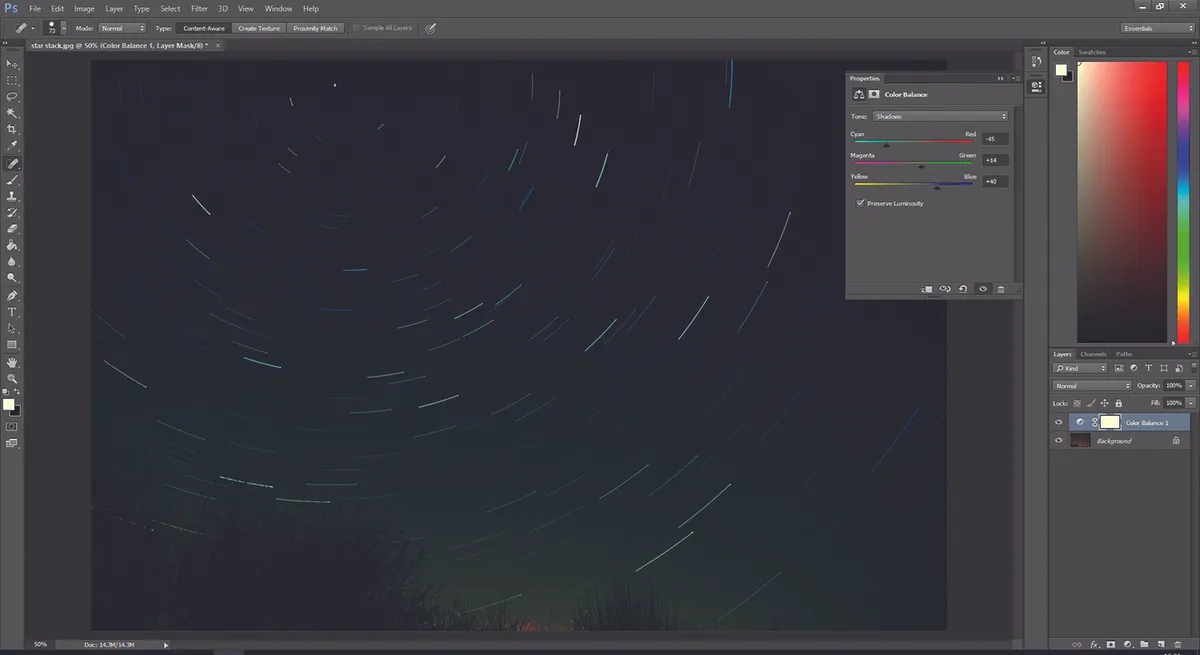
If you want to minimise light pollution in Jpeg images, try setting the white balance to Tungsten before you start.
This is the setting used for shooting under incandescent lights that put out a yellow tone, similar in colour to light pollution from streetlights.
With your RAW image open in your image processing software, there are several things you can do to adjust the white balance.
Some image processing apps, especially those supplied by the camera manufacturer, allow you to cycle through the camera’s presets from a dropdown menu.
For a truly custom balance setting, however, you’ll need to use the sliders. It’s a simple process: raise or lower the colour temperature and judge by eye when it looks right.
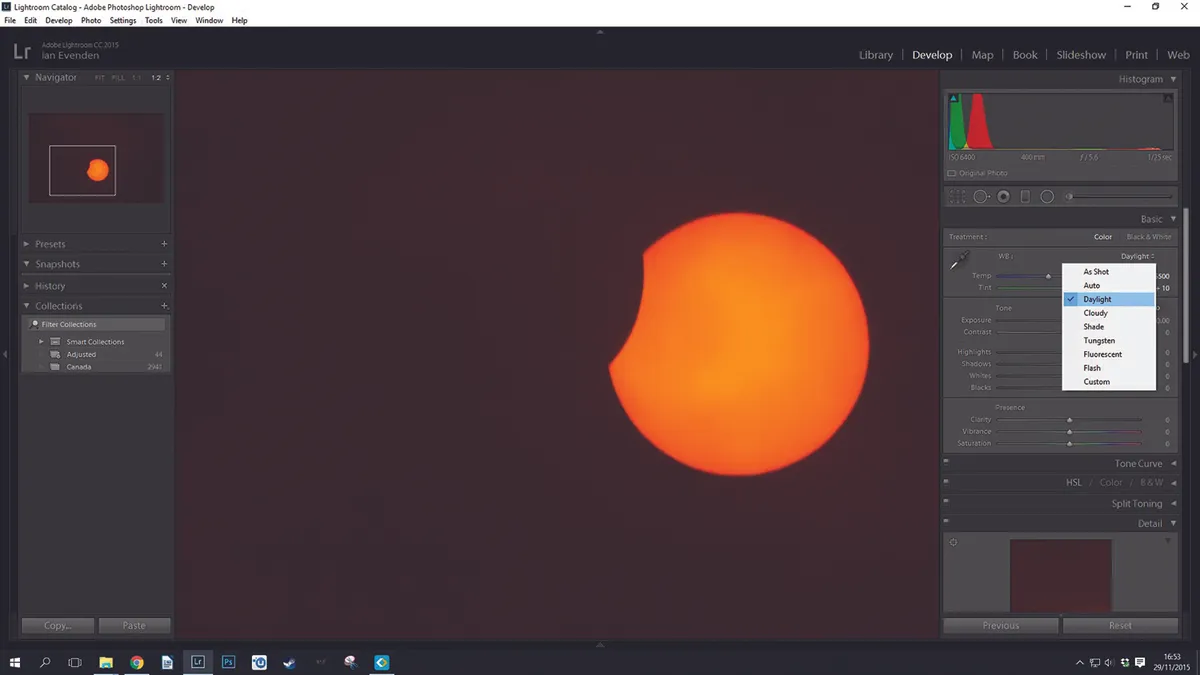
If the app you’re using offers a dropper tool, use this to sample a colour in the image that should be neutral, light grey or white.
This will get you close to a correct custom balance setting, but you can fine-tune it with the slider. If the Tint slider is present in your chosen program, use it to remove green or magenta casts.
If your camera is modified for astrophotography so that it collects far more infrared light than standard models, you may find your images come out too red.
The dropper tool is useful here: shoot in RAW and, in post-processing, use the dropper to sample a star you know is meant to be white.
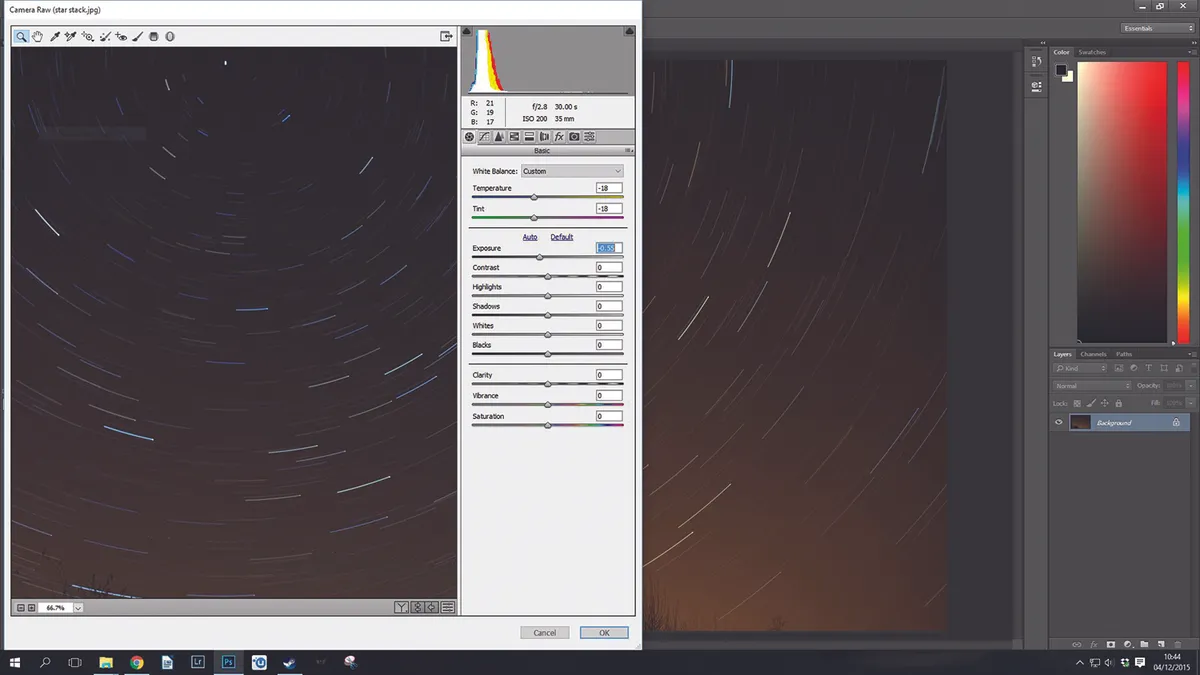
If you’ve been shooting at high ISO, be careful not to sample a pixel of noise, as these bright red, green or blue dots can throw the whole process off.
If you get it right, the stars should snap into their proper colours.
This article originally appeared in the February 2016 issue of BBC Sky at Night Magazine. Ian Evenden is a tech journalist and keen astrophotographer
