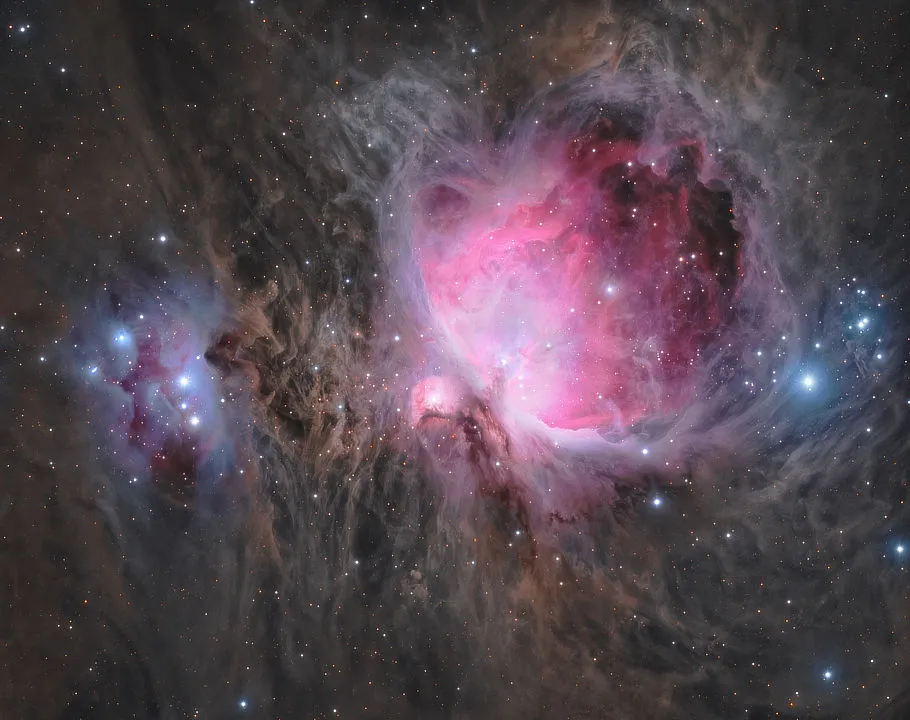
The Orion Nebula (M42) is one of the most photographed deep-sky objects, because it’s large, bright, highly detailed and very colourful.
But its brilliance can work against you, as many smart telescope owners have discovered.
- Read our complete guide on how to photograph the Orion Nebula

It’s all too easy to burn out the core of the Orion Nebula in astrophotos, leading to a nebula that looks beautiful around the outside but a pure-white mess in the middle.
This is a simple method for restoring the core to produce a high-dynamic-range (HDR) image of the nebula similar (albeit more colourful) to what you’d see through the eyepiece.

Why the nebula's core looks blown out
Take a photograph of the Orion Nebula exposed for the core and it’ll look wonderfully detailed.
However, much of the intricacy and colour of the surrounding area will be lost in darkness.
No problem: simply increase the exposure to bring them back. Now you have M42’s beautiful surroundings restored in all their glory… but the main nebula core looks burnt out.
There will be a middle ground where the core is close to, but just below, being overexposed.
Here there may well be a fair bit of detail in the surrounding regions too, but they will fade into underexposure.
This is something that will be revealed when final processing takes place, the results looking less than perfect.

There is a better way
Here's how to solve the issue of overexposing and blowing out the core of the Orion Nebula in your images.
First, take exposures optimised for the core, completely disregarding the need to capture fine detail adjacent to this region.
This can be hard to do as it just feels wrong.
There’s all that wonderful detail which is relatively easy to capture and you’re simply ignoring it! Stay strong and just capture the core.
Once you’ve done this, flip your sensibilities around and try for the fainter regions, choosing exposures that will burn out the core.
Again, it may feel wrong, but stick with it.

Orion Nebula and smart telescopes
If you own a smart telescope, you may be wondering how this applies to you.
Smart scopes work by taking short exposures and live-stacking them.
If you’re relying on the output of your device, the key is to limit the number of live-stacked exposures, stopping when the core is correctly exposed.
Then do a second capture letting the smart scope do its thing as long as necessary for the outer regions.
Most smart scopes allow you access to the raw files, normally in FITS format.
If you can do this and are versed in rudimentary image processing, you can stack the results yourself but you should process two versions, one for the core and one for the outer regions.
What you’re aiming for here is at least two images that you can manually combine to create an HDR result that shows the core and outer regions properly exposed in a single shot.
If you get adept at the process, you could also use more than two steps to further refine the result.
Below we'll show you, step by step, how to capture an image of the Orion Nebula and retain detail in the core.
Equipment
- Smart telescope
or
- Camera fitted to an equatorially mounted and driven telescope
Step-by-step
Step 1

Choose a setup that captures a decent amount of M42 and objects adjacent to it (the Running Man Nebula makes a great addition). Framing and orientation are a personal choice, but a shot with space to allow the nebula to breathe creates a better result.
For smart scopes that don’t do mosaics, the framing and orientation are dictated by the scope’s design and time of night you’re doing the imaging.
Step 2

Set the exposure time to avoid burning out the core. It can appear bright, but you don’t want areas
of pure white. Completely disregard the outer regions of the nebula at this step; they really aren’t important.
If using a smart scope and intending to use the internally generated image, stop the capture when the core region begins to appear bright.
Step 3

Once you have a correctly exposed core from Step 2, it’s time to concentrate on the outer regions. Increase your exposure or ISO settings to bring these out best. Don’t worry that the core becomes washed out.
If you’re using a smart scope, this will simply be a regular session on the nebula, capturing at least 30 minutes’ worth of image data.
Step 4

If you’re using a smart scope and want to process its FITS files yourself, download them and use your favourite processing software to generate a result from the image stack.
When you stretch the data, create one version favouring the core and another for the outer regions. Save them as separate images.
Step 5

You should now have two images: the core and the outer regions. Using a layer-based image editor, copy and paste each result into a separate layer in the same image.
Put the outer region shot above the core image. Use the magic wand tool to select the white core in the upper layer. Copy and paste as a layer mask.
Step 6

Select the layer mask and blur the image to soften the edges. You’ll see that the hole in the upper image begins to blend with the core image below.
When you’re happy with the edge blending, consider a gentle curve tweak of the lower core image so its appearance is more suited to the overall look.
If you've captured an image of the Orion Nebula, we'd love to see it! Get in touch via contactus@skyatnightmagazine.com
