Astro Pixel Processor (APP) was released in June 2017 and was developed to make deep-sky image processing as easy as possible.
This piece of software can be used for calibration, registration and integration as well as final processing.
This is not revolutionary, but the ease with which it can be done is APP’s biggest selling point.
And it does give very good final images in the simplest format we have yet seen.
APP works best when used on a computer with the recommended specs.
A solid state drive will allow APP to work much quicker than a standard hard disc drive, and if you are looking at combining images into large mosaics there’s a benefit to having more than 8GB of RAM.
Installers for Linux (DEB & RPM), Windows and MacOS (DMG) are available.
Once installed, setting up the program is easy.
After purchase a licence code is emailed to you, and all you have to do to get started is enter it into the Info tab on the top left of the opening screen.
The user interface may seem rather strange to begin with.
There are the pre-processing menus on the left-hand side. The centre of the screen is dedicated to your image. The lower part of the screen is the image console, showing your loaded images and which processes have been performed.
The right-hand side of the screen is the processing side, which is controlled using sliders.
Clicking on the light blue ‘?’ button near the middle of the processing side brings up a useful help menu.

Get your frames ready
To get the best from the software and create the best final image, you will need calibration frames – these remove in-camera electronic noise, dust and vignetting in your imaging setup, and hot and cold pixels.
It is straightforward both to make master calibration frames and a bad pixel ‘map’, which can be used instead of dark frames to remove hot and cold pixels.
Once you have loaded all your exposures, you are able to set the processing parameters specific to your needs.
Most of these can be left unchanged, though if you are making a mosaic, or want to use a specific integration statistical method then you will need to select these from the Registration and Integration tabs.
Then in one button press you will end up with a fully integrated stack of your data.
If you are using a mono camera it is quickest to load in each filter set individually, save each final integrated stack and then load them in separately for alignment, cropping and so on.
The menu on the left-hand side gives access to tools for colour combination, light pollution removal, background calibration and other important processes.
We found that the light pollution tool gave an even background, while the colour combination tool (which isn’t needed if using a colour camera) had sliders that could strengthen the effect of one colour filter in relation to another.
You can crop from the ‘batch modify’ menu and there is also a rotation tool, so there are plenty of options to work with an image.
Having used all the left-hand tools, you still have a linear and unprocessed image.
You can easily process your image on the right-hand of the screen. We have found this to give very satisfactory results and deliver a good final image.
APP really is a competent all in one package with many excellent features and it is easy to use to get good results.
One notable drawback is that comprehensive user instructions are not available, but the developer does offer excellent support, and there is an active forum on APP website and a number of video tutorials.
There are two payment options available – annual and renter.
For annual you pay a one-off fee of €125, but only minor software updates are included in that price, not major upgrades; for renter, you pay €50 annually, but are able to upgrade to any new version of APP as it becomes available.

Masterful Mosaicing
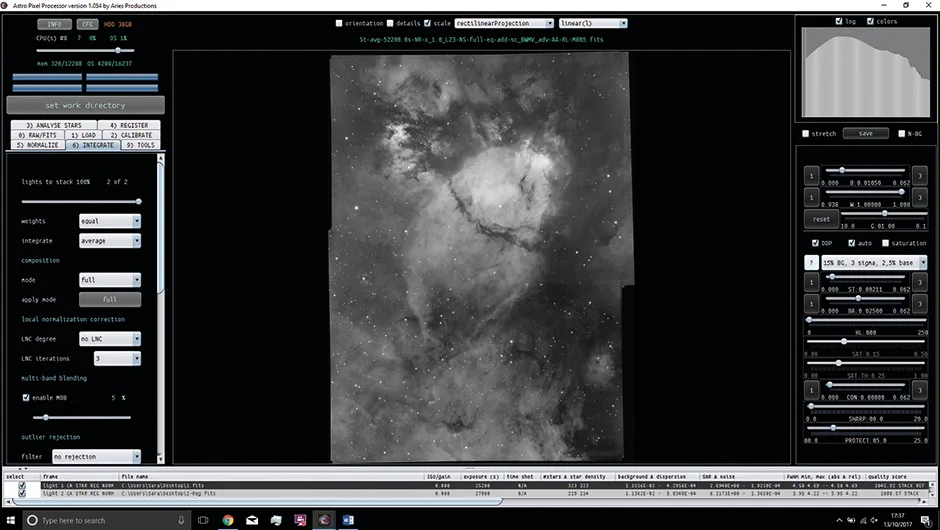
The standout feature of this software has to be the mosaic integration feature.
It uses a distortion modelling process to ensure that the panes fit together and that there are no pinched stars in the frame.
Huge mosaics are supported and can seamlessly be stitched, and there’s an option to use different cameras and optics within the same mosaic – a welcome inclusion if you want to collaborate with another imager or add data to increase the resolution of specific targets within the frame.
The clever ‘local normalisation correction’ feature ensures that backgrounds and data of different panes are matched, which is vital in mosaics.

Memory Use Control
With the CFG tab you can specify how much of your computer’s RAM APP will use.
This can help speed up the program, especially when it is carrying out memory intensive tasks such as processing large mosaics or stacking large image files.
Bad Pixel Map
Upload five dark frames, five bias frames and five flat frames, and you can create a ‘bad pixel map’ using APP’s Calibration tab.
This can be saved and used for all images taken with the same equipment.
Menu Numbering
Each menu tab is numbered to help you do thing in the right order, should you want to run through the calibration process individually.
Menus 1-6 deal with pre-processing whilst Menu 9 deals with the tools such as cropping and removal of light pollution.
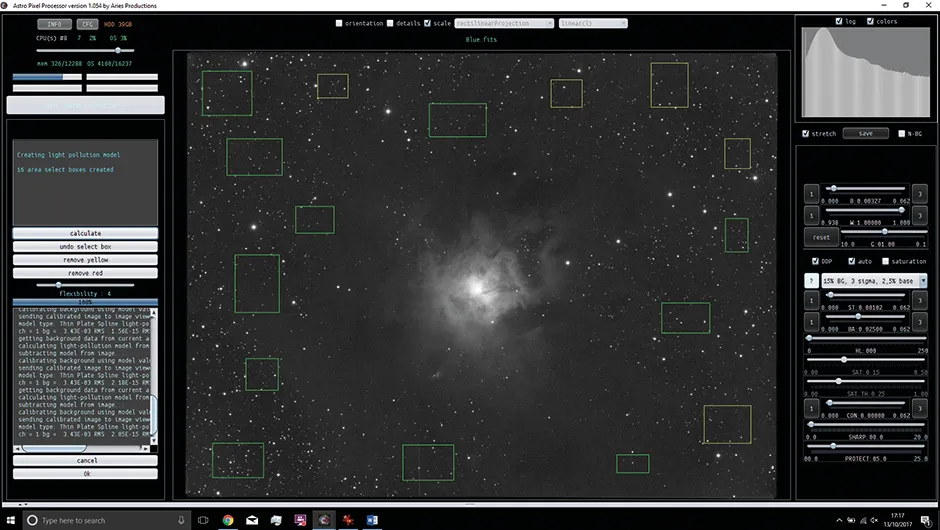
Light pollution removal tool
The light pollution tool allows you to create selection boxes (a minimum of five) of any size around your image.
Pressing ‘calculate’ will give you a view of how well it’s worked; more boxes can be added if needed to better map the light pollution present, if any.
Colour combination tool
This is useful to use on monochrome data if you want a result that looks like a traditional Hubble colour palette.
You can add Ha and OIII data into the red, green and blue channels in any strength you want, using the sliders to adjust the effect.
This review originally appeared in the January 2018 issue of BBC Sky at Night Magazine
