“Zodiacal light? I see it all the time!” says Simon Waldram, astrophotographer for Stars By Night, when asked about what I think of as a one of the rarest of night-sky phenomena.
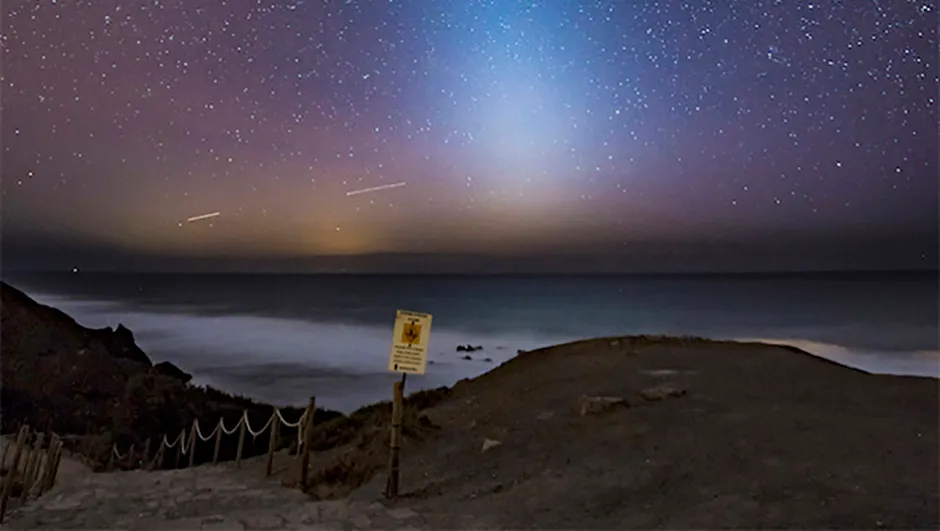
Seeing a glowing pyramid of light in the west after a springtime sunset (sunlight reflected from dust in the inner Solar System) might be rare for those of us who live in light-polluted northern Europe, but here on Fuerteventura, an island almost 60 miles from the Moroccan coast and only 28° above the equator, it’s an everyday occurrence.
Ready for anything
I’m on a four-day astro-photography workshopin Fuerteventura in the Canary Islands, and I’m hopeful of capturing all kinds of night-sky phenomena.
“You have to be careful not to brighten it too much in post-processing,” says Simon of that delicate zodiacal light, but I’m still hoping for a glimpse tonight, and not really believing it’s as common as all that.
However, as we arrive at Tostón lighthouse near El Cotillo on Fuerteventura’s north-western coast, I get out of the car and there it is, a bright, triangular arc of light shooting up from the western horizon.
Wow! It’s something I’ve always wanted to see and photograph.
I begin setting up my camera in the dark, extend the legs of my tripod and then fuss around looking for a jacket and a hat (Fuerteventura is famously windy, and it can get chilly here), but I’m too slow; when I’m finally ready to shoot, a sea-mist has drifted across.
My first-ever zodiacal light has vanished.
Setting-up the camera
“That’s your first lesson in night photography,” says Simon. “If you see something that you want to photograph, don’t wait around – just do it.”
The second and third lessons are more deliberate; under instruction, I set my Canon DSLR camera to ISO 800 to avoid too much noise, open the aperture as wide as possible, set the colour temperature to tungsten, focus in infinity and shoot for between 20 and 30 seconds.
"The great thing about night-sky photography is those settings don't change much," says Simon, adding that creating something memorable is largely about composition.
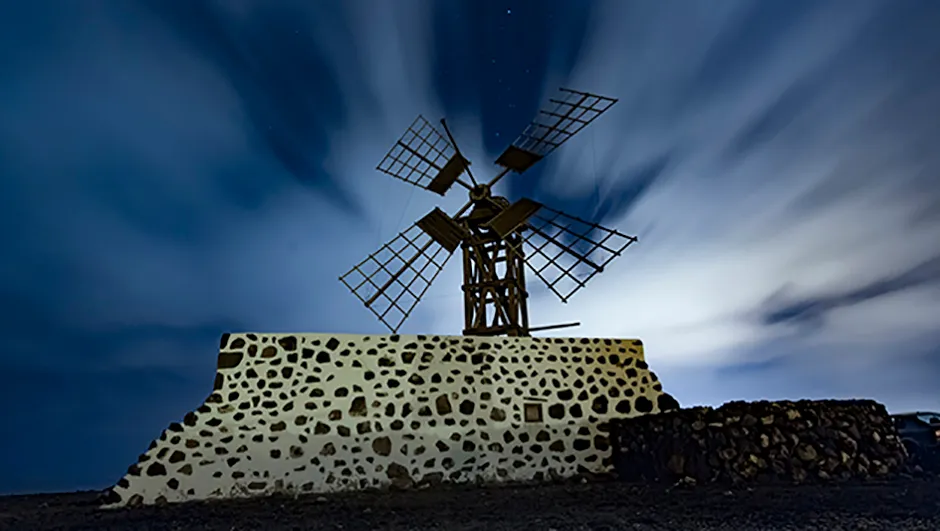
Luckily, on Fuerteventura there are a great deal of lighthouses, derelict buildings and windmills to put in the foreground.
"You don't just want a picture of some stars," adds Simon. “The rule of thirdsstill applies to night sky photos.”
The pace of the course is tailored to who's on it; it's suitable for beginners, but for advanced astro-photographers Stars By Night also offer a guided trip focused just on getting to the very finest, darkest locations.
Planning a star-trail
Night sky photography might sometimes be about chance and luck, but some photographs do have to be meticulously planned.
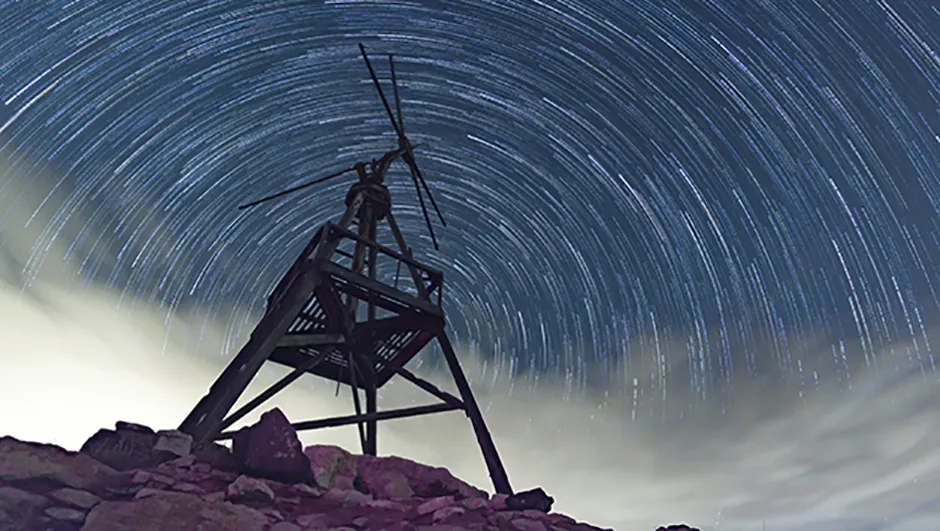
On the third day of the trip we planned a star-trail image, where multiple images are taken to show how Earth's spin makes the stars appear to move.
However, being at 28° latitude Fuerteventura has a huge advantage over the UK; Polaris is a lot lower in the sky.
“It means you don’t have to angle your camera upwards to get Polaris in,” says Simon.
“So it's easy to create star-trails around derelict buildings, the tops of lighthouses and windmills.”
And that's exactly what we do, setting down our tripods beside an old water tower and taking about 80 incredibly star-studded shots.
The next day he teaches me how to use Photoshop to clean up the pictures.
Reducing the colour temperature to 2200K miraculously removes any orangey light pollution, while the luminance slider cleans-up noise.
Then we use the free StarStaxsoftware to layer the shots to create the start-trail image.
Even better, I find a shooting star in one of my shots!
Exploring a Starlight Reserve
Designated a Starlight Reserve in 2015, there is plenty of darkness to explore on Fuerteventura.
“The darkest places are around the west coast, from the south of El Cotillo to the north of La Pared, including Sicasumbre, and in Cuchillos de Vigan on the east coast from Pozo Negro to the lighthouse of La Entallada,” says Enrique de Ferra Fantín, professor of Astronomy at the Academia de Ciencias e Ingenierías de Lanzarot who studies double stars, and leads stargazing sessions Mondays and Thursdays for Stars By Night.
He’s also a consultant to the Starlight Reserve.
During the four days, Simon drives us to dozens of secluded, super-dark spots right around the island, experimenting with composition, using flashlights to illuminate subjects in the foreground, and even indulging in some light painting.

Milky Way
The beauty of Fuerteventura's location isn’t just that it’s an island (the ocean is always the best anti-light polluter), but that it’s the most south-westerly of all the Canary Islands.
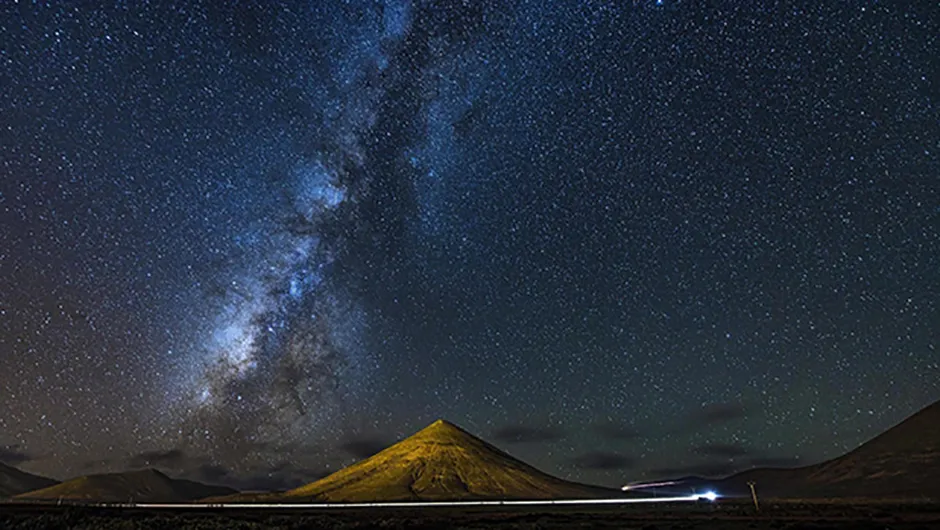
So if you point your camera east and south from Fuerteventura, not only is the light pollution from the holiday islands of Lanzarote to the north and Gran Canaria to the west totally hidden, but you also come face to face with the Milky Way, rising up in truly dark skies.
“The best time to shoot the Milky Way is in July or August,” says Simon.
“We’re in a great position here because Sagittarius and Scorpius rise high above the horizon in summer, and we get to see the bright core of the Milky Way not visible at all from most of Europe.”
It’s been quite the galactic tour.
In just four days I learned how to compose a night sky shot, created a star-trail, photographed a meteor … and almost captured zodiacal light!
Warm, easy to reach and with a night sky of immense clarity, Fuerteventura's Stars By Night astro-photography course proved an ideal place to learn how to photograph the night sky.
Next time, I'll have my camera ready for anything the Universe reveals.
Processing a night sky photograph using Photoshop
1
The original
The original RAW file from the camera – shot at 30 seconds on ISO 800 and f2.8 aperture – is darker than you might expect.
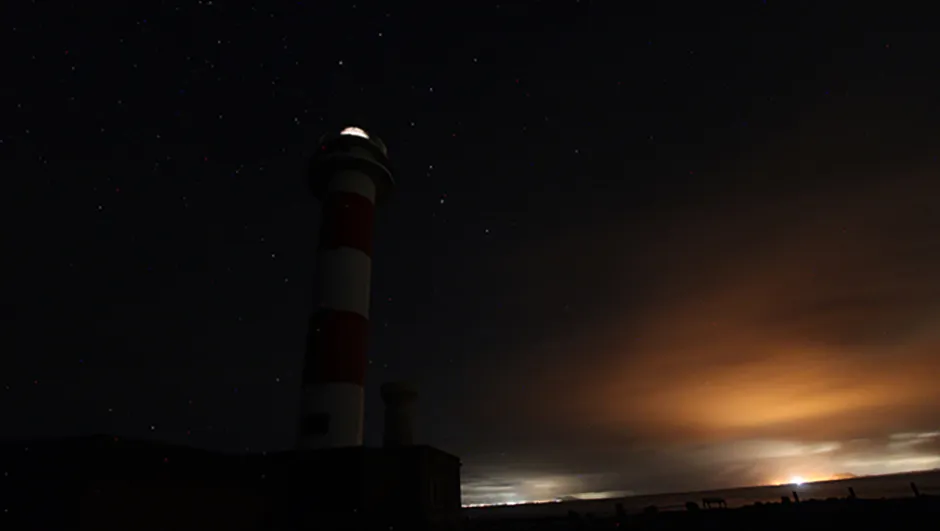
Although it's composed to show The Plough, Polaris and the Little Dipper, they aren't easily visible on the left, while on the other side there's some light pollution that's been amplified by cloud.
2
Post-processing
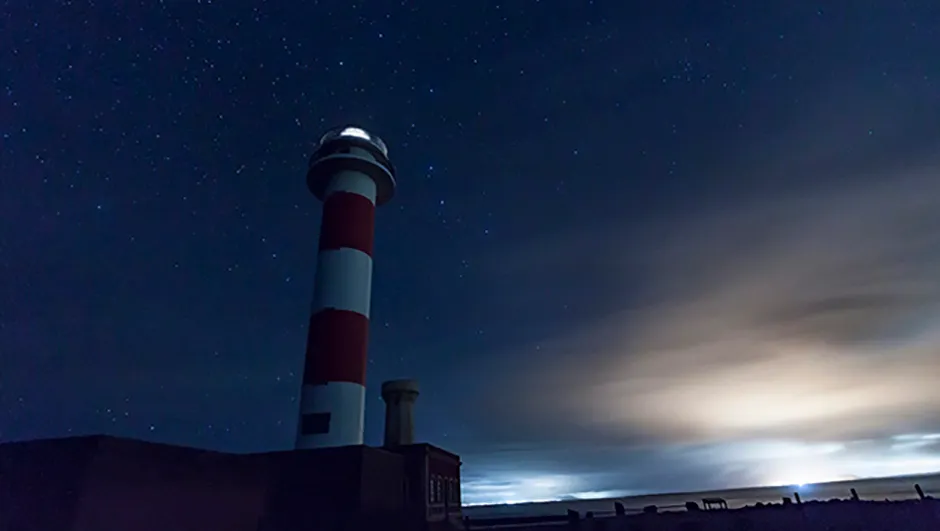
After opening the RAW file in Photoshop, I change the colour temperature to 2200K to banish the orange from light pollution, increase the sharpness and use the luminance slider to reduce noise, then the de-haze tool to produce a bolder, cleaner image.
The result is a lot more stars, and a more easily visible foreground.
3
Crop & highlight
I then use Photoshop to create a layer and use the brush tool (set to white colour, and 9-12 points in size) to brighten the 'important' stars.

I then use the straighten tool to level not the horizon, but the lighthouse, and then the 'free transform' tool to crop out both the (wonky) horizon and the light pollution on the right-hand side.
Astrophotography kit
A DSLR camera is a must – preferably one with a full-frame sensor, which captures more sky and produces less noise – though a crop-sensor DSLR is fine.
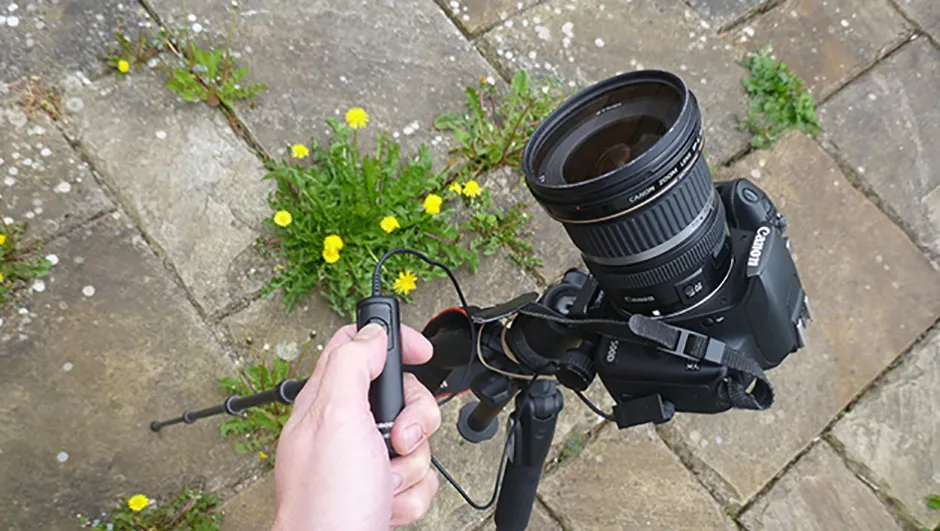
Using as wide an angle lens as possible and a tripod to keep the camera steady, a remote shutter release cable helps prevent any vibrations that happen when you touch the camera.
If you don't want to stand there clicking the shutter every 30 seconds, an intervalometer helps, too.
