Set up a Raspberry Pi meteor detector

Set up a Raspberry Pi meteor detector

Detect meteors in the night sky with a Raspberry Pi and become a citizen scientist in the Global Meteor Network.

Magazine gift subscriptions - from just £18.99 every 6 issues. Christmas cheer delivered all year!
Published: December 19, 2020 at 10:00 am

We all know about the big meteor showers such as the Geminids and Perseids, but Earth is also bombarded by much smaller meteors every night. Knowing more about these tiny pieces of space dust helps us to analyse meteor showers, sporadic meteors and fireballs, as well as increasing our knowledge of the risk to Earth from larger debris.

One way amateurs can help is by setting up a meteor detection system and engaging in a little citizen science. A few years ago this was an expensive task, but now with a Raspberry Pi and some simple electronic parts it’s much easier.

These systems record the sky all night long, so even when you can’t stay up late observing yourself, your camera will continue to record for you.

And since the camera is running constantly you’ll never miss any cloud breaks.

For more on the science of meteors, read our guide on what causes meteor showers.
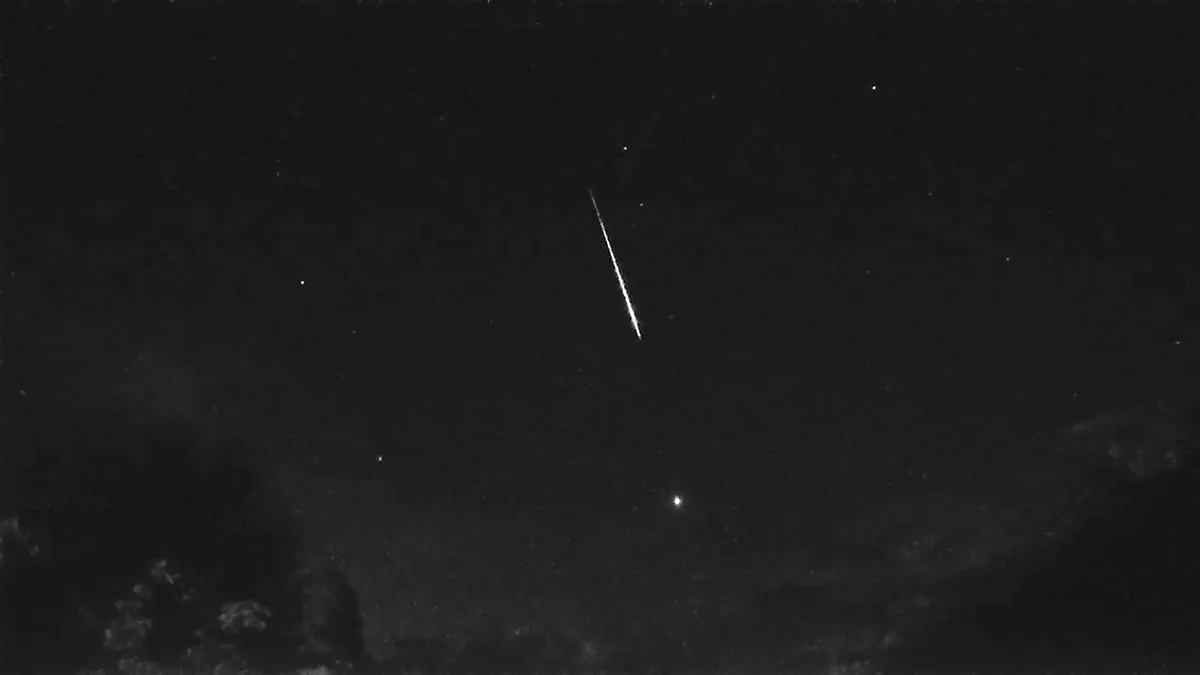
Meteor Captured by Camera HR. Credit: Mary McIntyre

A meteor detection system captures both video and stills. The images and videos are not high resolution as the main goal here is scientific analysis of the data, but it’s still great to have a visual record of events.

Your data will be automatically uploaded to a global database, where it is combined with data from other cameras to work out the orbit, and often the origin, of a meteor; it may even be used to work out where a meteorite might have landed.

The data is used to monitor meteor shower rates and duration, accurately forecast the peak of the shower, as well as monitoring and predicting outbursts and plotting the radiant – the point at which the shower appears to originate as seen from Earth.

These systems help to track minor meteor showers, sporadic meteors, fireballs and new showers. Once your camera is set up it all happens automatically, but you can do your own analysis of the data as well.
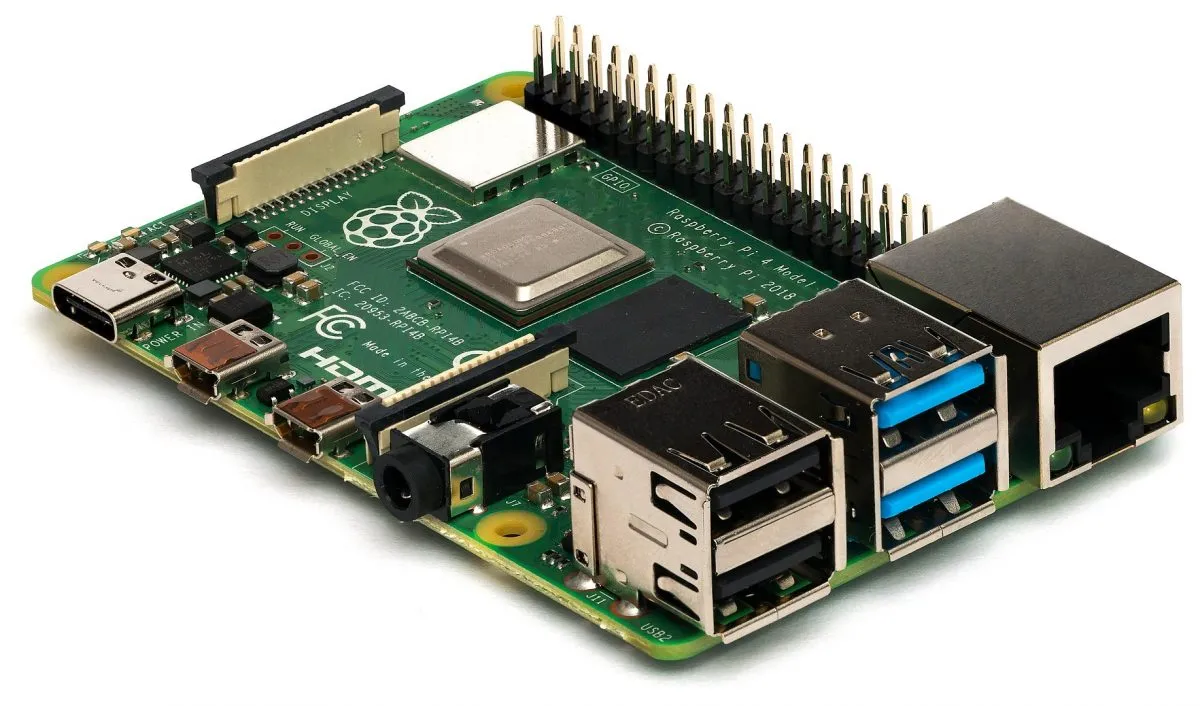
Raspberry Pi. Credit: Miiicihiaieil Hieinizilieir / Wikimedia Commons
Credit: Miiicihiaieil Hieinizilieir / Wikimedia Commons

Set up your Raspberry Pi and software

The system we are setting up runs on a Raspberry Pi and uses a cheap security camera module. It uses the Raspberry Pi Meteor Station (RMS) software, which is free to download from the Global Meteor Network (zip).

Before you begin, download the RMS disk image (a copy of the operating system (OS)) from the link above, unzip it to a folder and burn the image to the micro-SD card using balenaEtcher, or a similar tool for burning disk images.

When you boot up the Pi it will automatically install the OS software ready for you to configure it. You will also need a camera code before you begin, so contact the GMN team via email, at denis.vida@gmail.com.
Set up your meteor detector, step-by-step

Step 1

Raspberry Pi meteor detector. Credit: mary McIntyre

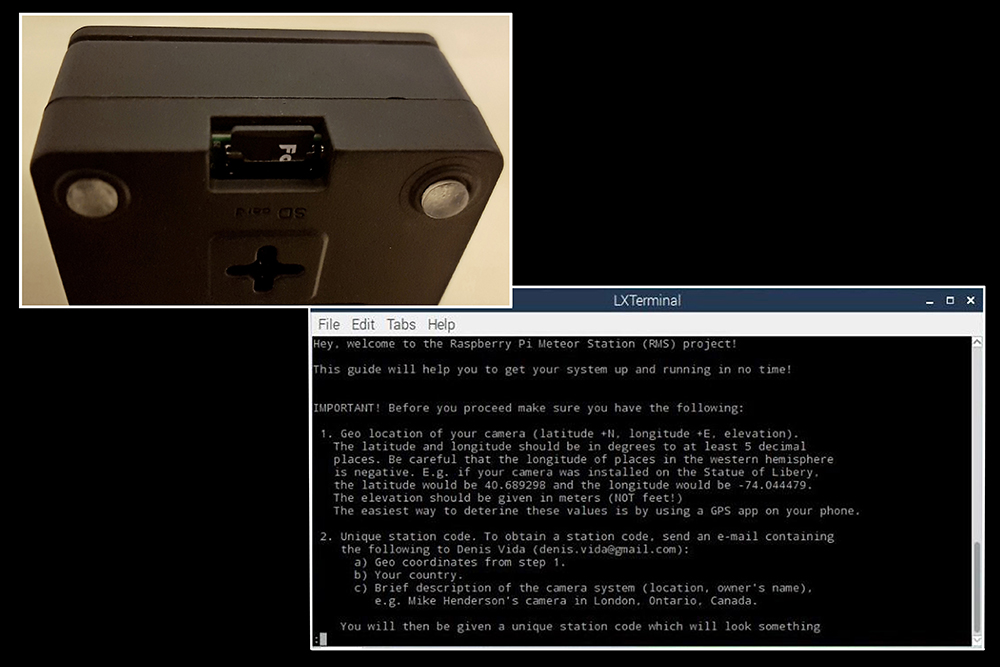
Insert the micro-SD card into the Pi, connect a keyboard, mouse and monitor and start it up. You’ll find that the RMS software will start automatically. Work through the configuration script, entering your location and camera code when you’re prompted.

Step 2

Raspberry Pi meteor detector. Credit: mary McIntyre

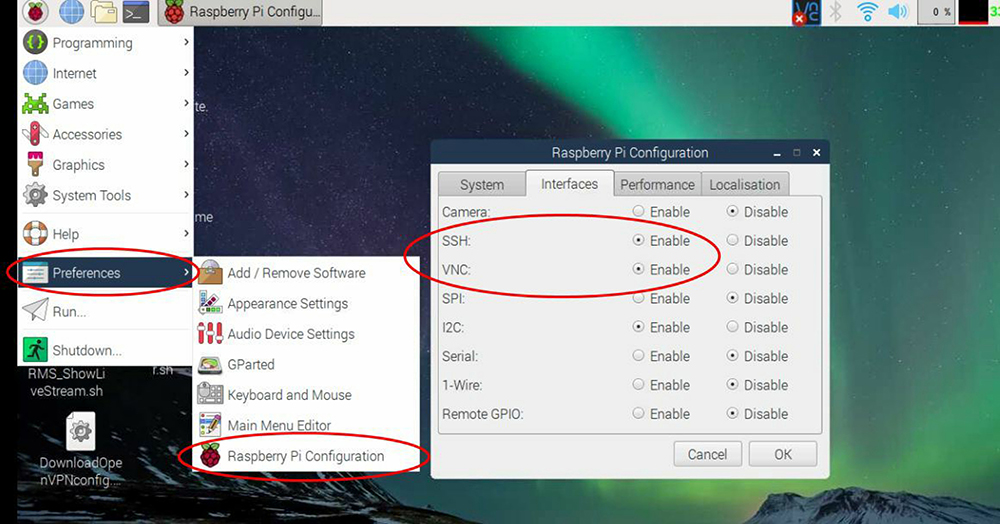
Click the ‘Raspberry icon’ at the top left and select ‘Preferences > Raspberry Pi Configuration’. On the ‘Interfaces’ tab, ensure that ‘SSH’ and ‘VNC’ are enabled. Close the configuration tool, then click the ‘Wi-Fi icon’ on the menu bar and connect to your Wi-Fi.

Step 3

Raspberry Pi meteor detector. Credit: mary McIntyre

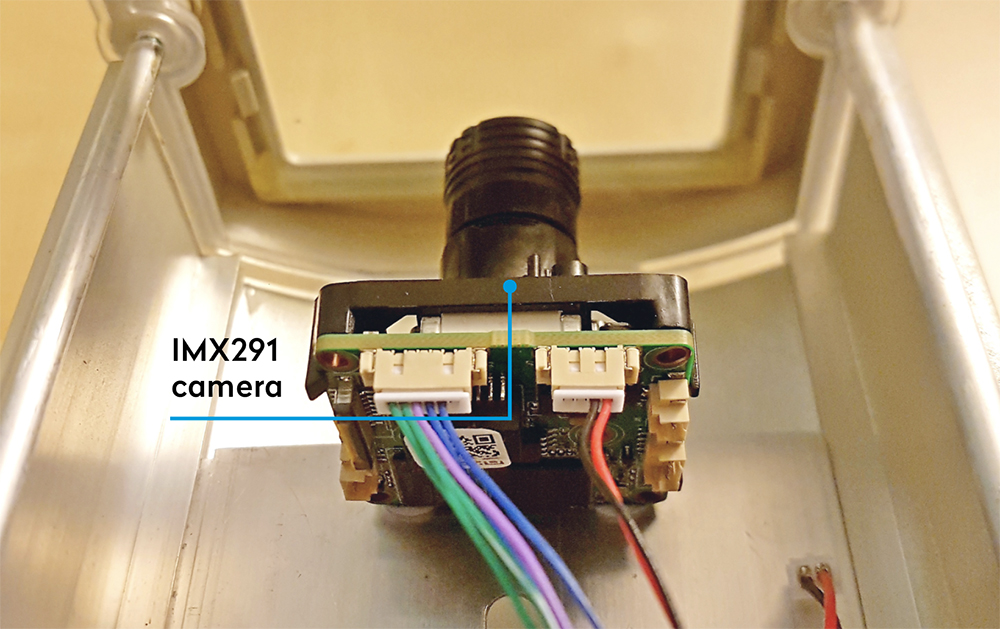
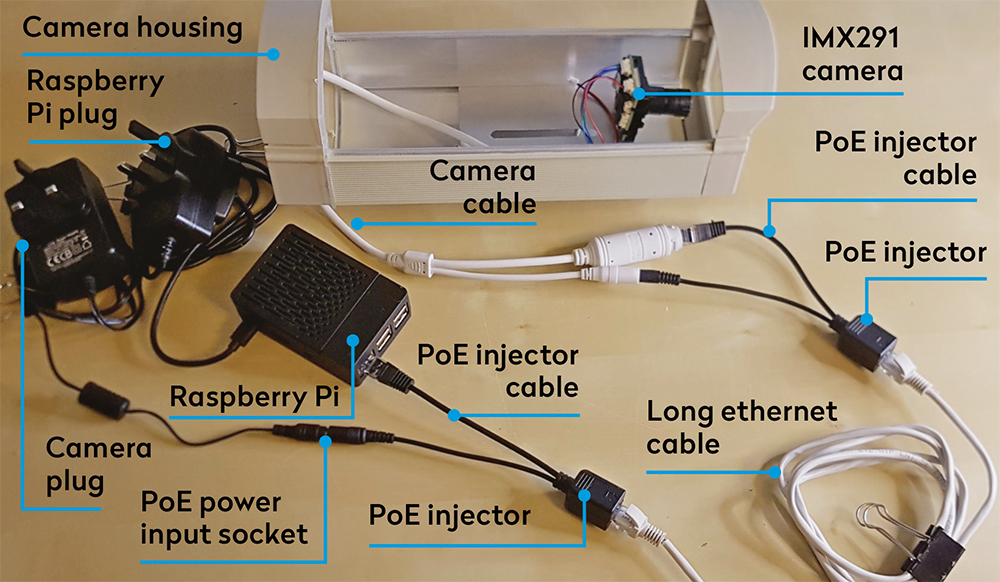
To set the camera and case up, begin by feeding the camera cable through the security camera housing. Then connect the PoE (power-over-ethernet) injector cable to it. Next, fit the camera inside the housing, close to the front glass. Use hot glue, but don’t seal just yet.

Step 4

Raspberry Pi meteor detector. Credit: mary McIntyre

Now plug the other PoE cable into the Pi’s ethernet port and then, using an ethernet cable, connect the Pi to the camera by connecting up the PoE injector cables. Meanwhile, plug the camera power supply into the PoE power input socket.

Step 5

Raspberry Pi meteor detector. Credit: mary McIntyre

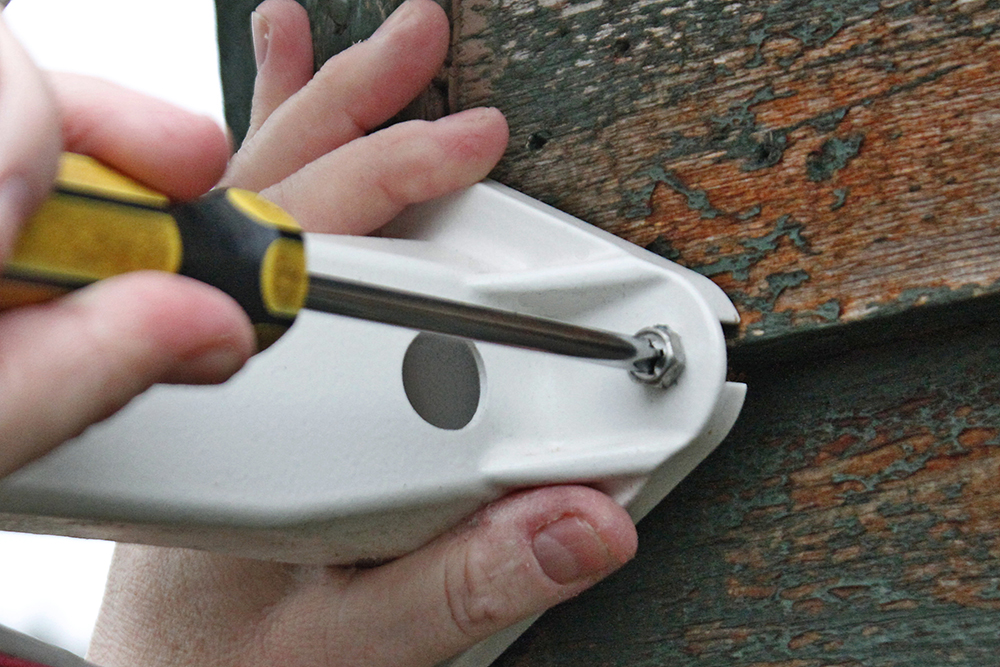
On the Pi screen, double click on ‘RMS_ShowLiveStream.sh’ and select ‘Open in terminal’. Use the live view to help you focus the camera, then close and seal up the camera housing. Disconnect and mount the camera on an outside wall pointing it up about 45°.

Step 6

Raspberry Pi meteor detector. Credit: mary McIntyre

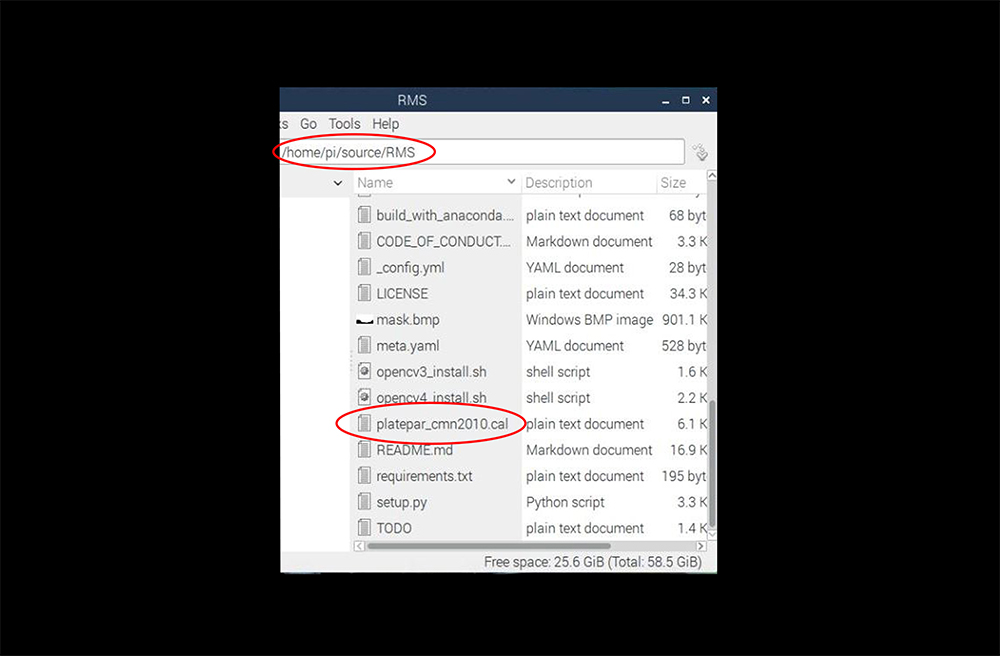
Power up the Pi, and it will now run automatically. Contact Denis Vida (details above) to create a ‘platepar’; copy this to the Pi and your camera will be ready to go. After the first night’s run, your system will upload data to the Global Meteor Network.

Mary McIntyreis an outreach astronomer and astro imager based in Oxfordshire. This How To originally appeared in the January 2021 issue of BBC Sky at Night Magazine.

This website is owned and published by Our Media Ltd. www.ourmedia.co.uk
© Our Media 2024