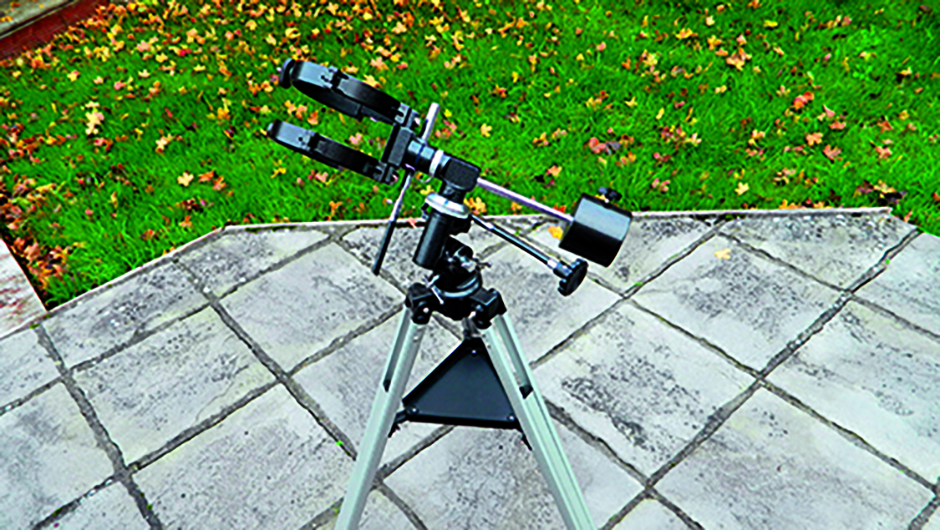
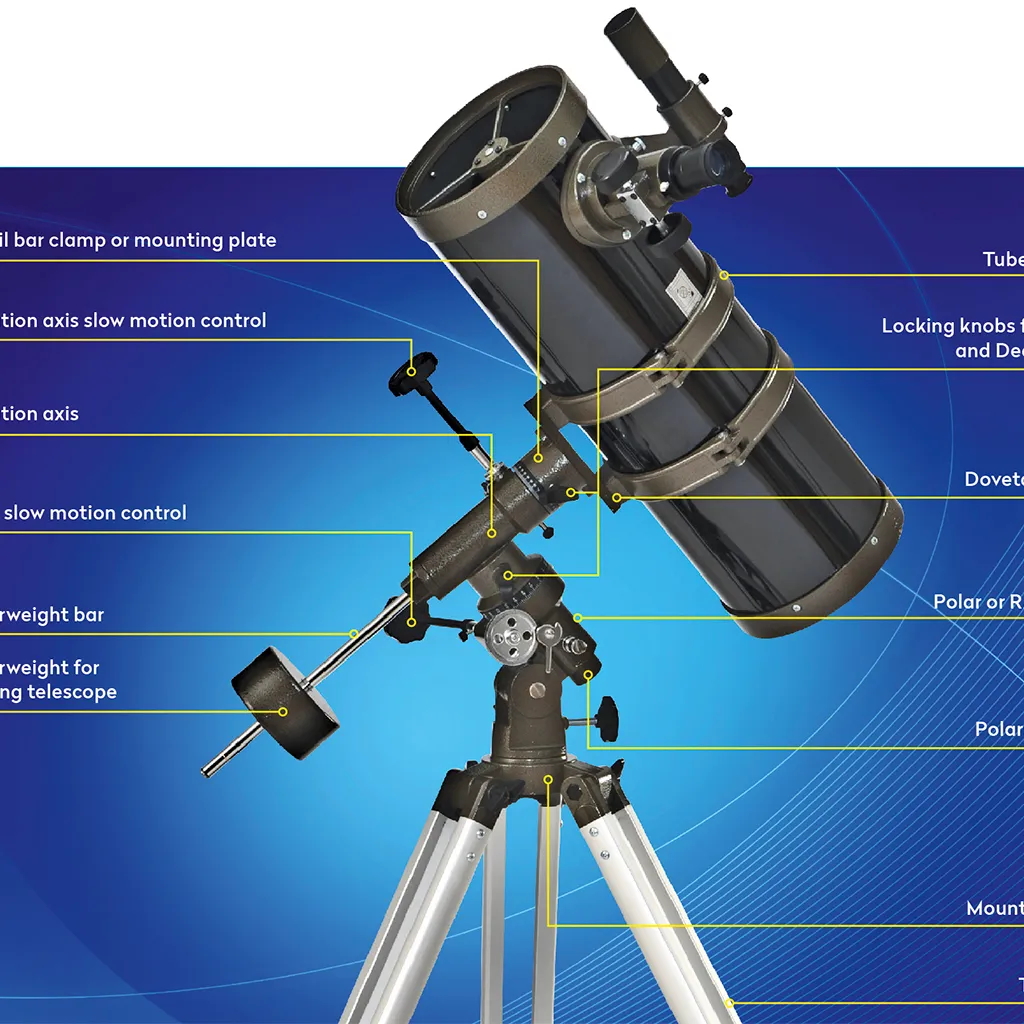
Equatorial mounts can be a bit of a mystery if you’ve never used one before, but they don’t come much simpler than the EQ-1, which many small telescopes come with.
It may be easier to set up a camera-type altazimuth (altaz) mount, but an equatorial mount has the advantage of only needing to be rotated around one axis to keep your target object in the field of view, rather than two.
There’s a simple explanation for why this is the case.
Our planet also has an axis, tilted at 23.5°. As Earth rotates around this axis, the stars appear to move against the background sky over the course of the night, rising in the east and setting in the west.
In order to follow this movement the telescope has to be moved slowly in the opposite direction to Earth’s rotation: in other words, following the stars.
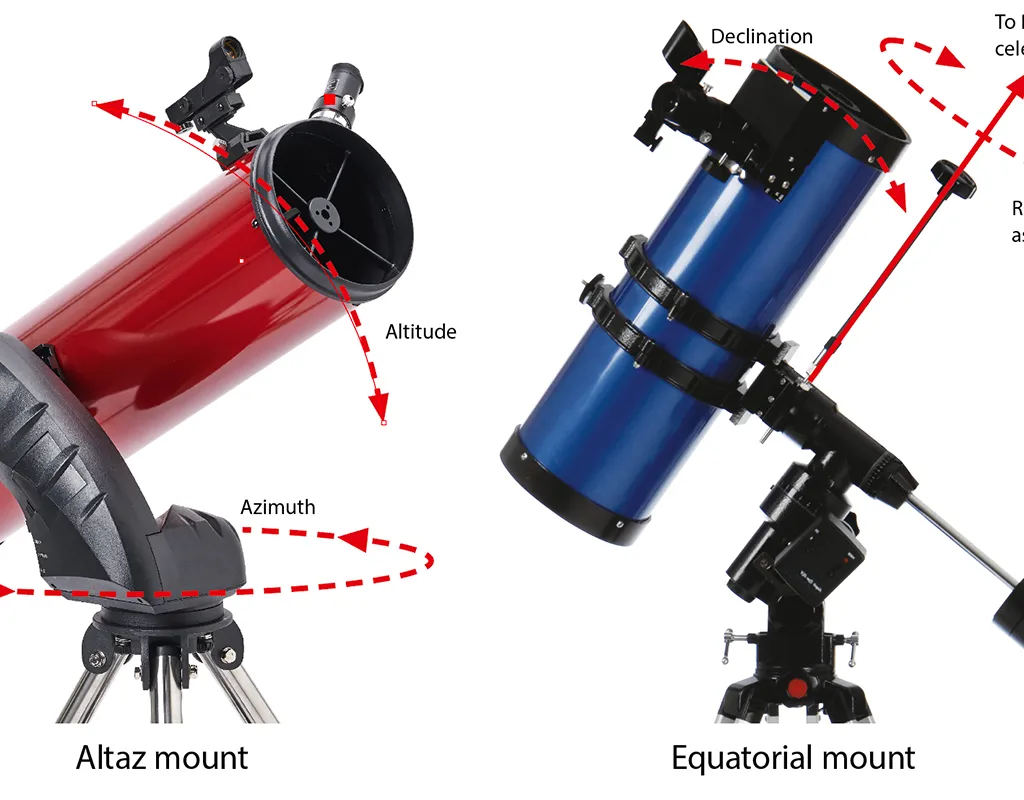
With an altaz mount, doing this requires you to adjust two axes, azimuth (left-right) and altitude (up-down).
Properly set up, the polar axis of an equatorial mount is parallel to Earth’s axis of rotation and, therefore, doesn’t need to be adjusted further.
You just have to rotate the telescope’s other axis – the declination axis – to stay on target.
Once you are familiar with how to set up an EQ-1 in this way you should find it easy to get going and be able to maximise your time out under the night skies.
The simple steps set out below tell you how, and most of them can be performed during the daytime in anticipation of a clear night’s observing.
Finding true north
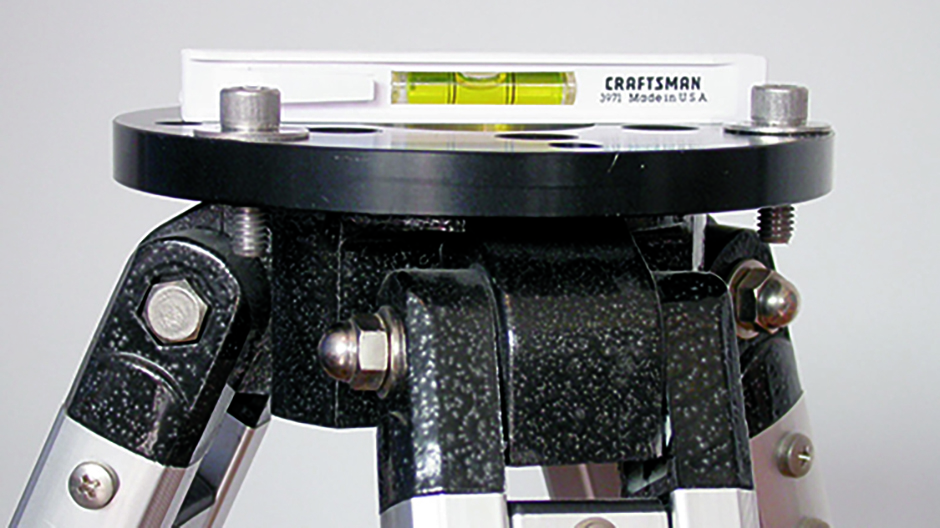
When assembling your mount, make sure it is as level as possible – use a small spirit level on the tripod head before attaching the mount head.
Position the completed mount so that the polar axis (the oneyou’re going to tilt) roughly points north.
The next step is to set it to true north, which can be several degrees east of magnetic north from the UK.You can find out the magnetic variance of your location using the British Geological Survey’s snappily named ‘Grid Magnetic Angle Calculator’.
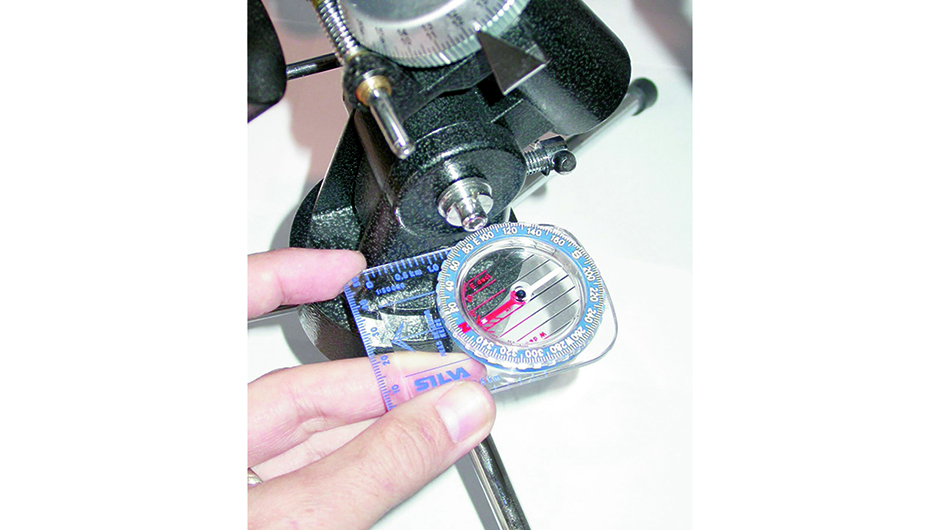
Use a compass to adjust your mount away from magnetic north accordingly.
To get the polar axis aligned properly you’ll need to set it for the latitude of your observing site. You can do this by checking your position against an Ordnance Survey map or online at www.latlong.net.
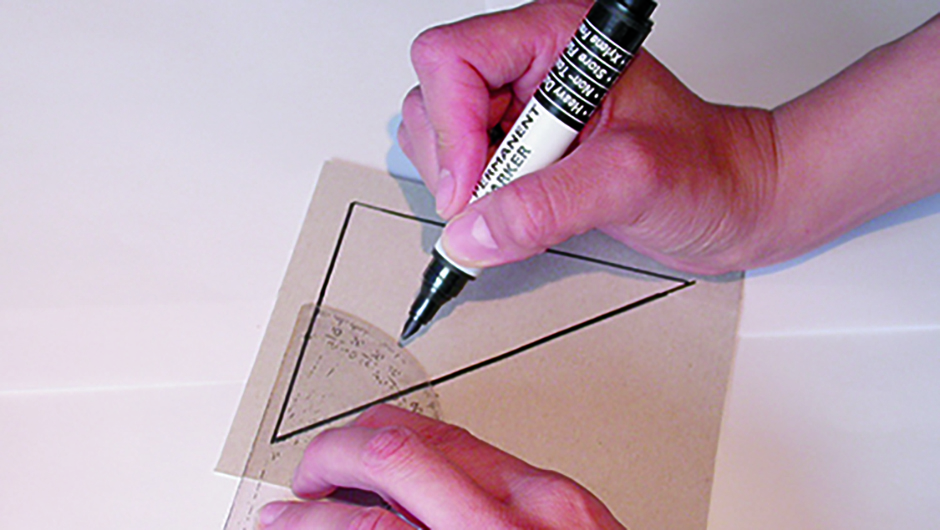
Take some stiff card and mark out a right-angled triangle that has one angle equal to your latitude.
For example, if you were in London you would be at a latitude of 51.5°N, so you’d need a triangle with an angle of 51.5° too.
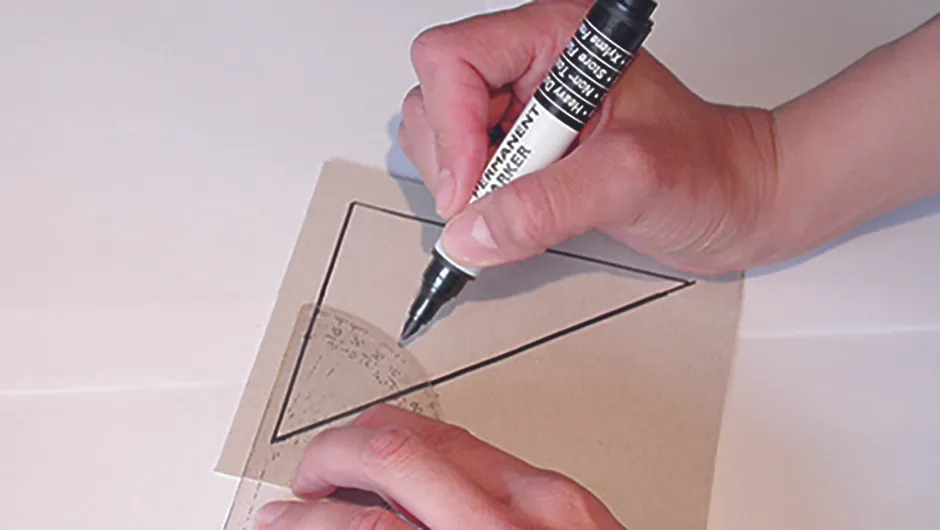
This triangle gives you a template that tells you how much adjustment you need to make to the polar axis to achieve polar alignment.
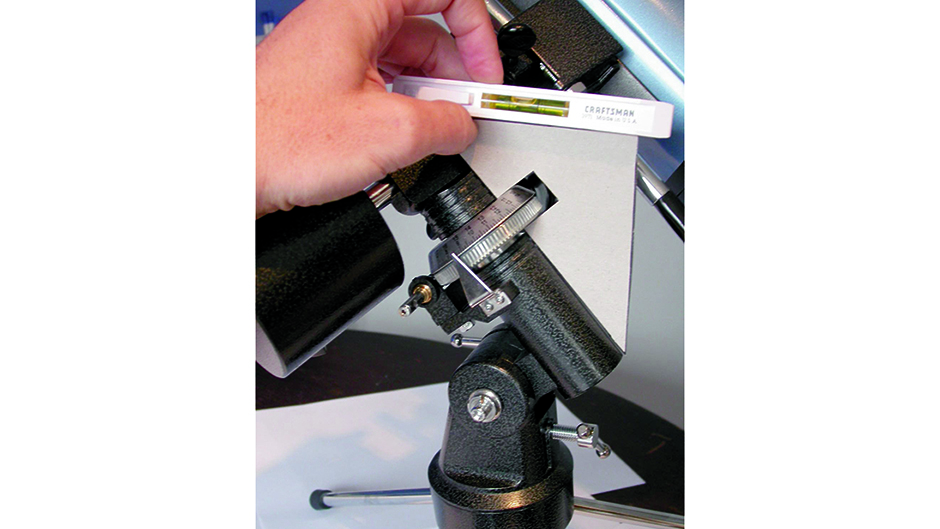
Hold it against your mount, with the longest side against the polar axis, and place a spirit level on the shortest side – which should be uppermost.
Turn the altitude adjustment bolt until the spirit level is level; the polar axis should now be parallel with Earth’s axis.
If the mount’s wormwheel prevents you from placing the template close enough, you can cut a slot out of the longest side without affecting its usefulness.
Home in on Polaris
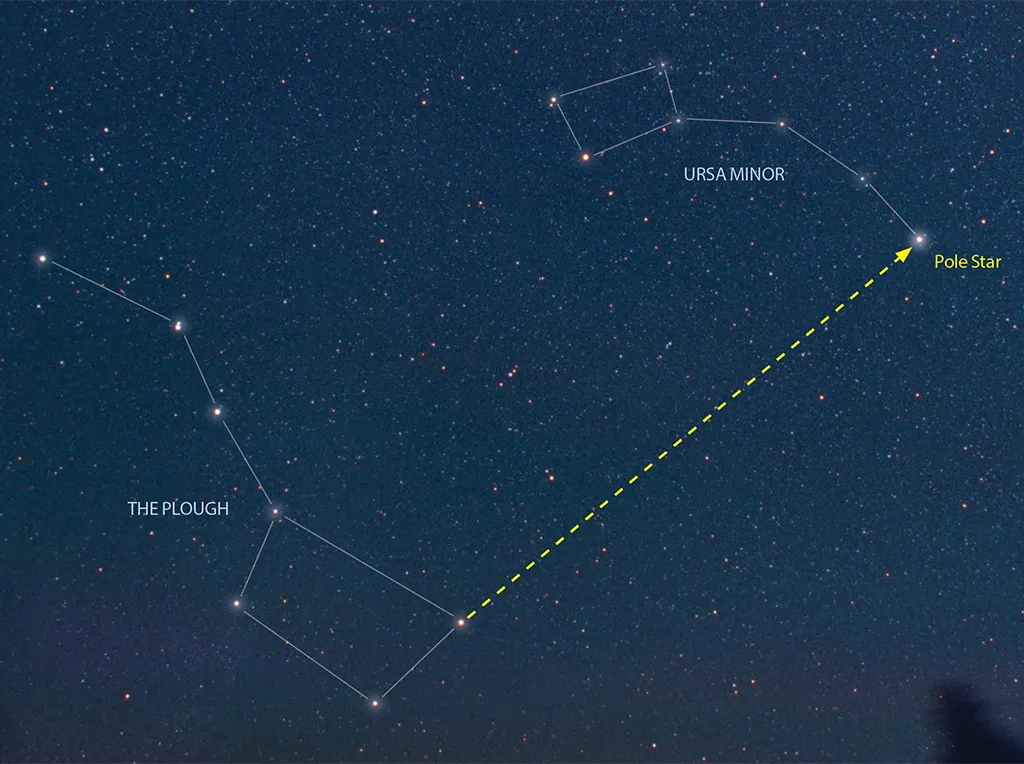
The north celestial pole lies within 1° of Earth’s rotational axis. If you point your telescope so that it is parallel to the mount’s polar axis, Polaris - the north star - should now be in the field of view of a low power eyepiece.
It will also appear in the view of a finderscope, providing this has already been aligned with the main scope.
You can do this during daylight by centring a distant object in your telescope’s eyepiece and checking whether it also lies behind the cross-wires of the finder. Find out more in our guide to polar aligning during the day.
If it does not, turn the finder’s adjustment screws to achieve alignment.
You can check the accuracy of your polar alignment on any clear night by loosening the polar axis clutch and steadily rotating the telescope around this axis.
If you are accurately aligned, Polaris should travel in a small circle within the finderscope’s field of view.If not, make small adjustments to the altitude and azimuth of the mount head until it does.
You are then ready to use your mount.
Equipment
Compass
Ideally, one that shows angular degrees and is easy to read under red light.
Markers
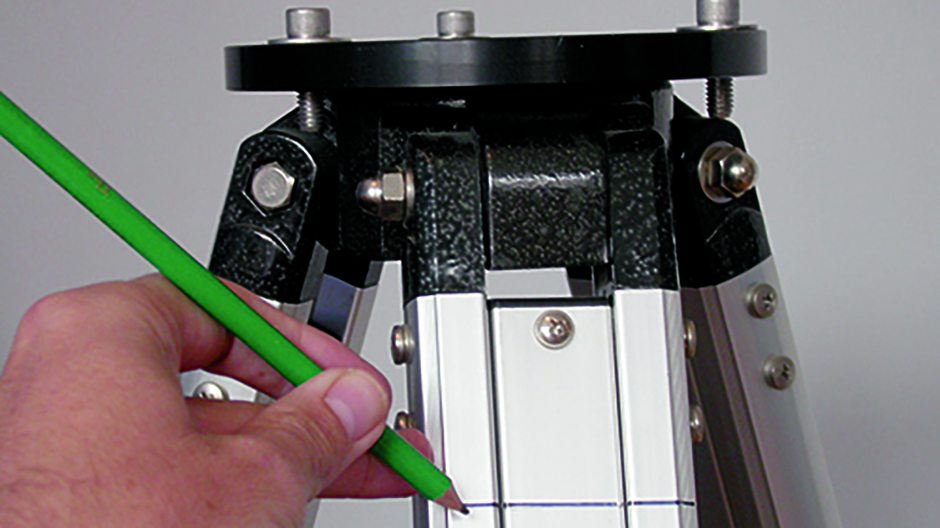
Something to mark the position of each tripod leg after you’ve polar aligned your mount, to make the process quicker in the future. What you use depends on the surface you set up on.
Red light torch
Not only will a red light torch help you set up in the dark, it will protect your precious night vision while you do it.
Spirit level
A small pocket sized one, preferably circular, to make it easier to level the tripod.
Sundries
Make your triangle templates using a protractor, a pen, stiff card and scissors.
