The Milky Way arching across the night sky is one of the most awe-inspiring sights . As it covers such a large area, capturing it entirely in one photograph can be difficult, even with a wide-angle lens. But a series of overlapping photographs can be stitched together into a mosaic to create a single image.
This can be done using a free piece of software called Microsoft Image Composite Editor (ICE), which is simple to use and helps you create striking images.
Ideally, you should be photographing the Milky Way from a dark-sky location, where there is little light pollution and no interference from moonlight.
The best time of year to capture the full arc is when the Milky Way sits a bit lower in the sky during autumn in late evening or spring in the early hours.
But nothing stops you imaging the Milky Way at other times of the year if the skies permit.
For more tips and tricks, read our guide on how to photograph the stars, find out which are the best cameras for astrophotography and our beginner's guide to astrophotography.

For this project, a series of 22 overlapping photographs (a small selection of which can be seen above) were taken in two horizontal rows in the early hours during May 2019 in north Oxfordshire.
They were taken under Bortle Class 4 skies – where Class 1 represents perfectly dark skies and Class 9 is for brightly lit inner-city skies.
The camera used was a Canon EOS 1100D DSLR with an 18–55mm lens at a focal length of 18mm.
Each image was a single shot – ISO 1600 for 20 seconds at f/3.5 – with the camera in portrait orientation. They were all shot in RAW mode.
The distortion created by a camera lens can make it difficult to stitch images together, so each of the starting images had a lens correction applied in Adobe Lightroom, then they were exported as TIFF files.
Aside from a lens correction, the photographs should be unprocessed: processing may introduce artefacts that will affect the ability of the software to stitch them together.
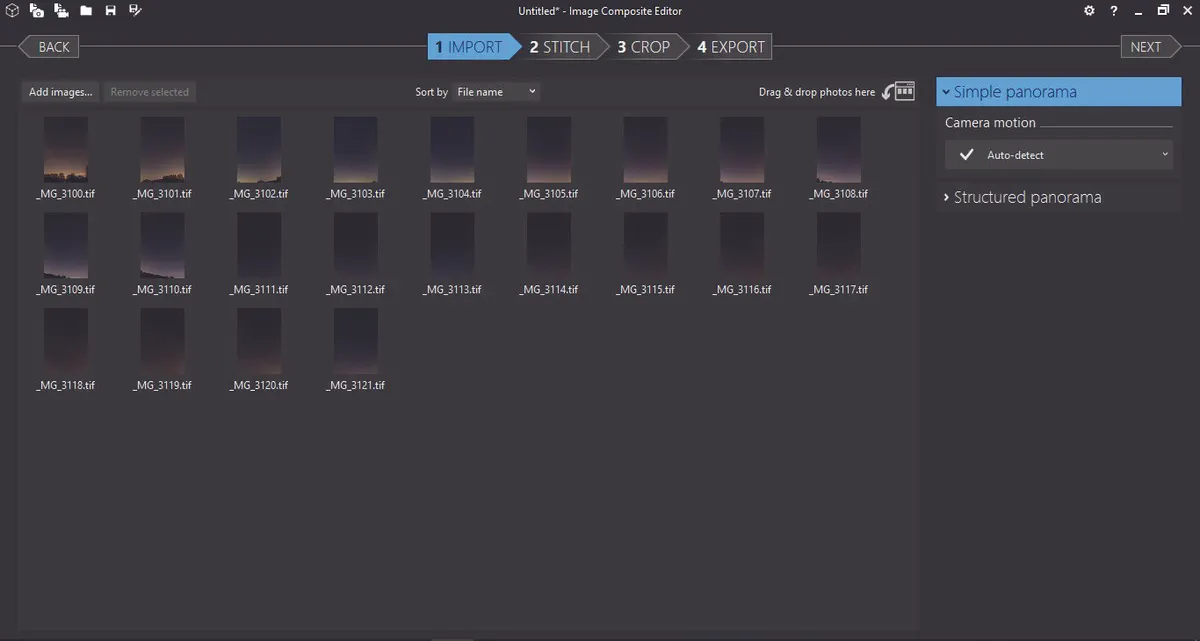
The first thing to do in Microsoft ICE is to click on ‘New Panorama From Images’ and then select all of the photographs you want to stitch together.

The software is good at detecting the structure of your mosaic, but check that the drop-down menu on the right-hand side is set to ‘Simple Panorama’ and that ‘Autodetect’ has been selected.
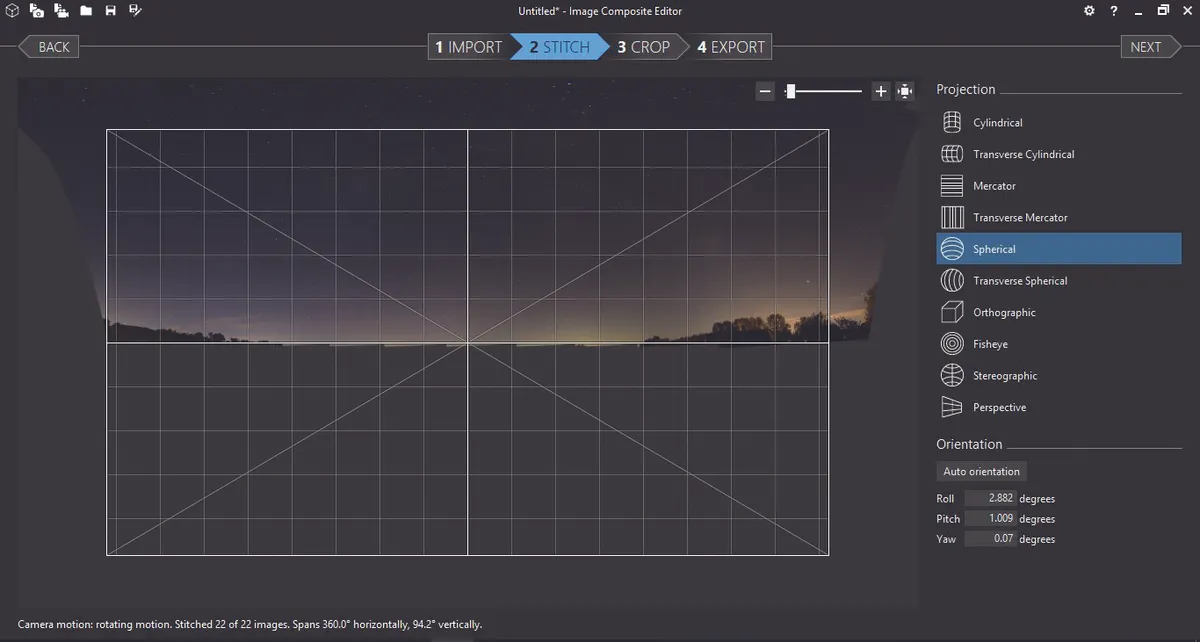
At the top of the page are four tabs. The photographs will begin in ‘Import’ and when you move on to ‘Stitch’, the software will automatically begin to align and stitch all of them together into a single image.
Once completed, this mosaic will appear overlaid with a grid. On the right at this stage is a list of different projection effects that can be applied.
The ICE program will have picked a default one, but experiment until you find the projection that works best for your mosaic. In this instance, the ‘Spherical’ option gave the most aesthetically pleasing yet realistic result.

The grid over the mosaic will assist with changing the perspective, which can be done by clicking and dragging on different areas of the image.
You may want to begin by placing the centre of the Milky Way arc at the centre of the image.
Dragging up and down or side to side can alter the angle of the arc or tilt the image so that you can make sure that it is perfectly aligned with the horizon. Experiment until you are happy with how it is looking.
The top edges will become totally distorted during the process of making these changes, but don’t worry as this can be fixed in the next step.
This comes when you move on to ‘Crop’, the third tab at the top. Click and move the edges of the box that appears over your mosaic to crop the area of the image you want to keep.
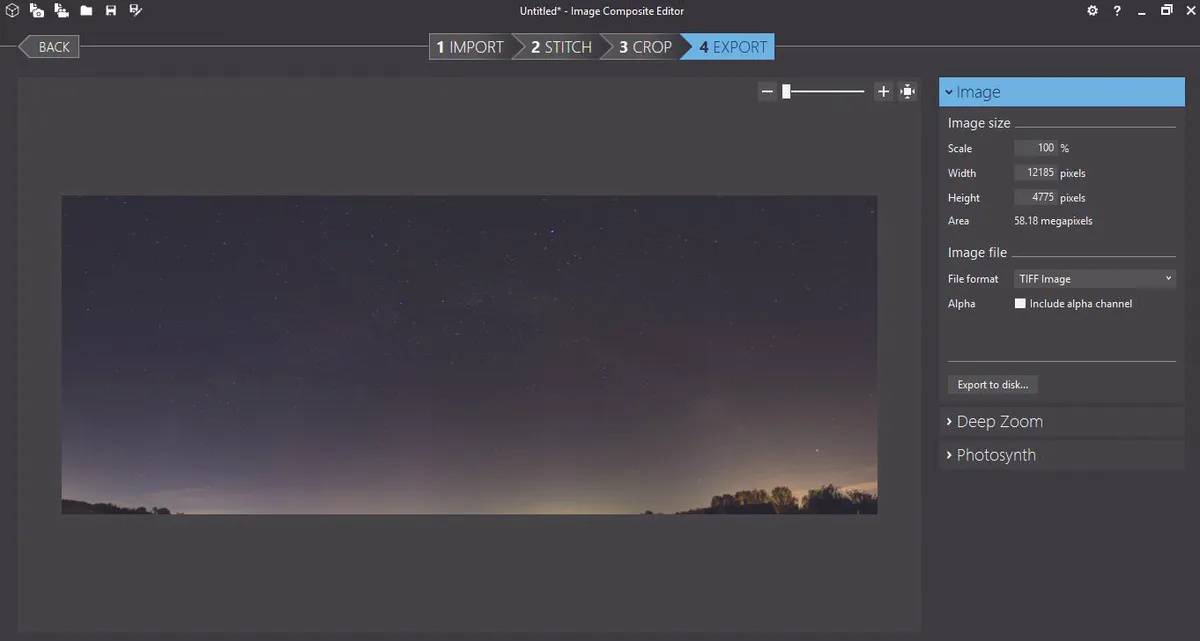
Once that is done, move on to the final tab, ‘Export’. You will see on the right-hand side a section called ‘Image size’.

The default setting on Microsoft ICE will set the ‘Scale’ to 100 per cent – as this is still an unprocessed image, it is important that you keep this full size or data will be lost. Under this is a drop-down menu called ‘File format’.
Select ‘TIFF’ because, at this stage, you will want to avoid JPEG compression.
Finally, click ‘Export to Disc’ and save the image where you would like it.
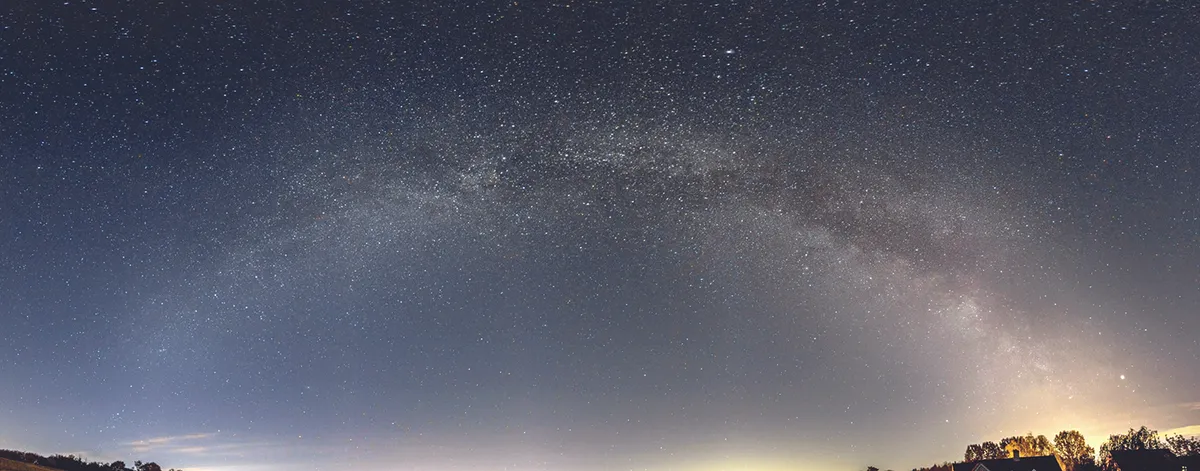
You can now process your stitched mosaic using your preferred software to further bring out the Milky Way in more detail, as shown in our final processed image.

This article originally appeared in the October 2019 issue of BBC Sky at Night Magazine. Mary McIntyre is an outreach astronomer and a teacher of astrophotography.
