When you take an image with a camera, in a perfect world you would get every exposure spot-on, meaning there would be no need to make any further adjustments.
But the reality is that we nearly always need to make adjustments after taking photographs, usually using our preferred photo-editing software.
In most cases it’s a matter of studying a histogram and using the Levels and Curves features or, in the case of PaintShop Pro, an actual Histogram adjustment tool.
- For more advice, browse our astrophotography guides
The histogram itself is simply a way of showing the varying light levels captured in your image from the dark tones on the left (the Blacks) to the white highlights on the right (the Whites).
A bump in the middle, representing the middle tones, can also be adjusted.
The histogram can also be used for adjusting the individual Red, Green and Blue (RGB) colour levels in the same way, making it a very flexible and powerful tool in your image processing armoury.
In this article we will look at how to use PaintShop Pro’s Histogram adjustment tool to improve the colours in an image.
Being an astronomy website, of course, we're turning to astrophotography and are going to look at how a histogram can be used to imoprove an image of a nebula.
We're using an already stacked image of the North America Nebula and Pelican Nebula (below).
Getting started
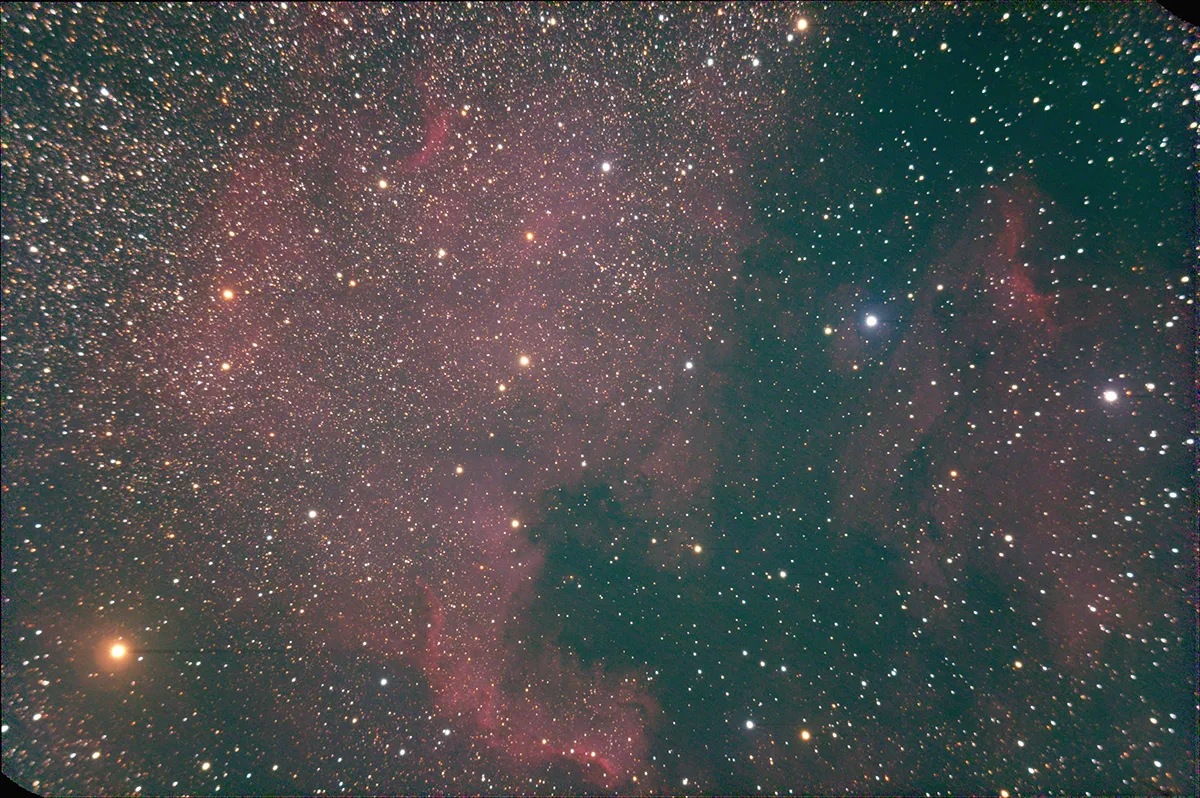
The stack of 78 images was taken with a modified Canon 300D DSLR camera through a telescope.
As the resulting stack is a little green and lacklustre, the first action in PaintShop Pro is to select and click the following from the top menu: Adjust > Brightness and Contrast > Histogram adjustment.
This brings up the Histogram adjustment box (as shown below).
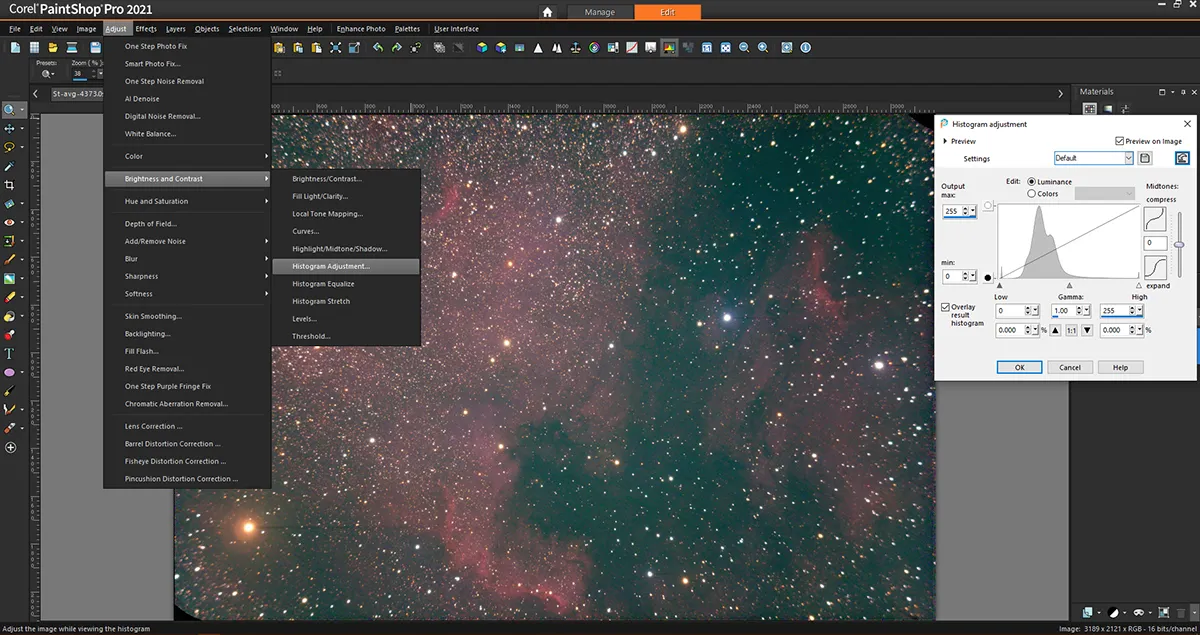
There are plenty of options here, so first ensure you tick the Preview on image so you can see any changes taking place live on the screen.
For now, the rest of the options can be left as they are, but the first job is to deal with the greenish tinge.
To do this select Colours and then Green from the drop-down list in Histogram adjustment box (see below).
This shows the histogram for the green part of the image, so now use your mouse to click and hold the left-hand black adjustment handle at the base of the histogram and carefully slide it to the right until it’s close to the start of the green section.
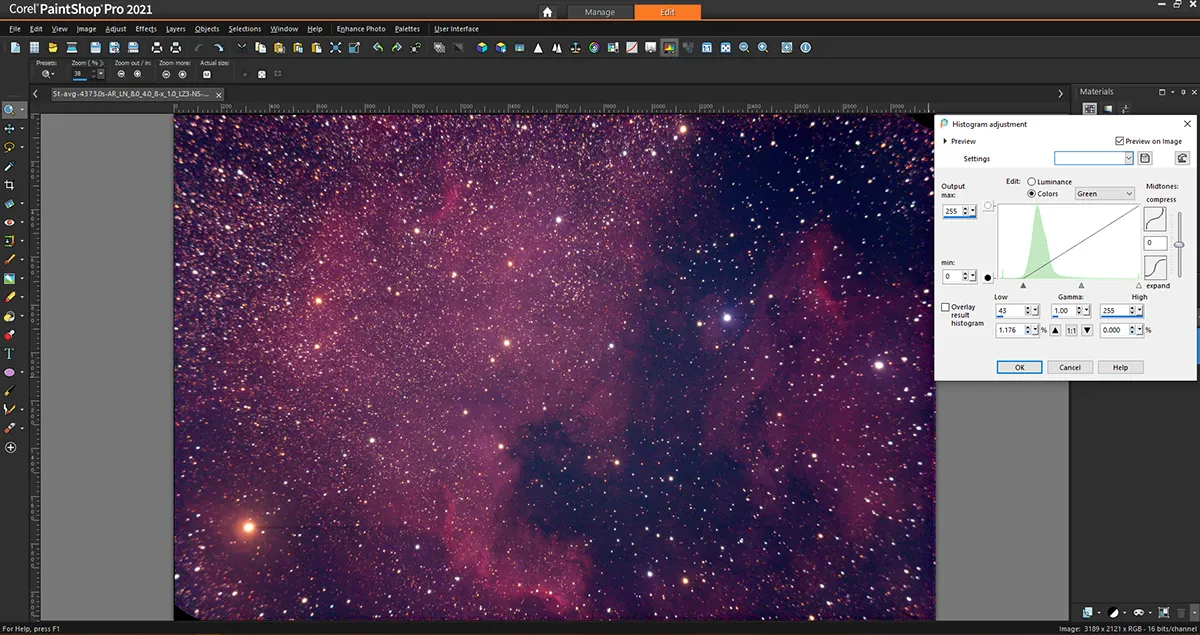
The green is now darkened, removing the cast, but it’s showing up some blue in the image that you might not want.
To deal with this, keep the Histogram adjustment box open and repeat the steps for the Green adjustments, but instead choose Blue from the drop-down list and adjust it slightly (see below).
In both the Green and Blue sections, make subtle adjustments until you’re happy with the result and then click OKat the bottom of the box to apply them to the image.
Remember to reset
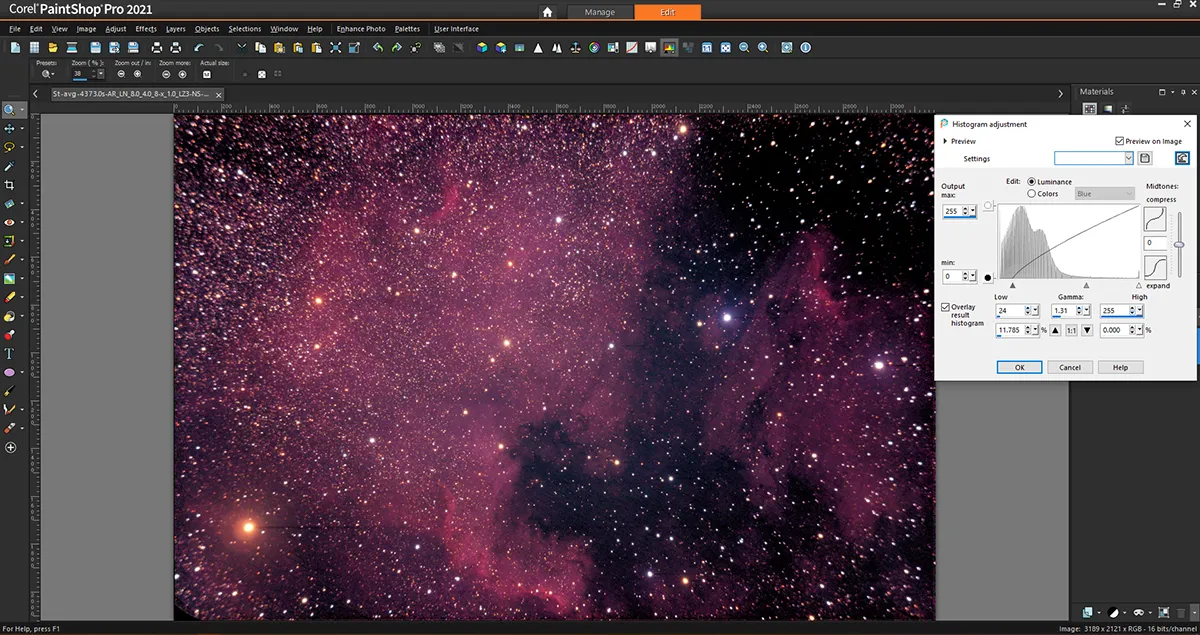
If the image still looks a little dim, you can adjust it by re-opening the Histogram adjustment box.
If the Settings menu says Last used then press the Reset to default to the far right of the box, otherwise the last set of adjustments will be applied again, and you don’t want that.
The Reset to default sets the Histogram adjustment function to the default of Luminance, which allows you to adjust the black adjustment handle at the left and slide it slightly to the right.
Again, do this in small increments and watch carefully how the image changes until you’re happy with the result.
Although this has darkened the image slightly, you can amend this by moving the middle Gammaadjuster a little to the right to change the curve of the histogram.
Again, do this in small adjustments until you’re happy with the result.
At this stage you haven’t needed to move the white adjustment handle for this particular image, but it may benefit from a slight adjustment.
Remember, it is down to personal taste how much you push the adjustments. When you’re happy, click OK to finish the Luminanceadjustment.
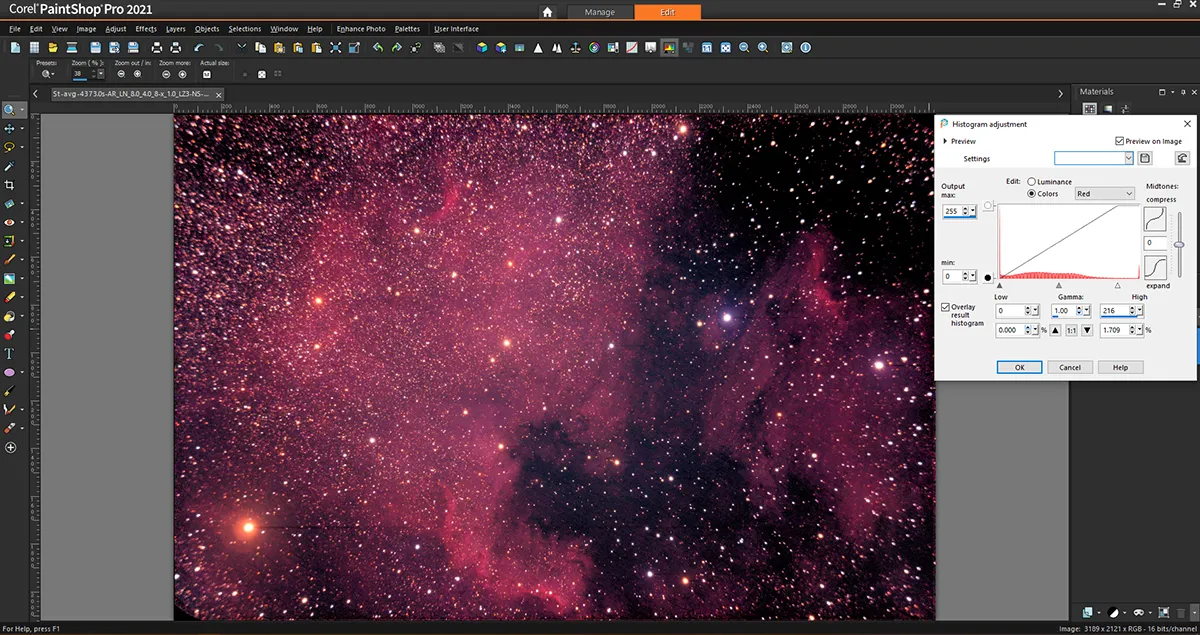
The image has been improved, but if you’d like the nebulae to be a little redder, you can now open the Histogram adjustment box again and click Select > Colours > Red (see above).
This time, move the white adjustment handle inwards a little at a time, watching how the image changes. Once you’re satisfied, click OKto close the box.
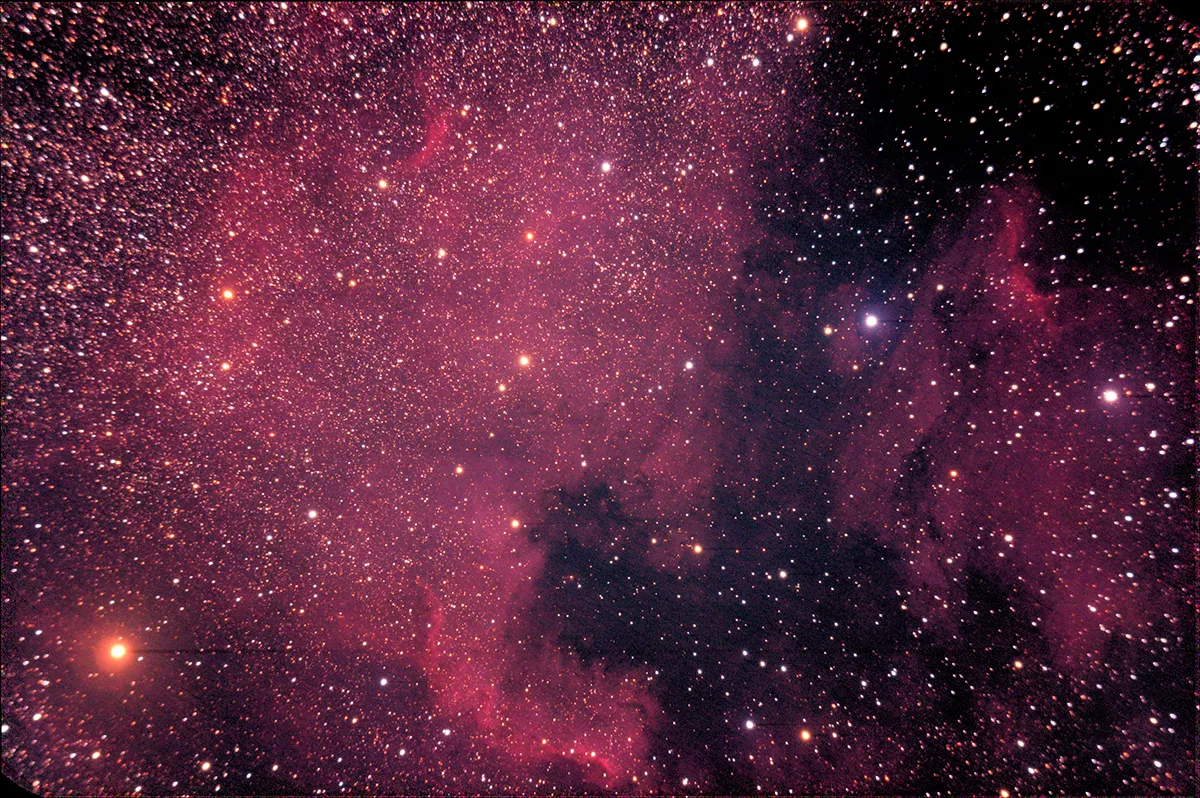
These simple steps have removed the green and slight blue cast, darkened the background to a more natural view of space and brought out the hydrogen-alpha (Ha) red emission of the nebulae, all by using one tool to make multiple small adjustments.
The image can be further processed, if necessary, using the Saturation tool but, for now you can enjoy the final, processed image of the North America and Pelican Nebulae (see image at the top of this article).
3 tips for using a histogram
- Always make a series of small adjustments rather than one big one.
- Make sure the settings tab is either empty or press the Reset to defaultbutton.
- Don’t be afraid to explore the other options in the Histogram adjustmentsbox to further enhance your image.
This guide originally appeared in the November 2021 issue of BBC Sky at Night Magazine.
