In this quick guide, we'll show you step-by-step how to stack and derotate your astro images with the Astro Pixel Processor app.
This is particularly useful if you're photographing deep-sky images with an altaz mount, which you can read about in our guide How to do deep-sky astrophotography with an altaz mount.
Follow our guide below and learn how to use APP to iron out the imperfections in your Go-To altaz image captures.
For more help with processing, read our guides to astrophotography image processing and deep-sky image processing.
Derotating with Astro Pixel Processor, step-by-step
Step 1
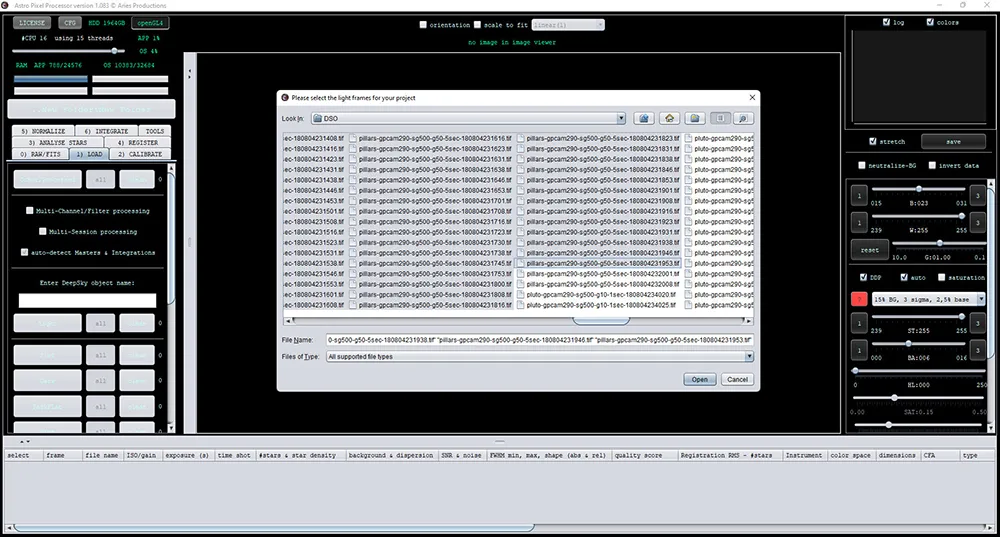
Open Astro Pixel Processor
Select the tab marked 1) Load
Navigate to your working folder that contains all of your image files
Select the light frames of your target and click ‘Open’ to load them
If you have dark and flat frames, select and add those to the selection too
Step 2
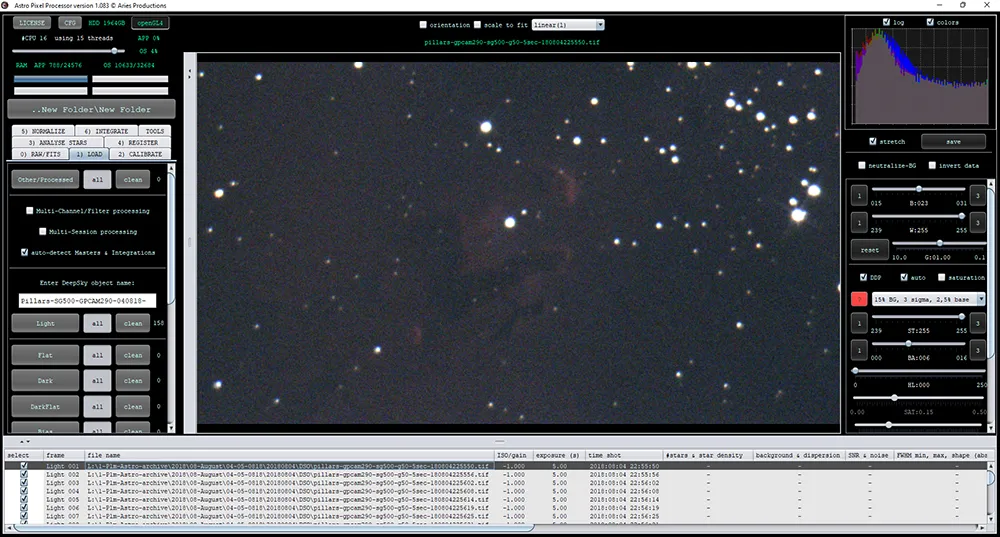
Give your image an appropriate name for when the processing run has finished (you can change it at the end if you wish)
Then check tab 2) Calibrate and tab 3) Analyse stars
These can usually be left at their default values unless you feel inquisitive and want to test out some adjustments.
Step 3
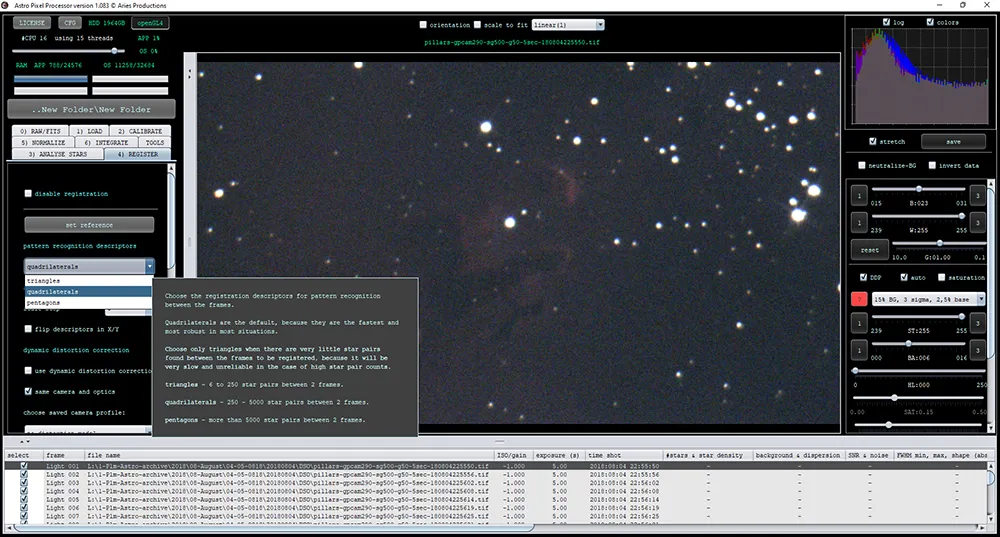
Select tab 4) Register to bring up its window
‘Quadrilaterals’ is the default setting for the pattern recognition descriptors, but if you have 250 stars or less choose ‘Triangles’
The software has a useful pop-up window with lots of information that appears and helps to guide you throughout
Step 4
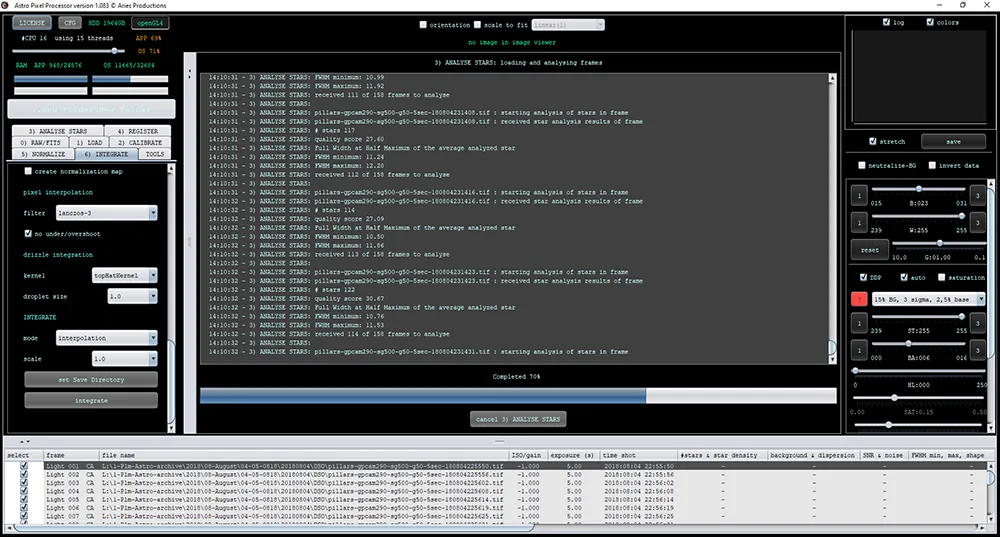
Open tab 5) Normalise and ensure ‘Neutralise background’ is unticked
Click on tab 6) Integrate
The default settings work well and there are plenty of options for experienced imagers to play with
Scroll to the bottom and click ‘Integrate’
This then runs through all the previous tabs and processes your image
Step 5
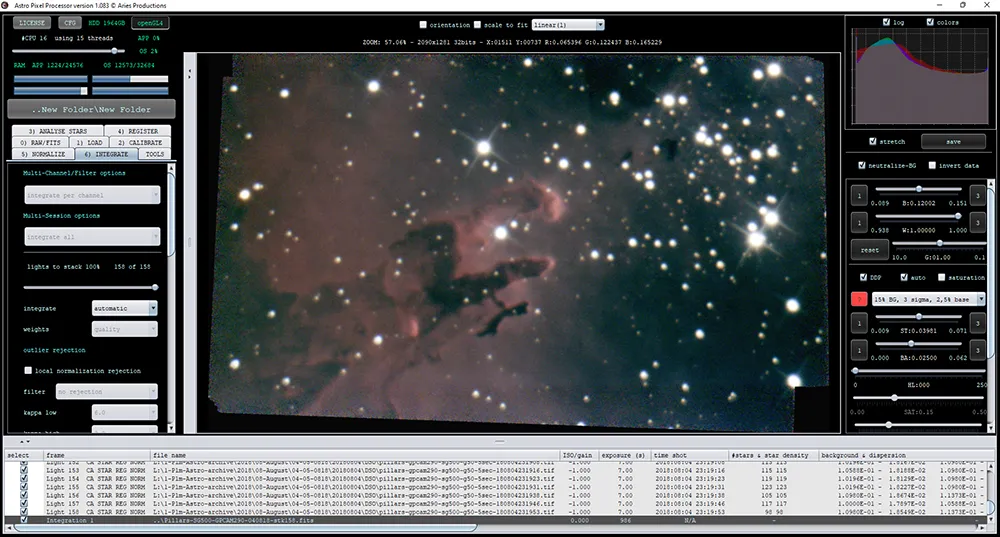
A short beep announces that the integration is complete and the above screen will appear with a stacked, aligned and processed image displayed
On the right, select ‘Neutralise background’ and there are a range of options to adjust the image; the default settings often give good results
Step 6
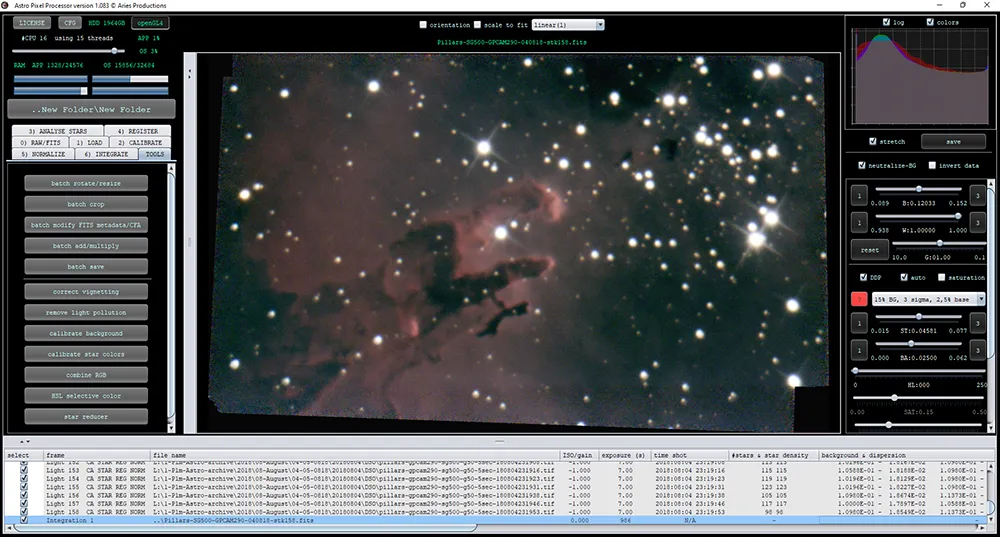
A final set of tools is provided to process the image further; those that remove light pollution, calibrate background and calibrate star colours are particularly useful, and experienced imagers have plenty of options to experiment with
Once done, save your image ready to import into your favourite photo-editing program.
This guide originally appeared in the November 2022 issue of BBC Sky at Night Magazine.
